INSTALLING THE REMOTE | CONNECTING THE SUBWOOFER |
| LEVEL CONTROL TO BASSPRO II |
The Subwoofer Level Control may be mounted under the dash or dismantled and mounted in the dash for a factory- installed appearance.
Choose a mounting location that allows easy access to the control, and provides
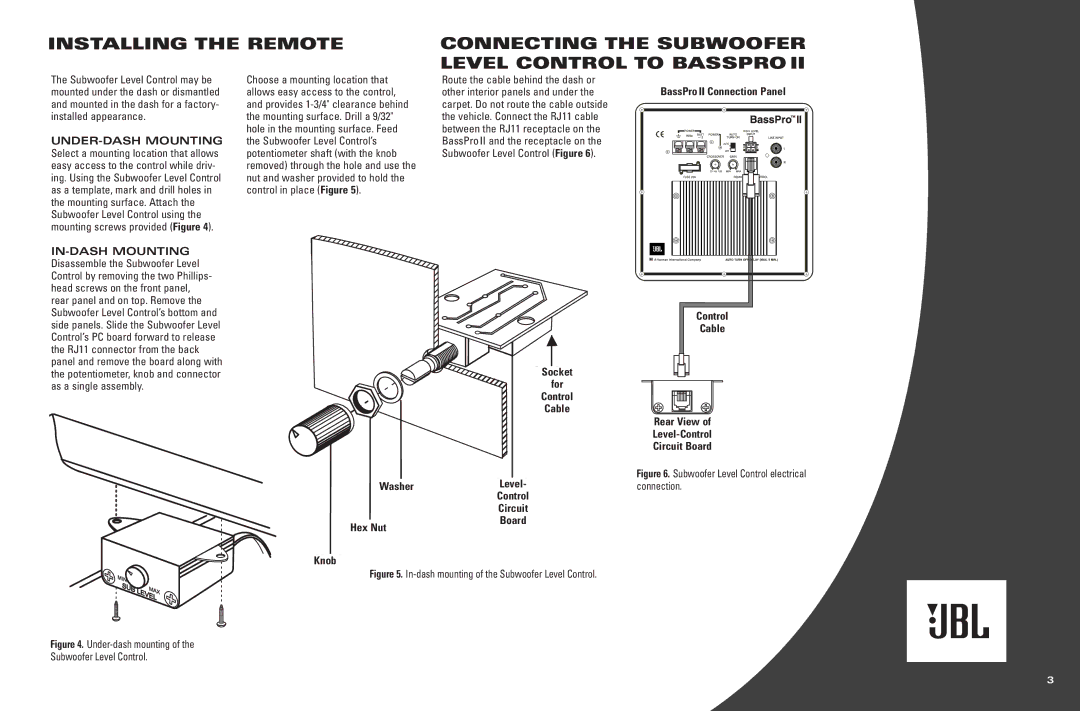
Route the cable behind the dash or other interior panels and under the carpet. Do not route the cable outside the vehicle. Connect the RJ11 cable between the RJ11 receptacle on the BassPro II and the receptacle on the Subwoofer Level Control (Figure 6).
BassPro II Connection Panel
Socket
forfor
Control
Control
Cable
Cable
| Washer |
| Level | |
|
|
|
| - |
|
|
| ||
|
|
|
| Control |
|
|
|
| Circuit |
|
|
|
| Circuit |
|
|
|
| Board |
HexNut |
| |||
|
| Board | ||
|
|
|
|
|
Knob
Figure 5. In-dash mounting of the Subwoofer Level Control.
![]() Control
Control
Cable
Rear View of
Circuit Board
Figure 6. Subwoofer Level Control electrical connection.
Figure 4. Under-dash mounting of the Subwoofer Level Control.
3