CONTROLS AND FUNCTIONS
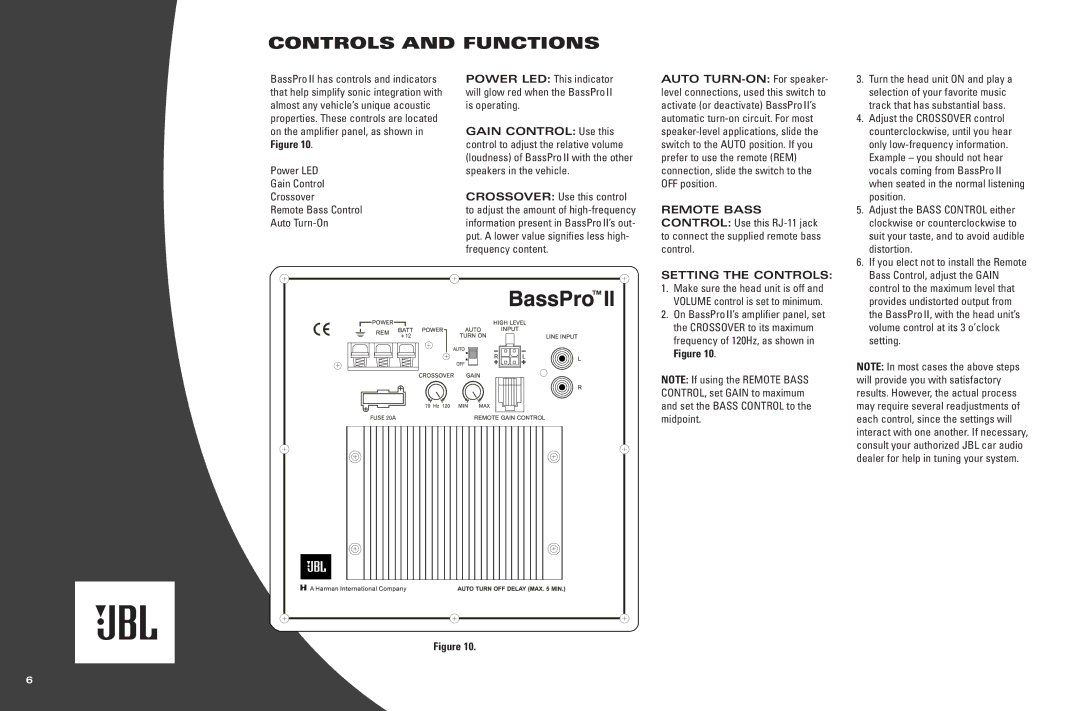
BassPro II has controls and indicators that help simplify sonic integration with almost any vehicle’s unique acoustic properties. These controls are located on the amplifier panel, as shown in Figure 10.
Power LED
Gain Control
Crossover
Remote Bass Control
Auto
POWER LED: This indicator will glow red when the BassPro II is operating.
GAIN CONTROL: Use this control to adjust the relative volume (loudness) of BassPro II with the other speakers in the vehicle.
CROSSOVER: Use this control to adjust the amount of
AUTO
REMOTE BASS CONTROL: Use this
SETTING THE CONTROLS:
1.Make sure the head unit is off and VOLUME control is set to minimum.
2.On BassPro II’s amplifier panel, set the CROSSOVER to its maximum frequency of 120Hz, as shown in Figure 10.
NOTE: If using the REMOTE BASS CONTROL, set GAIN to maximum and set the BASS CONTROL to the midpoint.
3.Turn the head unit ON and play a selection of your favorite music track that has substantial bass.
4.Adjust the CROSSOVER control counterclockwise, until you hear only
5.Adjust the BASS CONTROL either clockwise or counterclockwise to suit your taste, and to avoid audible distortion.
6.If you elect not to install the Remote Bass Control, adjust the GAIN control to the maximum level that provides undistorted output from the BassPro II, with the head unit’s volume control at its 3 o’clock setting.
NOTE: In most cases the above steps will provide you with satisfactory results. However, the actual process may require several readjustments of each control, since the settings will interact with one another. If necessary, consult your authorized JBL car audio dealer for help in tuning your system.
Figure 10.
6