jbl on stage micro II easy setup guide
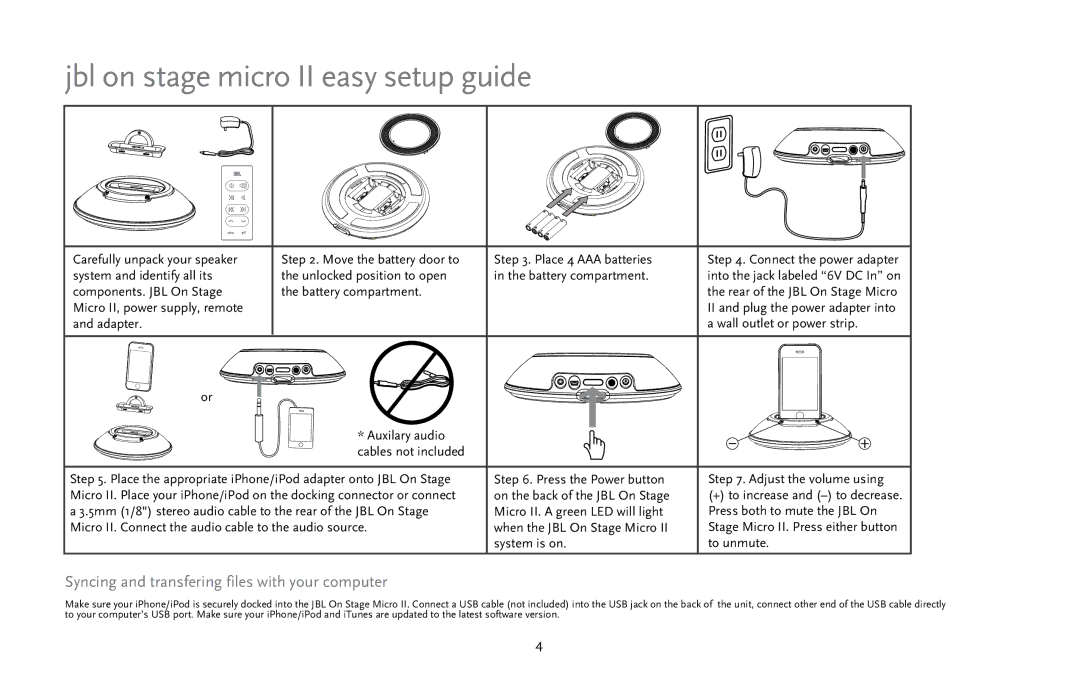
Carefully unpack your speaker | Step 2. Move the battery door to | Step 3. Place 4 AAA batteries | Step 4. Connect the power adapter | |
system and identify all its | the unlocked position to open | in the battery compartment. | into the jack labeled “6V DC In” on | |
components. JBL On Stage | the battery compartment. |
| the rear of the JBL On Stage Micro | |
Micro II, power supply, remote |
|
| II and plug the power adapter into | |
and adapter. |
|
| a wall outlet or power strip. |
|
or |
|
|
|
|
| * Auxilary audio |
| - | + |
| cables not included |
| ||
|
|
|
| |
Step 5. Place the appropriate iPhone/iPod adapter onto JBL On Stage | Step 6. Press the Power button | Step 7. Adjust the volume using | ||
Micro II. Place your iPhone/iPod on the docking connector or connect | on the back of the JBL On Stage | (+) to increase and | ||
a 3.5mm (1/8") stereo audio cable to the rear of the JBL On Stage | Micro II. A green LED will light | Press both to mute the JBL On | ||
Micro II. Connect the audio cable to the audio source. | when the JBL On Stage Micro II | Stage Micro II. Press either button | ||
|
| system is on. | to unmute. |
|
Syncing and transfering files with your computer
Make sure your iPhone/iPod is securely docked into the JBL On Stage Micro II. Connect a USB cable (not included) into the USB jack on the back of the unit, connect other end of the USB cable directly to your computer’s USB port. Make sure your iPhone/iPod and iTunes are updated to the latest software version.
4