Assembly
Handle Assembly
Controls
8
Assemble the handle to the handle brackets with the four hex head cap screws
Assemble the grips to the handle. (Soaking the grips in hot water will aid assembly.)
Figure 3
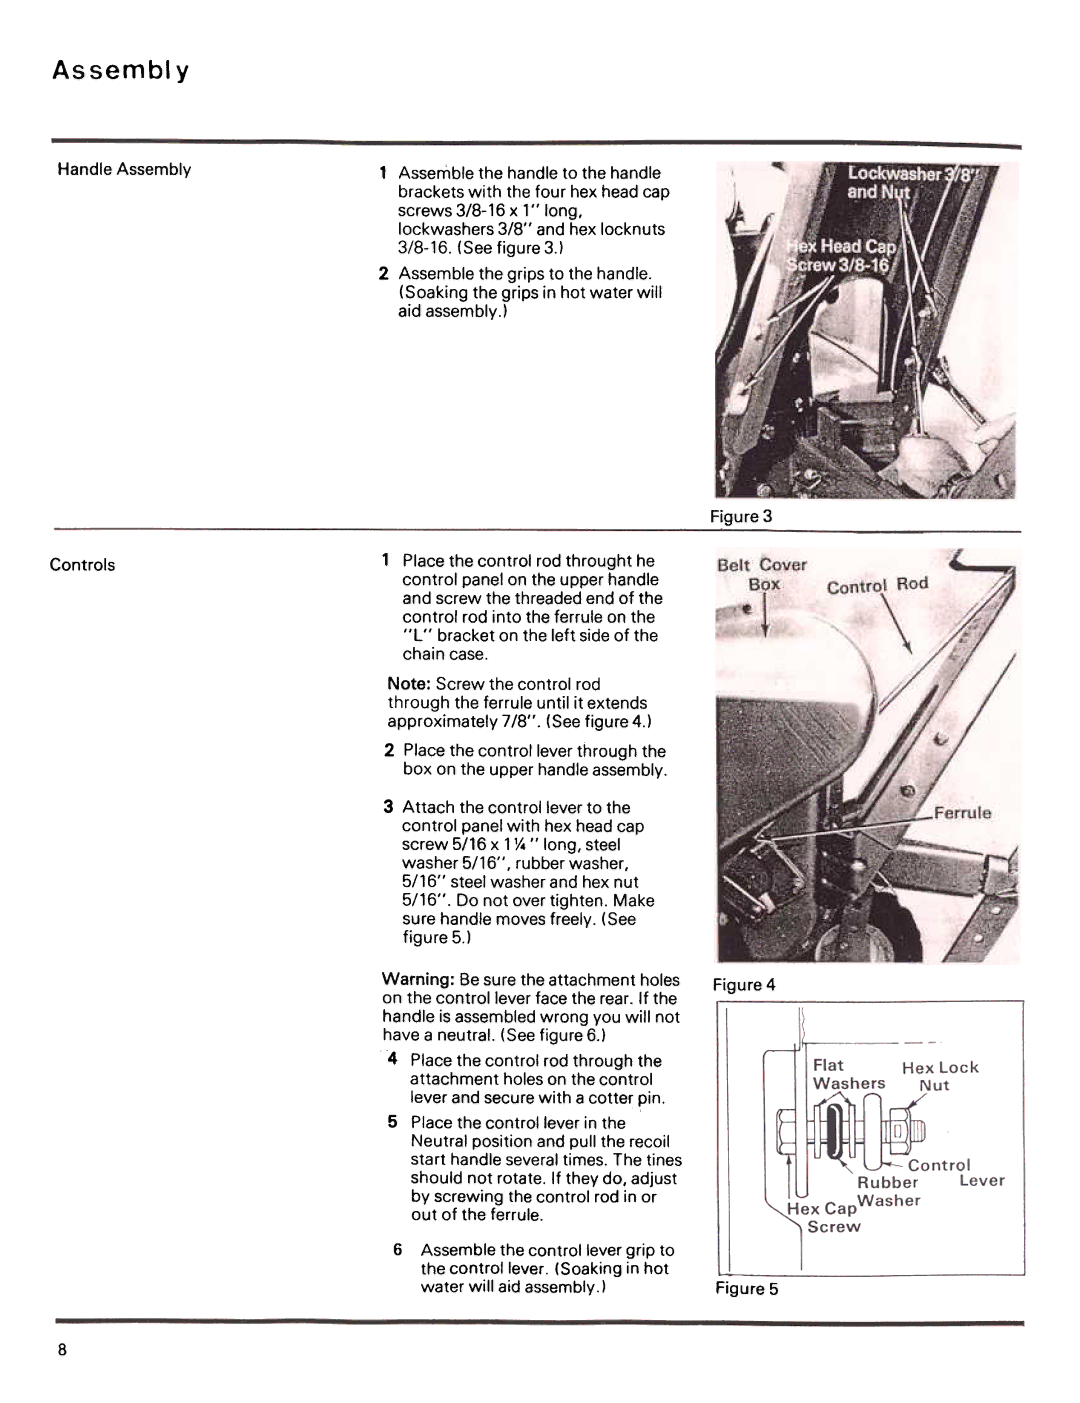
Place the control rod throught he control panel on the upper handle and screw the threaded end of the control rod into the ferrule on the "L" bracket on the left side of the chain case.
Note: Screw the control rod through the ferrule until it extends approximately 7/8". (See figure 4.1
2Place the control lever through the box on the upper handle assembly.
Attach the control lever to the control panel with hex head cap screw 5/16 x 1 Y4" long, steel washer 5/16", rubber washer, 5/16" steel washer and hex nut 5/16". Do not over tighten. Make sure handle moves freely. (See figure 5.)
Warning: Be sure the attachment holes Figure 4
on the control lever face the rear. If the handle is assembled wrong you will not
have a neutral. (See figure 6.)
4Place the control rod through the attachment holes on the control lever and secure with a cotter pin.
5Place the control lever in the Neutral position and pull the recoil start handle several times. The tines should not rotate. If they do, adjust by screwing the control rod in or out of the ferrule.
6 Assemble the control lever grip to the control lever. (Soaking in hot
water will aid assembly.) | 5 |
Figure13