2.Adjust the leveling legs to level and align the refrigerator from left to right and front to back so that the refrigerator is level and aligned with the cabinets.
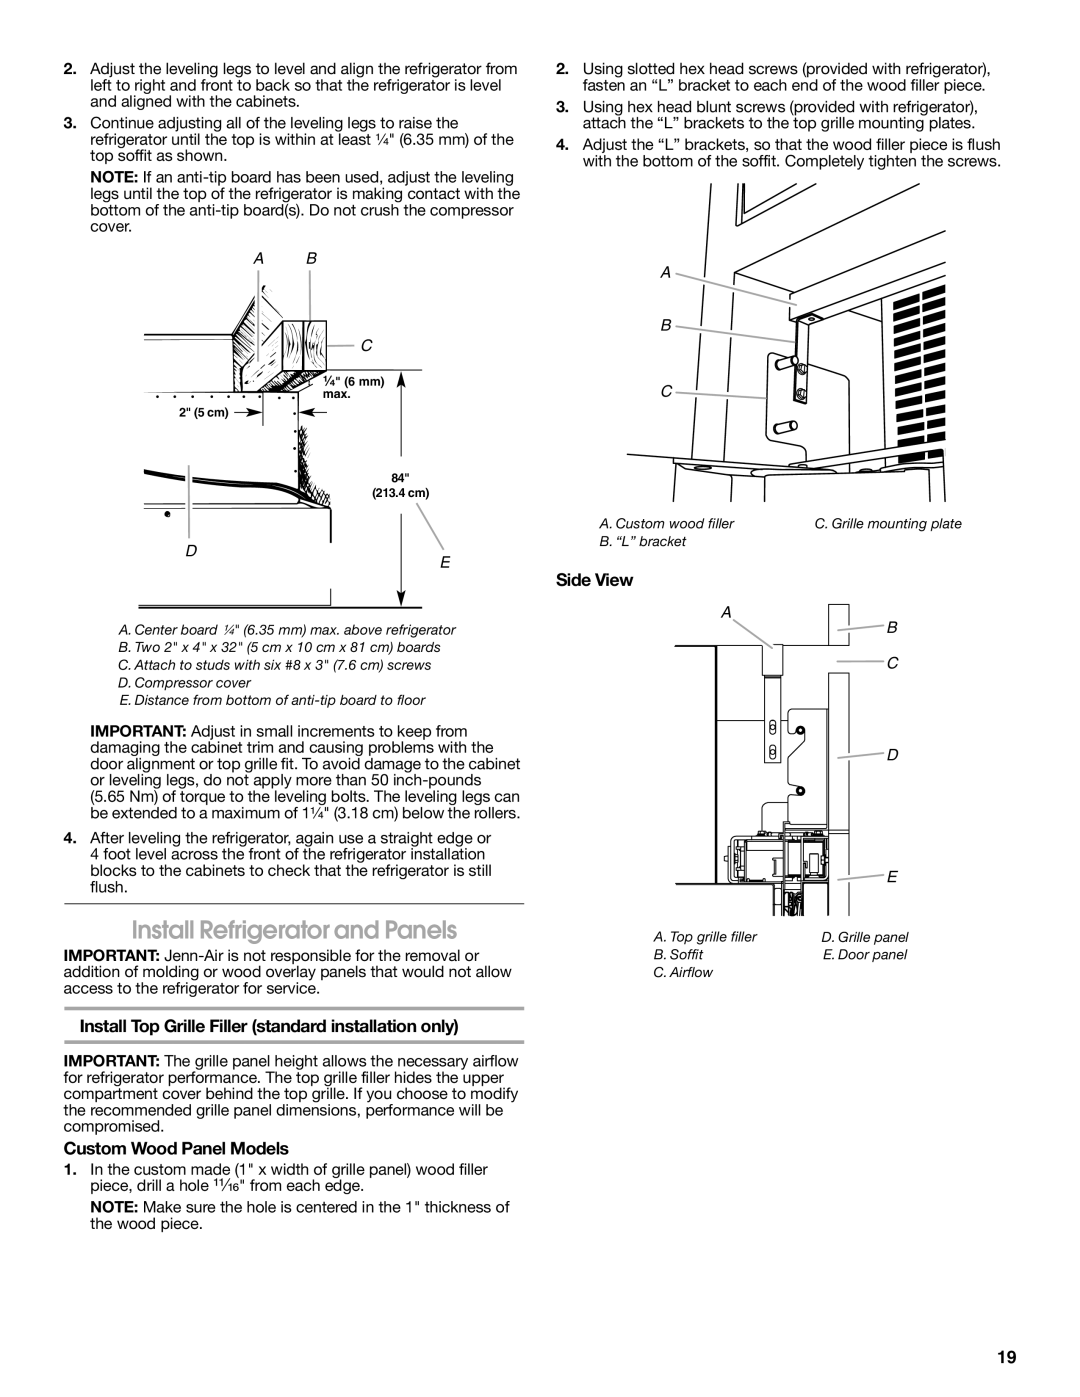
3.Continue adjusting all of the leveling legs to raise the refrigerator until the top is within at least ¹⁄₄" (6.35 mm) of the top soffit as shown.
NOTE: If an
A B
![]()
![]()
![]()
![]()
![]()
![]()
![]() C
C
¹⁄₄" (6 mm) max.
2" (5 cm) ![]()
84"
(213.4 cm)
D
E
A. Center board ¹⁄₄" (6.35 mm) max. above refrigerator
B. Two 2" x 4" x 32" (5 cm x 10 cm x 81 cm) boards
C. Attach to studs with six #8 x 3" (7.6 cm) screws
D. Compressor cover
E. Distance from bottom of
IMPORTANT: Adjust in small increments to keep from damaging the cabinet trim and causing problems with the door alignment or top grille fit. To avoid damage to the cabinet or leveling legs, do not apply more than 50
(5.65 Nm) of torque to the leveling bolts. The leveling legs can be extended to a maximum of 1¹⁄₄" (3.18 cm) below the rollers.
4.After leveling the refrigerator, again use a straight edge or 4 foot level across the front of the refrigerator installation blocks to the cabinets to check that the refrigerator is still flush.
Install Refrigerator and Panels
IMPORTANT:
Install Top Grille Filler (standard installation only)
IMPORTANT: The grille panel height allows the necessary airflow for refrigerator performance. The top grille filler hides the upper compartment cover behind the top grille. If you choose to modify the recommended grille panel dimensions, performance will be compromised.
Custom Wood Panel Models
1.In the custom made (1" x width of grille panel) wood filler piece, drill a hole ¹¹⁄₁₆" from each edge.
NOTE: Make sure the hole is centered in the 1" thickness of the wood piece.
2.Using slotted hex head screws (provided with refrigerator), fasten an “L” bracket to each end of the wood filler piece.
3.Using hex head blunt screws (provided with refrigerator), attach the “L” brackets to the top grille mounting plates.
4.Adjust the “L” brackets, so that the wood filler piece is flush with the bottom of the soffit. Completely tighten the screws.
A
B ![]()
C ![]()
A. Custom wood filler | C. Grille mounting plate |
B. “L” bracket |
|
Side View
A
![]() B
B
![]() C
C
![]() D
D
A. Top grille filler |
|
| E |
|
| ||
D. Grille panel | |||
B. Soffit | E. Door panel | ||
C. Airflow |
|
|
|
19