5.Attach a mounting bracket to the top edge of each door panel by placing the large end of the keyhole slot over the screws and sliding the bracket so that the screws are centered in the slots.
NOTE: Start with the screws in the center of the slots as shown, then move the door panel, as necessary, to align.
A B
A. Door panel | B. Mounting bracket |
Top Grille Panel
1.Using the slotted hex head screws (provided with refrigerator), attach a mounting bracket to each side of the top grille panel.
IMPORTANT: See the Parts Provided insert sheet to select the brackets designated for your installation.
■Use the Integrated Grille brackets for an Integrated Installation with a full height grille.
■Use the Standard Grille brackets for a Standard Installation with a closed or open soffit.
A
B
A. Top grille brackets
B. Grille trim piece
2.Using round head screws (provided with refrigerator), attach the grille trim piece to the bottom of the grill panel.
NOTE: The grille trim is pre installed on the panel kits.
Remove Trim Pieces
1.Remove all tape and door bracing from the refrigerator and freezer doors.
2.Open the refrigerator and freezer doors.
3.Remove the hinge cover pieces from the top and bottom of the door to expose the holes in the hinges.
NOTE: It is not necessary to remove the hinge side trims as they will not interfere with the installation.
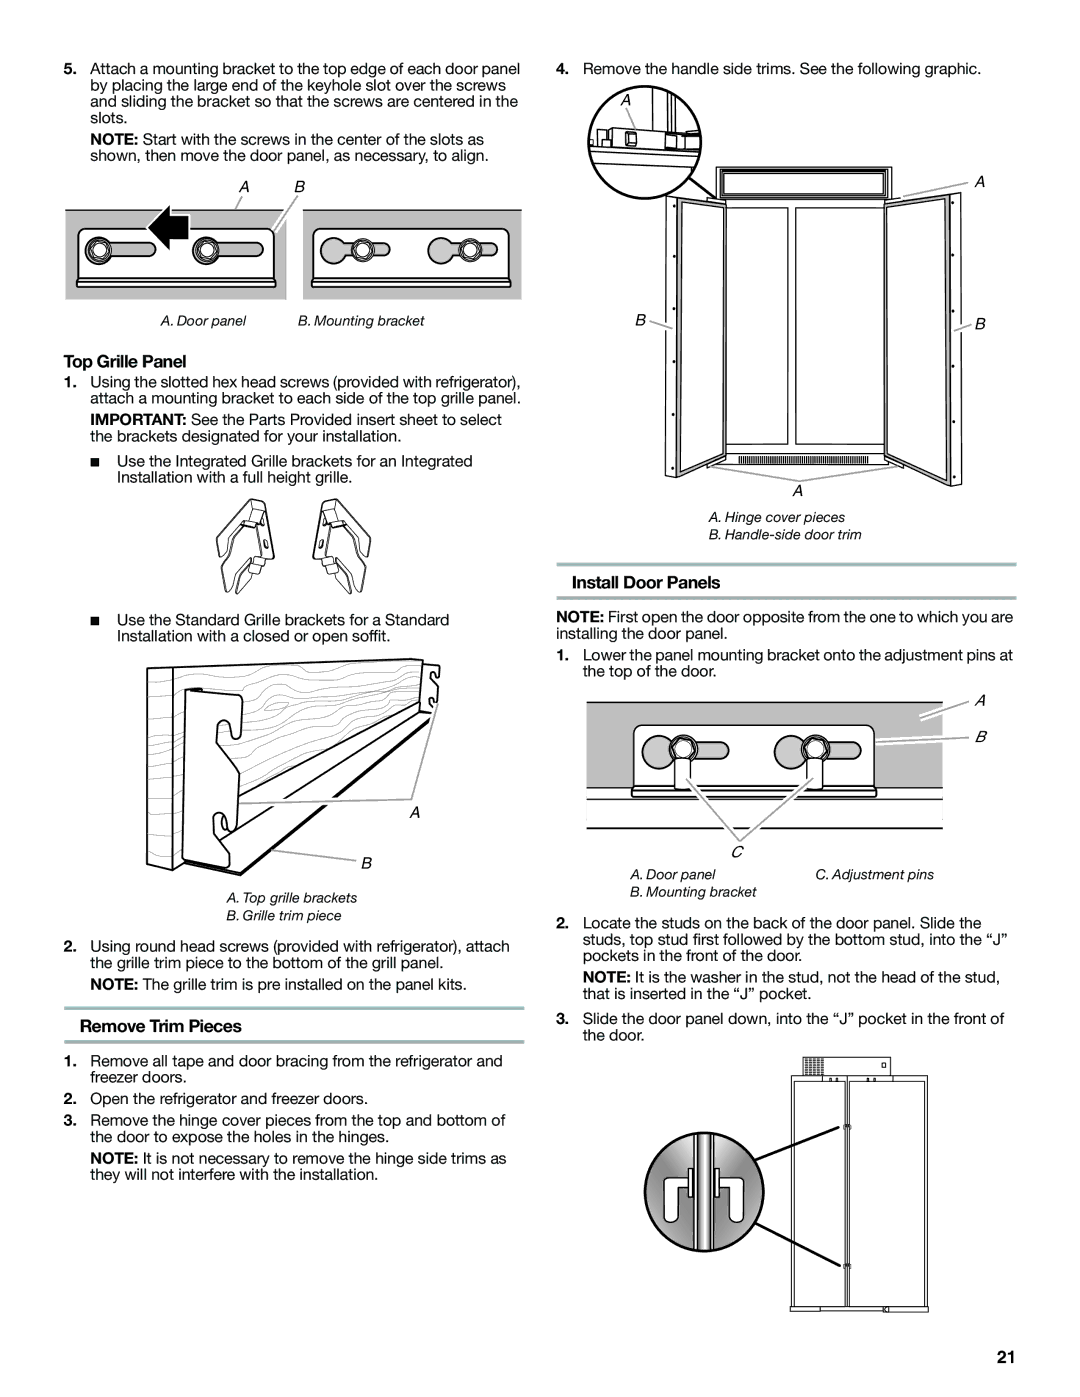
4.Remove the handle side trims. See the following graphic.
A
A
B ![]() B
B
A
A. Hinge cover pieces
B.
Install Door Panels
NOTE: First open the door opposite from the one to which you are installing the door panel.
1.Lower the panel mounting bracket onto the adjustment pins at the top of the door.
![]() A
A
![]() B
B
C |
|
A. Door panel | C. Adjustment pins |
B. Mounting bracket |
|
2.Locate the studs on the back of the door panel. Slide the studs, top stud first followed by the bottom stud, into the “J” pockets in the front of the door.
NOTE: It is the washer in the stud, not the head of the stud, that is inserted in the “J” pocket.
3.Slide the door panel down, into the “J” pocket in the front of the door.
21