UV8035
DIN Rear Mount (Method B)
This unit has threaded holes in the chassis side panels which may be used with the original factory mounting brackets of some vehicles to mount the radio to the dashboard. Please consult with your local mobile stereo shop for assistance on this type of installation.
1.Remove the existing factory radio from the dashboard or center console mounting. Save all hardware and brackets as they will be used to mount the new radio.
2.Carefully unsnap the plastic trim ring from the front of the new radio chassis. Remove and discard the trim ring.
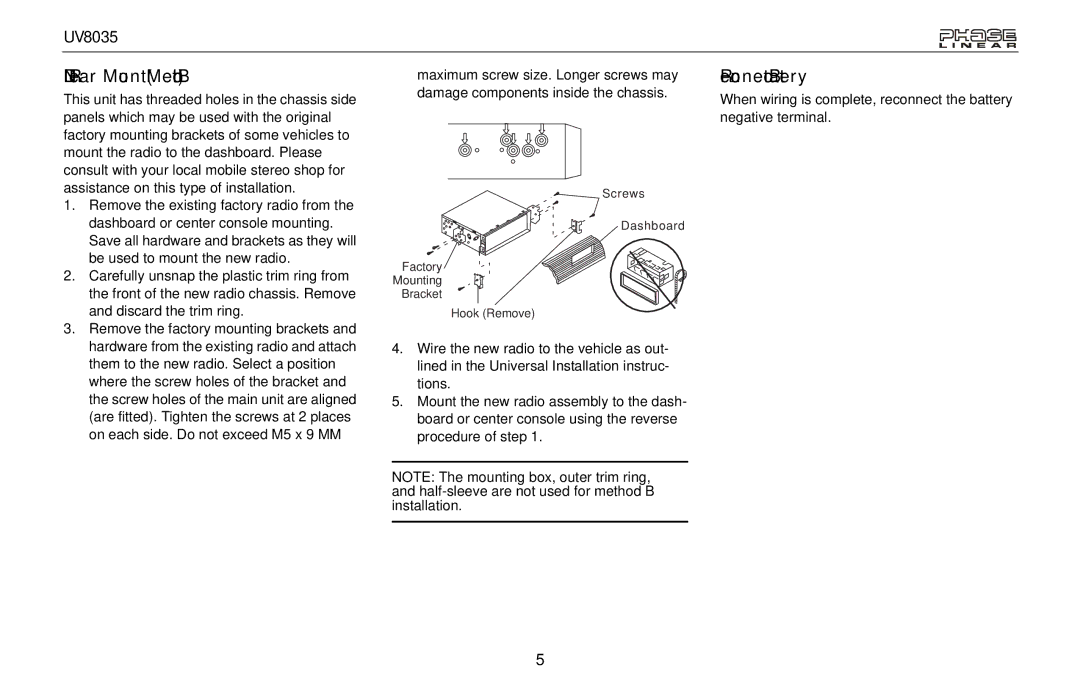
3.Remove the factory mounting brackets and hardware from the existing radio and attach them to the new radio. Select a position where the screw holes of the bracket and the screw holes of the main unit are aligned (are fitted). Tighten the screws at 2 places on each side. Do not exceed M5 x 9 MM
maximum screw size. Longer screws may | Reconnect Battery |
damage components inside the chassis. | When wiring is complete, reconnect the battery |
| |
| negative terminal. |
Screws
Dashboard
Factory
Mounting
Bracket
Hook (Remove)
4.Wire the new radio to the vehicle as out- lined in the Universal Installation instruc- tions.
5.Mount the new radio assembly to the dash- board or center console using the reverse procedure of step 1.
NOTE: The mounting box, outer trim ring, and
5
