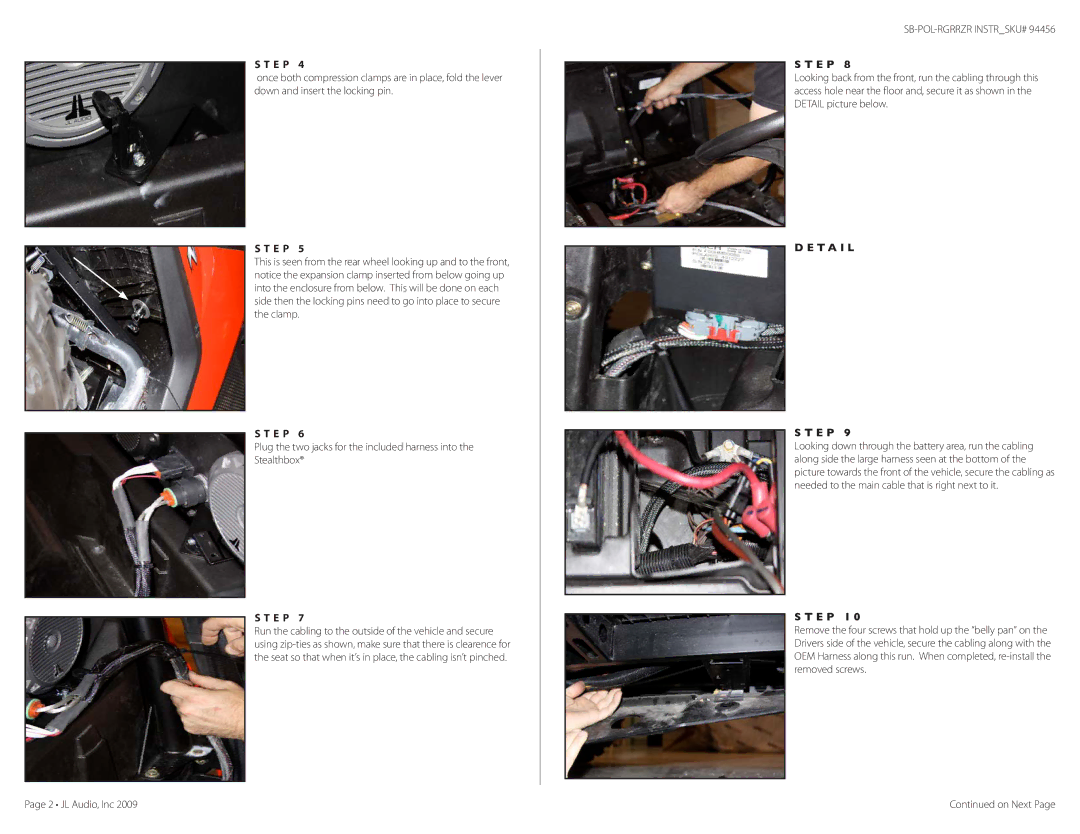
S T E P 4
once both compression clamps are in place, fold the lever down and insert the locking pin.
S T E P 5
This is seen from the rear wheel looking up and to the front, notice the expansion clamp inserted from below going up into the enclosure from below. This will be done on each side then the locking pins need to go into place to secure the clamp.
S T E P 6
Plug the two jacks for the included harness into the Stealthbox®
S T E P 7
Run the cabling to the outside of the vehicle and secure using
S T E P 8
Looking back from the front, run the cabling through this access hole near the floor and, secure it as shown in the DETAIL picture below.
D e t a i l
S T E P 9
Looking down through the battery area, run the cabling along side the large harness seen at the bottom of the picture towards the front of the vehicle, secure the cabling as needed to the main cable that is right next to it.
S T E P 1 0
Remove the four screws that hold up the “belly pan” on the Drivers side of the vehicle, secure the cabling along with the OEM Harness along this run. When completed,
Page 2 • JL Audio, Inc 2009 | Continued on Next Page |