6.Fill the smaller upper hole and the two large ones with the corresponding plastic plug caps supplied in the bag containing the instruction booklet.
Positioning and levelling
Install the machine on a flat hard floor. Make sure that air circulation around the machine is not impeded by carpets, rugs etc. Check that the machine does not touch the wall or other kitchen units.
Caution! Never place cardboard, wood or similar materials under the machine to compensate for any unevenness in the floor.
If the floor is carpeted or covered with crumbly or soft material, insert a rigid support base under the feet to prevent noise, vibration or displacement. The base should protrude a few centimetres beyond the edges of the machine.
Warning! The machine should NOT be placed on deep pile carpeting.
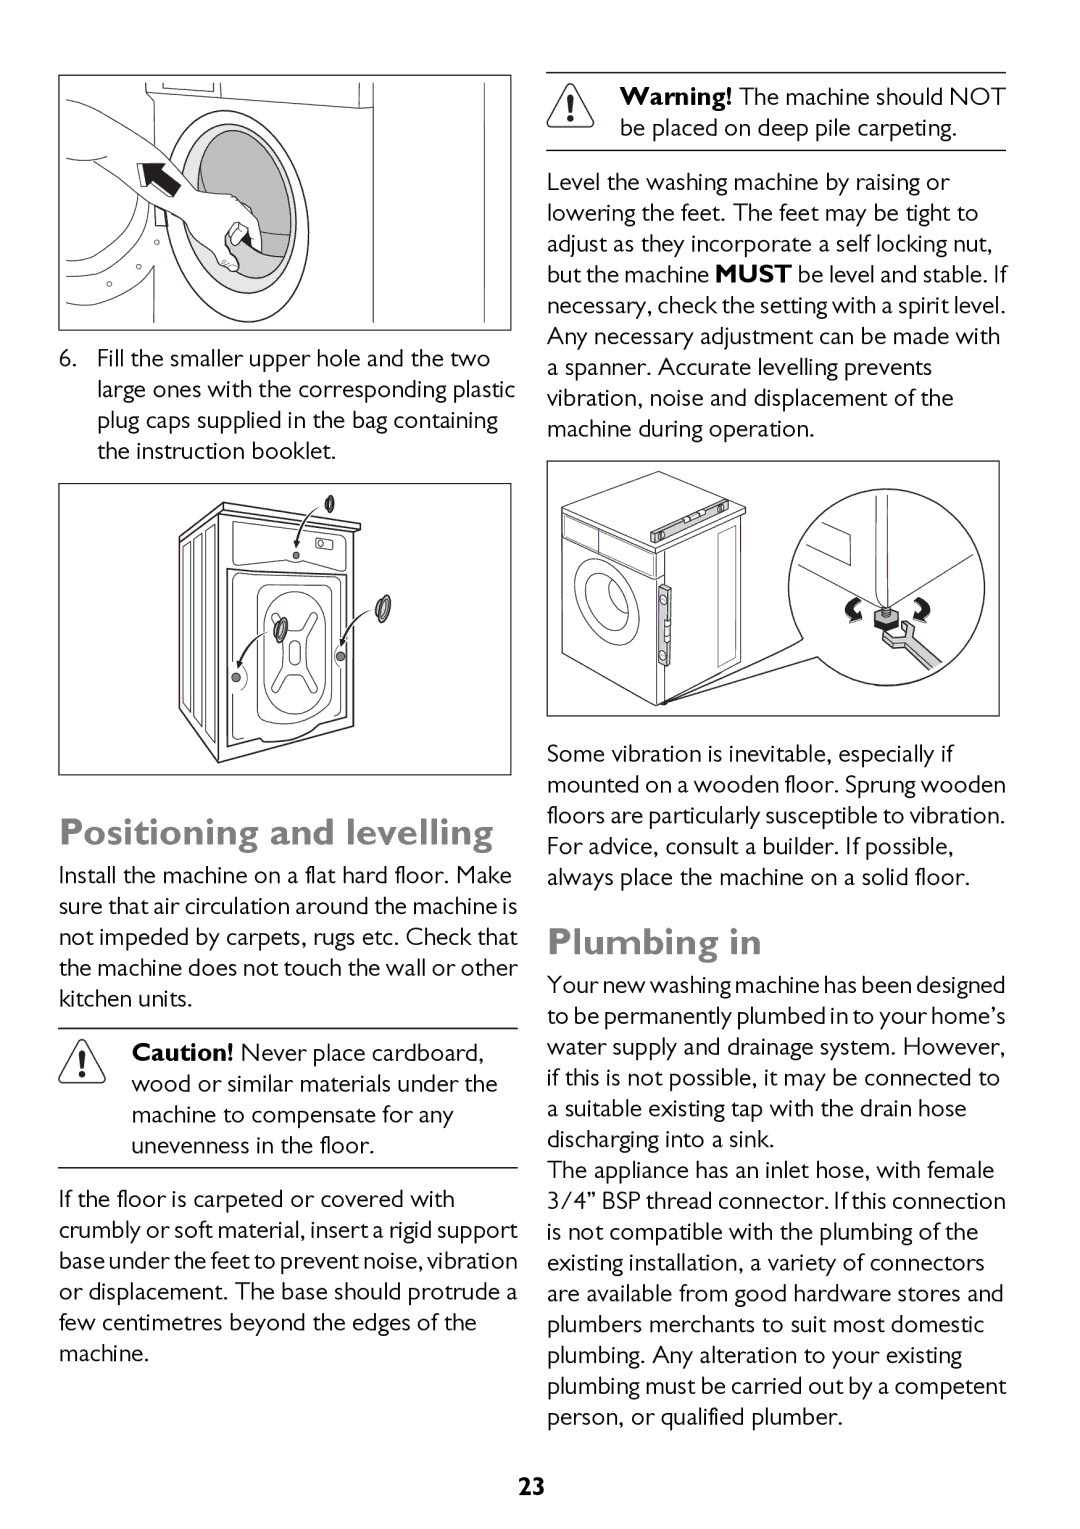
Level the washing machine by raising or lowering the feet. The feet may be tight to adjust as they incorporate a self locking nut, but the machine MUST be level and stable. If necessary, check the setting with a spirit level. Any necessary adjustment can be made with a spanner. Accurate levelling prevents vibration, noise and displacement of the machine during operation.
Some vibration is inevitable, especially if mounted on a wooden floor. Sprung wooden floors are particularly susceptible to vibration. For advice, consult a builder. If possible, always place the machine on a solid floor.
Plumbing in
Your new washing machine has been designed to be permanently plumbed in to your home’s water supply and drainage system. However, if this is not possible, it may be connected to a suitable existing tap with the drain hose discharging into a sink.
The appliance has an inlet hose, with female 3/4” BSP thread connector. If this connection is not compatible with the plumbing of the existing installation, a variety of connectors are available from good hardware stores and plumbers merchants to suit most domestic plumbing. Any alteration to your existing plumbing must be carried out by a competent person, or qualified plumber.
23