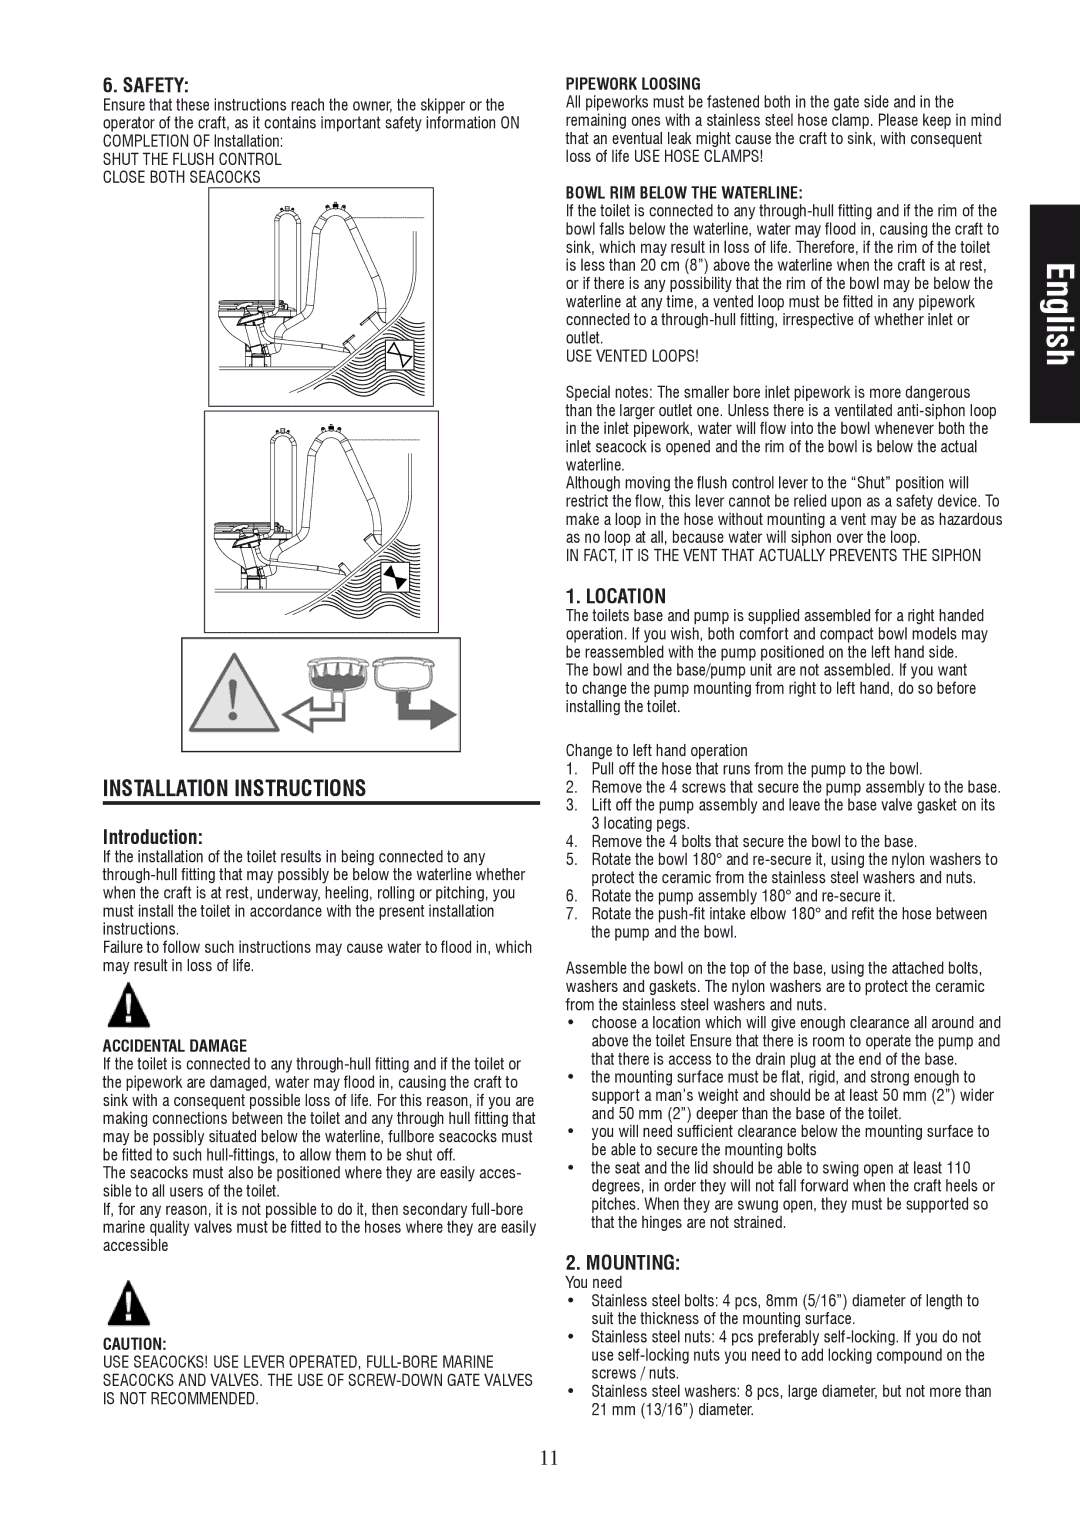
6. SAFETY:
Ensure that these instructions reach the owner, the skipper or the operator of the craft, as it contains important safety information ON COMPLETION OF Installation:
SHUT THE FLUSH CONTROL CLOSE BOTH SEACOCKS
INSTALLATION INSTRUCTIONS
Introduction:
If the installation of the toilet results in being connected to any
Failure to follow such instructions may cause water to flood in, which may result in loss of life.
ACCIDENTAL DAMAGE
If the toilet is connected to any
The seacocks must also be positioned where they are easily acces- sible to all users of the toilet.
If, for any reason, it is not possible to do it, then secondary
Caution:
USE SEACOCKS! USE LEVER OPERATED,
PIPEWORK LOOSING
All pipeworks must be fastened both in the gate side and in the remaining ones with a stainless steel hose clamp. Please keep in mind that an eventual leak might cause the craft to sink, with consequent loss of life USE HOSE CLAMPS!
BOWL RIM BELOW THE WATERLINE:
If the toilet is connected to any
USE VENTED LOOPS!
Special notes: The smaller bore inlet pipework is more dangerous than the larger outlet one. Unless there is a ventilated
Although moving the flush control lever to the “Shut” position will restrict the flow, this lever cannot be relied upon as a safety device. To make a loop in the hose without mounting a vent may be as hazardous as no loop at all, because water will siphon over the loop.
IN FACT, IT IS THE VENT THAT ACTUALLY PREVENTS THE SIPHON
1. LOCATION
The toilets base and pump is supplied assembled for a right handed operation. If you wish, both comfort and compact bowl models may be reassembled with the pump positioned on the left hand side.
The bowl and the base/pump unit are not assembled. If you want to change the pump mounting from right to left hand, do so before installing the toilet.
Change to left hand operation
1.Pull off the hose that runs from the pump to the bowl.
2.Remove the 4 screws that secure the pump assembly to the base.
3.Lift off the pump assembly and leave the base valve gasket on its 3 locating pegs.
4.Remove the 4 bolts that secure the bowl to the base.
5.Rotate the bowl 180° and
6.Rotate the pump assembly 180° and
7.Rotate the
Assemble the bowl on the top of the base, using the attached bolts, washers and gaskets. The nylon washers are to protect the ceramic from the stainless steel washers and nuts.
•choose a location which will give enough clearance all around and above the toilet Ensure that there is room to operate the pump and that there is access to the drain plug at the end of the base.
•the mounting surface must be flat, rigid, and strong enough to support a man’s weight and should be at least 50 mm (2”) wider and 50 mm (2”) deeper than the base of the toilet.
•you will need sufficient clearance below the mounting surface to be able to secure the mounting bolts
•the seat and the lid should be able to swing open at least 110 degrees, in order they will not fall forward when the craft heels or pitches. When they are swung open, they must be supported so that the hinges are not strained.
2. MOUNTING:
You need
•Stainless steel bolts: 4 pcs, 8mm (5/16”) diameter of length to suit the thickness of the mounting surface.
•Stainless steel nuts: 4 pcs preferably
•Stainless steel washers: 8 pcs, large diameter, but not more than 21 mm (13/16”) diameter.
English
11