PRESENTATION
1.Presentation of Printed and Three- Dimensional Materials
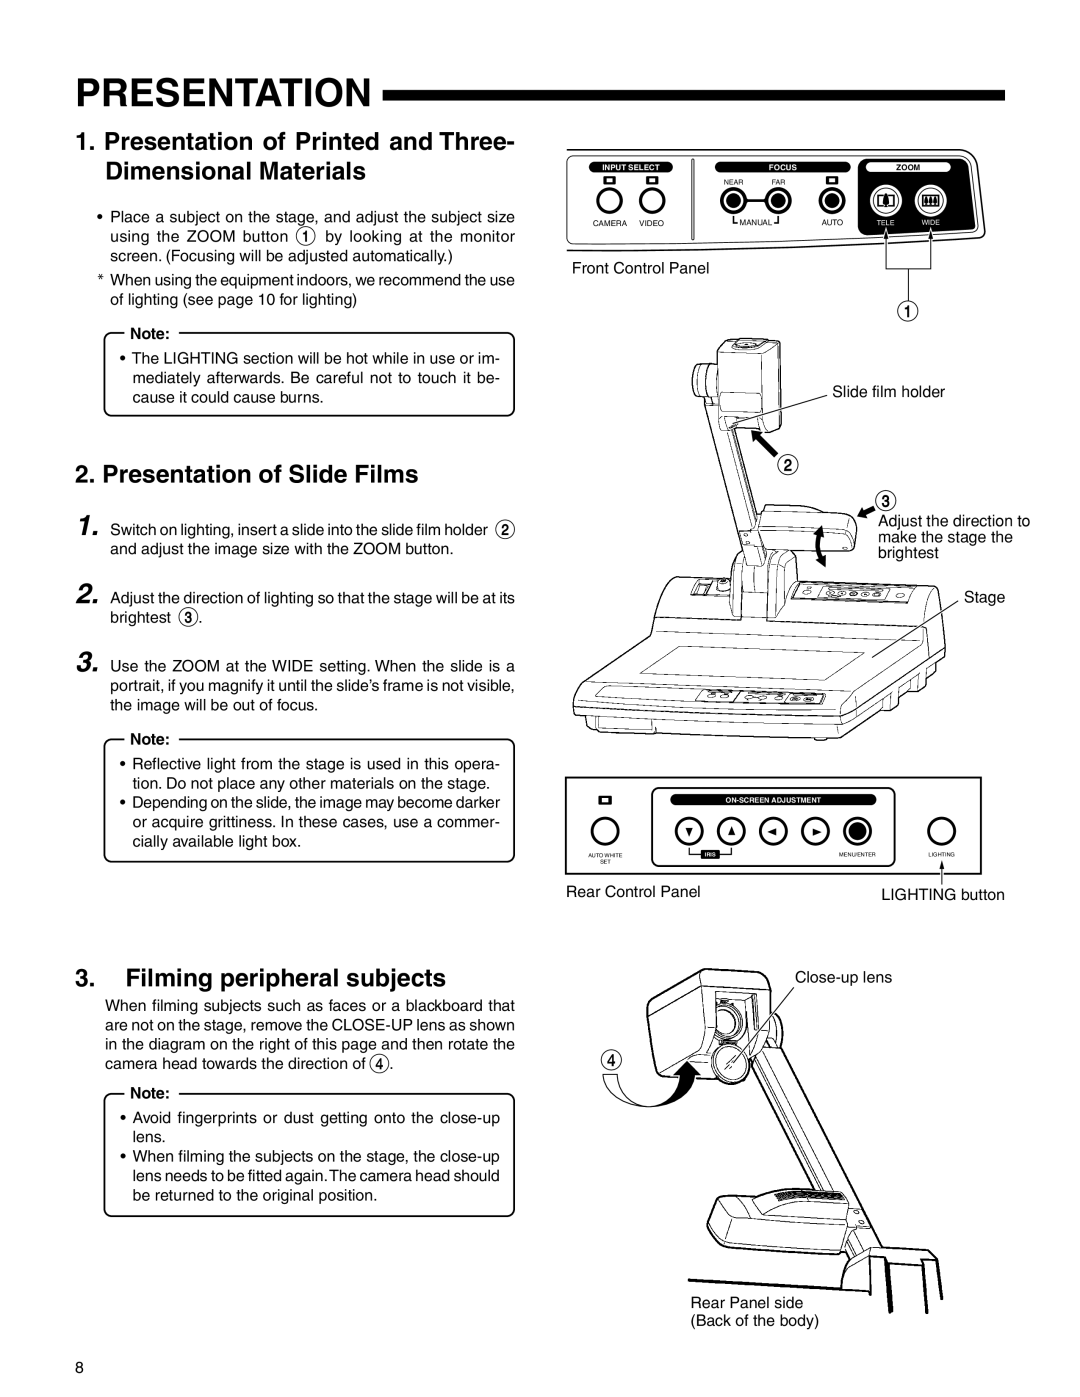
•Place a subject on the stage, and adjust the subject size using the ZOOM button 1 by looking at the monitor screen. (Focusing will be adjusted automatically.)
*When using the equipment indoors, we recommend the use of lighting (see page 10 for lighting)
Note:
•The LIGHTING section will be hot while in use or im- mediately afterwards. Be careful not to touch it be- cause it could cause burns.
2.Presentation of Slide Films
1. Switch on lighting, insert a slide into the slide film holder 2 and adjust the image size with the ZOOM button.
2. Adjust the direction of lighting so that the stage will be at its brightest 3.
3. Use the ZOOM at the WIDE setting. When the slide is a portrait, if you magnify it until the slide’s frame is not visible, the image will be out of focus.
Note:
•Reflective light from the stage is used in this opera- tion. Do not place any other materials on the stage.
•Depending on the slide, the image may become darker or acquire grittiness. In these cases, use a commer- cially available light box.
3.Filming peripheral subjects
When filming subjects such as faces or a blackboard that are not on the stage, remove the
Note:
•Avoid fingerprints or dust getting onto the
•When filming the subjects on the stage, the
INPUT SELECT |
| FOCUS |
|
| ZOOM |
| NEAR | FAR |
|
|
|
CAMERA VIDEO | MANUAL | AUTO | TELE | WIDE | |
Front Control Panel
1
Slide film holder
2
3
Adjust the direction to make the stage the brightest
Stage
|
|
|
|
| |
AUTO WHITE | IRIS | MENU/ENTER | LIGHTING |
| |
SET |
|
|
|
|
|
|
|
|
|
|
|
|
|
|
|
|
|
Rear Control Panel |
|
|
|
| |
|
| LIGHTING button | |||
4 ![]()
Rear Panel side (Back of the body)
8