7Adjusting the center and rear speaker output levels

You can adjust the speaker output level for the center speaker and rear speakers.

You can adjust the output level while listening to the test tone.

Make adjustments so that the sound level of the selected speaker is set at the same level as that of the front speakers.

To output test tone properly, turn off the sound mode and the DSP Surround mode before entering on-screen menu.

1Display EXPERT SPEAKER SETTING menu.

• See page 38.

2 Press Cursor (5 / / 3 / 2) to move


to “TEST


TONE,” then press ENTER.


“TEST TONE” changes its color to green and test tone comes out of in the following sequence—left front speaker, center speaker, right front speaker, right rear speaker, and left rear speaker.

Test tone is output only when the tray loaded with a DVD is selected.

3 Press Cursor (5 / / 3 / 2) to move to “C.SPK–

LEVEL” or “R.SPK–LEVEL,” then press ENTER.

4Press Cursor 3 or 2 to adjust the output level, then press ENTER.

• You can adjust the output level from “–6 dB” to “+6 dB.”

5Repeat steps 3 and 4 to adjust the other speaker output level.

6Press Cursor (5 / / 3 / 2) to select “TEST TONE,” then press ENTER.

Test tone stops.

7When finished, press Cursor (5 / / 3 / 2) to move

to “EXIT,” then press ENTER.

EXPERT SPEAKER SETTING menu disappears.

7Selecting the speaker for bass output

You can select the speaker for bass output according to your preference.

1Display EXPERT SPEAKER SETTING menu.

See page 38.

2Press Cursor (5 / / 3 / 2) to move to “BASS,” then press ENTER.

3Press Cursor 3 or 2 to select your desired setting.

L/R : to output the bass signals through the FRONT SUBWOOFERS terminals.

S.woofer : to output the bass signals through the subwoofer connected to the SUB-WOOFER 5.1ch OUT jack.

4When finished, press Cursor (5 / / 3 / 2) to move to “EXIT,” then press ENTER.

EXPERT SPEAKER SETTING menu disappears.

7Adjusting the subwoofer output levels

You can adjust the output level according to your preference.

1Display EXPERT SPEAKER SETTING menu.

• See page 38.

2 Press Cursor (5 / / 3 / 2) to move to “SUB

WOOFER,” then press ENTER.

• You can adjust the output level from “–6 dB” to “+6 dB.”

3Press Cursor 3 or 2 to adjust the output level, then

ENTER.

4When finished, press Cursor (5 / / 3 / 2) to move

to “EXIT,” then press ENTER.

EXPERT SPEAKER SETTING menu disappears.

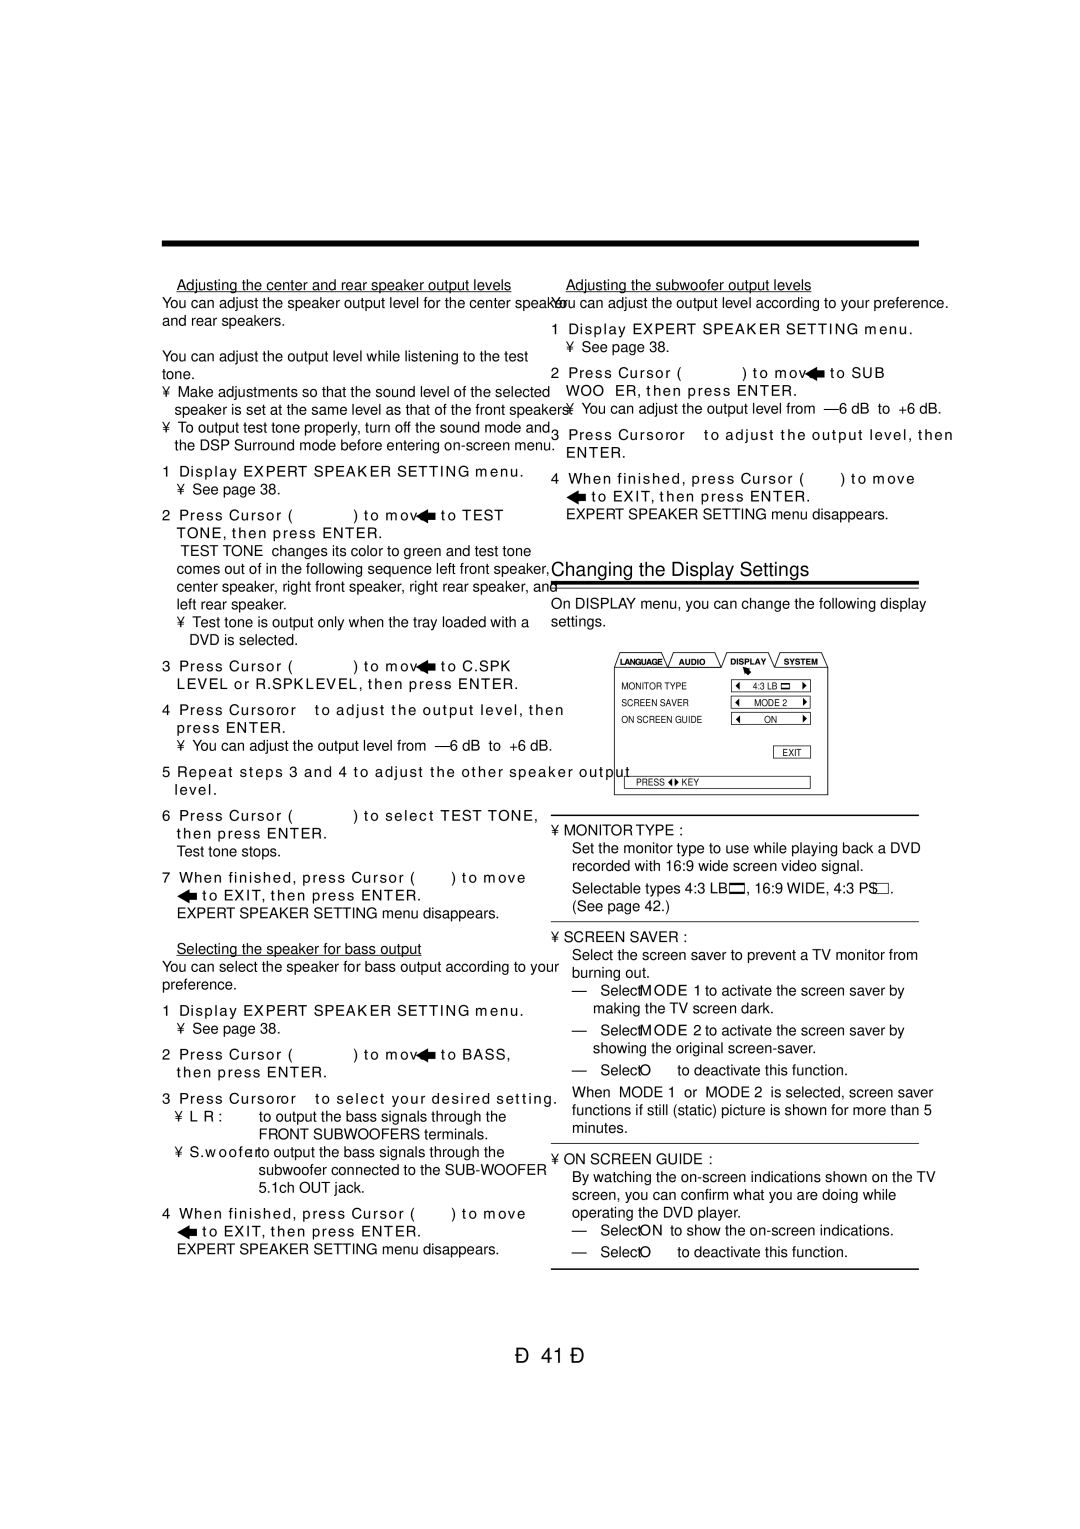
Changing the Display Settings

On DISPLAY menu, you can change the following display settings.

MONITOR TYPE

4:3 LB

SCREEN SAVER

MODE 2

ON SCREEN GUIDE

ON


EXIT

PRESS

KEY


MONITOR TYPE :

Set the monitor type to use while playing back a DVD recorded with 16:9 wide screen video signal.

Selectable types—4:3 LB , 16:9 WIDE, 4:3 PS . (See page 42.)

SCREEN SAVER :

Select the screen saver to prevent a TV monitor from burning out.

Select “MODE 1” to activate the screen saver by making the TV screen dark.

Select “MODE 2” to activate the screen saver by showing the original screen-saver.

Select “OFF” to deactivate this function.

When “MODE 1” or “MODE 2” is selected, screen saver functions if still (static) picture is shown for more than 5 minutes.

ON SCREEN GUIDE :

By watching the on-screen indications shown on the TV screen, you can confirm what you are doing while operating the DVD player.

Select “ON” to show the on-screen indications.

Select “OFF” to deactivate this function.

– 41 –

Page 44
Image 44
JVC CA-MXDVA9 manual Changing the Display Settings, Press Cursor 3 or 2 to adjust the output level, then, Monitor Type

CA-MXDVB10, CA-MXDVA9 specifications

The JVC CA-MXDVA9 and CA-MXDVB10 are compact audio systems that offer an impressive combination of features and technologies designed for music enthusiasts and casual listeners alike. These systems are notable for their sleek design and user-friendly interfaces, making them an excellent addition to any home or office environment.

One of the standout features of the JVC CA-MXDVA9 and CA-MXDVB10 is their multi-format playback capabilities. Both systems support a range of audio formats, including CD, MP3, and WMA, providing flexibility for users to enjoy their favorite music from various sources. Additionally, the systems come equipped with USB ports that allow for direct playback from USB flash drives, enhancing convenience and accessibility.

The CA-MXDVA9 and CA-MXDVB10 also boast advanced sound technologies. The systems utilize JVC’s proprietary digital sound enhancement technology, which elevates audio quality by processing sound in real-time to deliver clearer highs and deeper lows. This ensures that users experience rich, immersive sound whether they're listening to music, watching movies, or playing video games.

Connectivity is another strong point for these audio systems. Both models feature built-in Bluetooth technology, enabling users to stream music wirelessly from their smartphones, tablets, or laptops. This wireless capability ensures an effortless listening experience without the hassle of cables. Additionally, the auxiliary input allows for connecting various devices, making it versatile for different media players.

The design of the JVC CA-MXDVA9 and CA-MXDVB10 is sleek and modern, making them aesthetically pleasing while also being functional. They are compact in size, making them easy to fit into any space without compromising on sound quality. The front-panel display is intuitive, allowing users to navigate through their music library with ease.

Moreover, the systems come with a built-in FM/AM tuner, providing access to local radio stations. The ability to preset favorite stations ensures that users can quickly access their preferred channels.

In conclusion, the JVC CA-MXDVA9 and CA-MXDVB10 are dynamic compact audio systems that cater to a wide array of audio needs. With their multi-format playback, advanced sound processing technologies, and Bluetooth connectivity, they represent an excellent choice for those looking to enhance their audio experience. Their stylish design and practical features make them a valuable addition to any audio setup.