Controls and Features
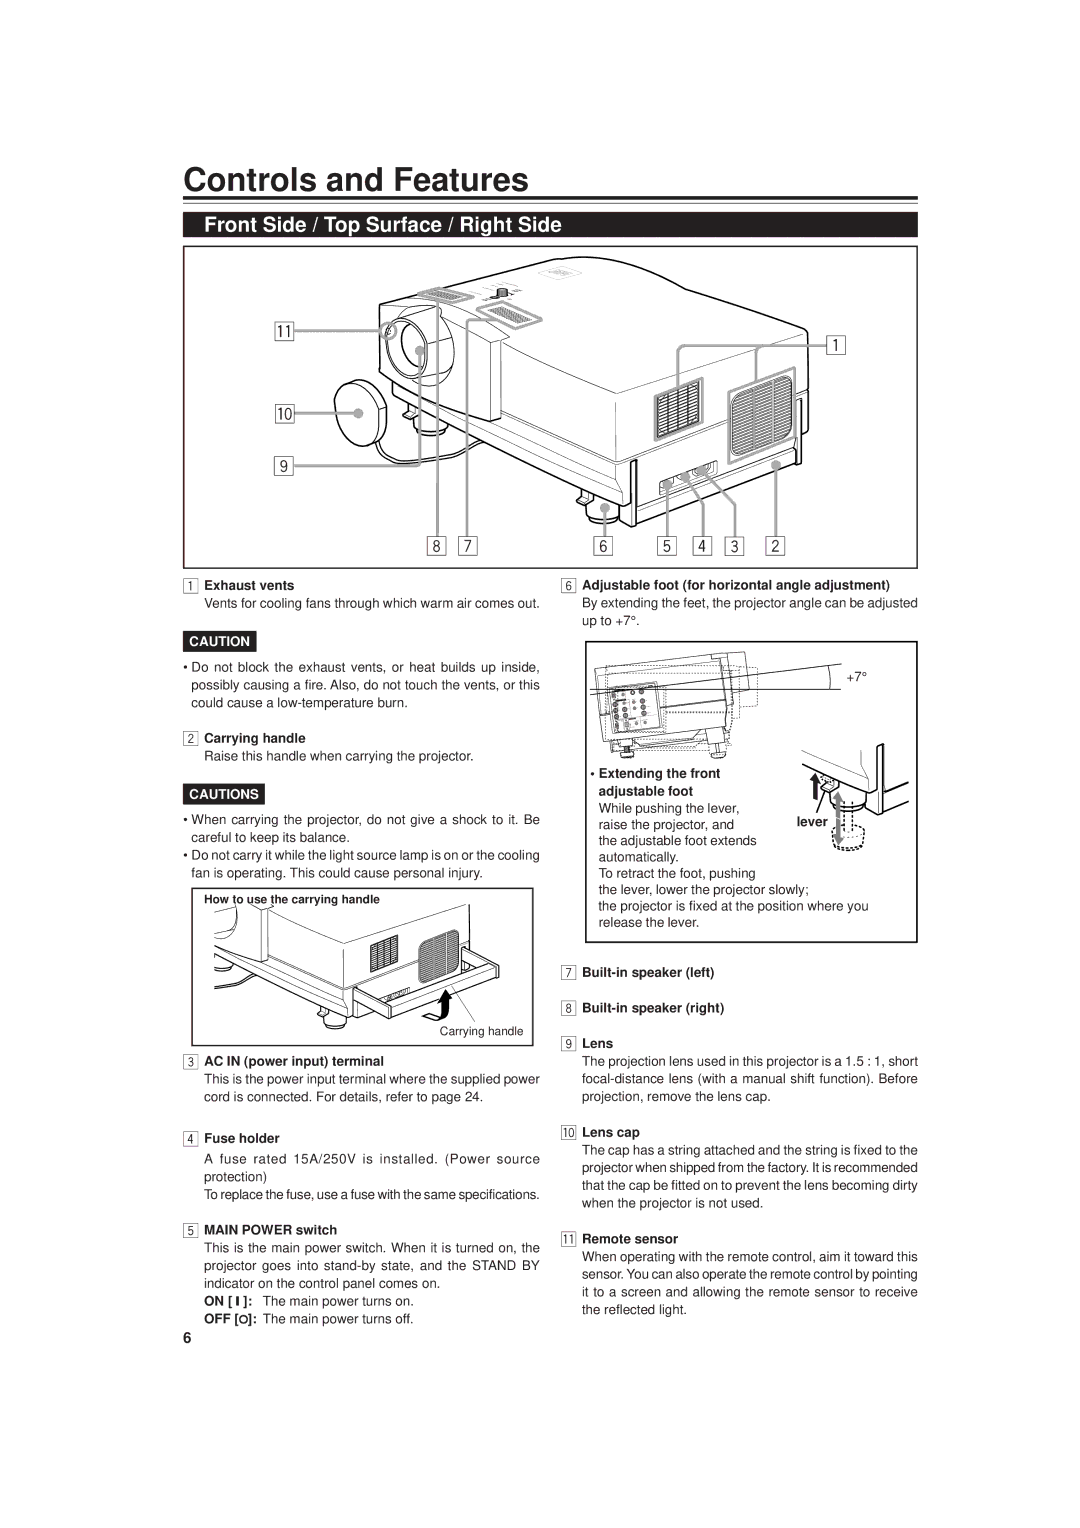
Front Side / Top Surface / Right Side
q
p
9
1
8 7 | 6 | 5 4 3 | 2 |
1 Exhaust vents | 6 Adjustable foot (for horizontal angle adjustment) |
Vents for cooling fans through which warm air comes out. | By extending the feet, the projector angle can be adjusted |
| up to +7°. |
CAUTION |
|
•Do not block the exhaust vents, or heat builds up inside, possibly causing a fire. Also, do not touch the vents, or this could cause a
2Carrying handle
Raise this handle when carrying the projector.
CAUTIONS
•When carrying the projector, do not give a shock to it. Be careful to keep its balance.
•Do not carry it while the light source lamp is on or the cooling fan is operating. This could cause personal injury.
How to use the carrying handle
Carrying handle
3AC IN (power input) terminal
This is the power input terminal where the supplied power cord is connected. For details, refer to page 24.
4Fuse holder
A fuse rated 15A/250V is installed. (Power source protection)
To replace the fuse, use a fuse with the same specifications.
5MAIN POWER switch
This is the main power switch. When it is turned on, the projector goes into
ON [ ❙ ]: The main power turns on.
OFF [à]: The main power turns off.
+7°
• Extending the front |
|
adjustable foot |
|
While pushing the lever, | lever |
raise the projector, and | |
the adjustable foot extends |
|
automatically. |
|
To retract the foot, pushing
the lever, lower the projector slowly;
the projector is fixed at the position where you release the lever.
7Built-in speaker (left)
8Built-in speaker (right)
9Lens
The projection lens used in this projector is a 1.5 : 1, short
pLens cap
The cap has a string attached and the string is fixed to the projector when shipped from the factory. It is recommended that the cap be fitted on to prevent the lens becoming dirty when the projector is not used.
qRemote sensor
When operating with the remote control, aim it toward this sensor. You can also operate the remote control by pointing it to a screen and allowing the remote sensor to receive the reflected light.
6