2.Projector LAN Settings
(1)Connect the projector to a PC with a LAN cable.
(2)Connect the power cord to the projector and turn on.
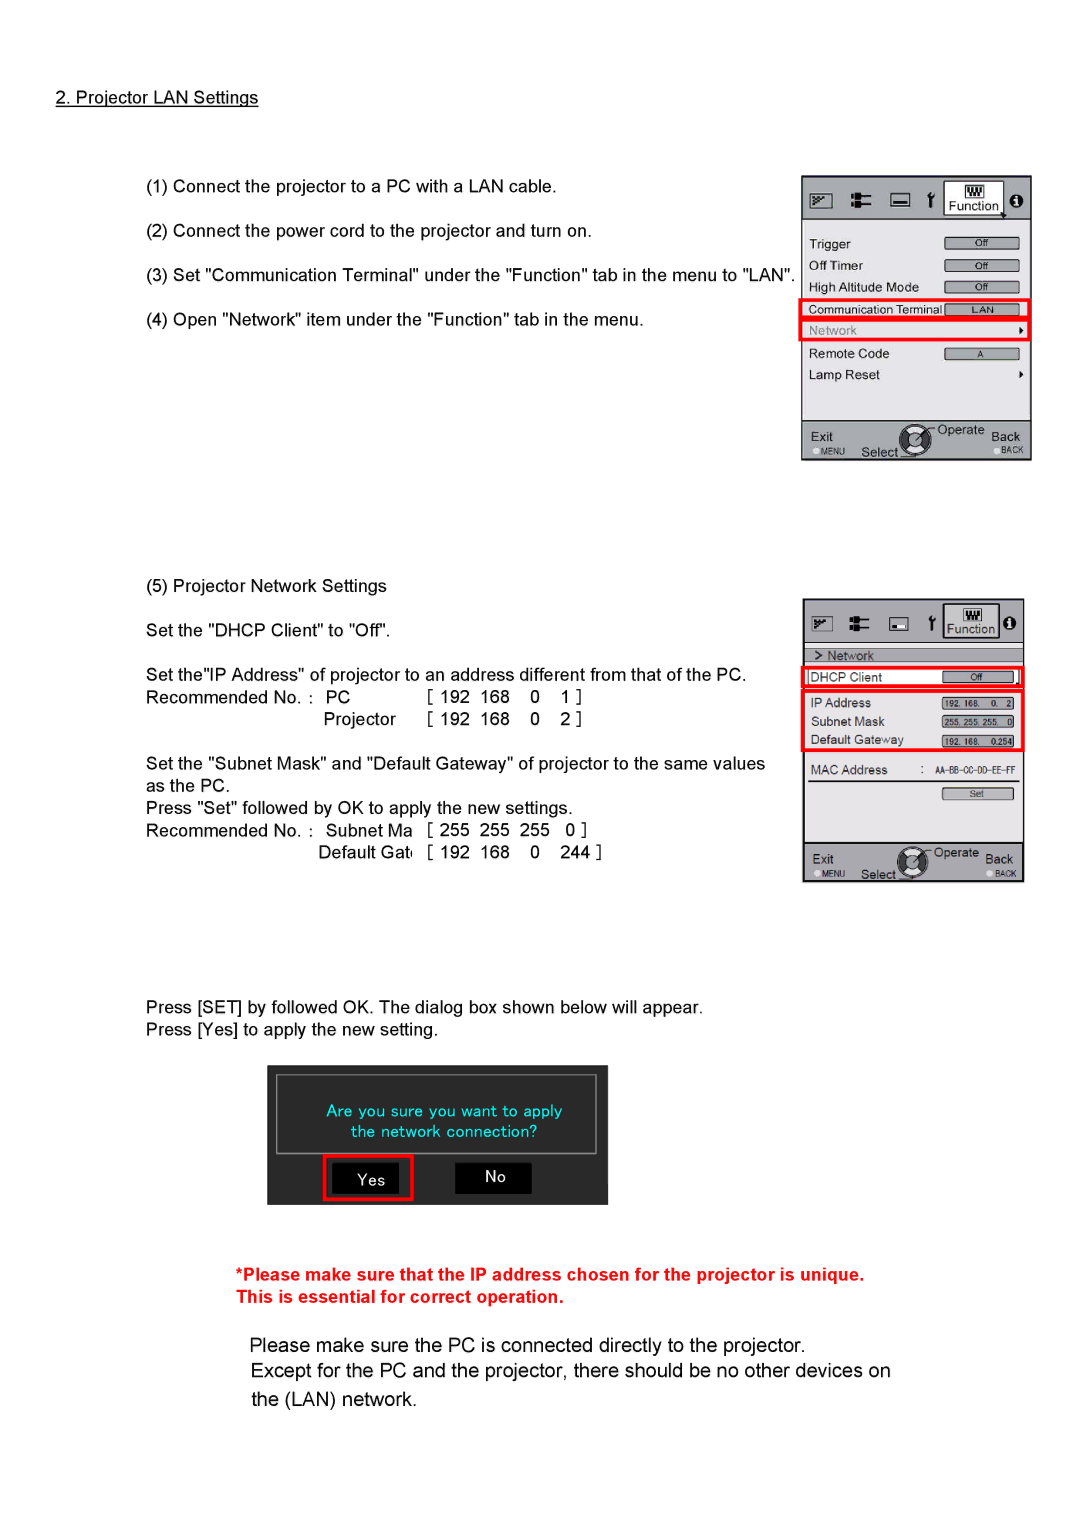
(3)Set "Communication Terminal" under the "Function" tab in the menu to "LAN".
(4) Open "Network" item under the "Function" tab in the menu.
(5)Projector Network Settings Set the "DHCP Client" to "Off".
Set the"IP Address" of projector to an address different from that of the PC.
Recommended No.: PC | [ 192 168 | 0 | 1 ] |
Projector | [ 192 168 | 0 | 2 ] |
Set the "Subnet Mask" and "Default Gateway" of projector to the same values as the PC.
Press "Set" followed by OK to apply the new settings.
Recommended No.: Subnet Ma [ 255 255 | 255 | 0 ] |
Default Gate [ 192 168 | 0 | 244 ] |
Press [SET] by followed OK. The dialog box shown below will appear.
Press [Yes] to apply the new setting.
Are you sure you want to apply
the network connection?
Yes
No
*Please make sure that the IP address chosen for the projector is unique. This is essential for correct operation.
Please make sure the PC is connected directly to the projector.
Except for the PC and the projector, there should be no other devices on the (LAN) network.