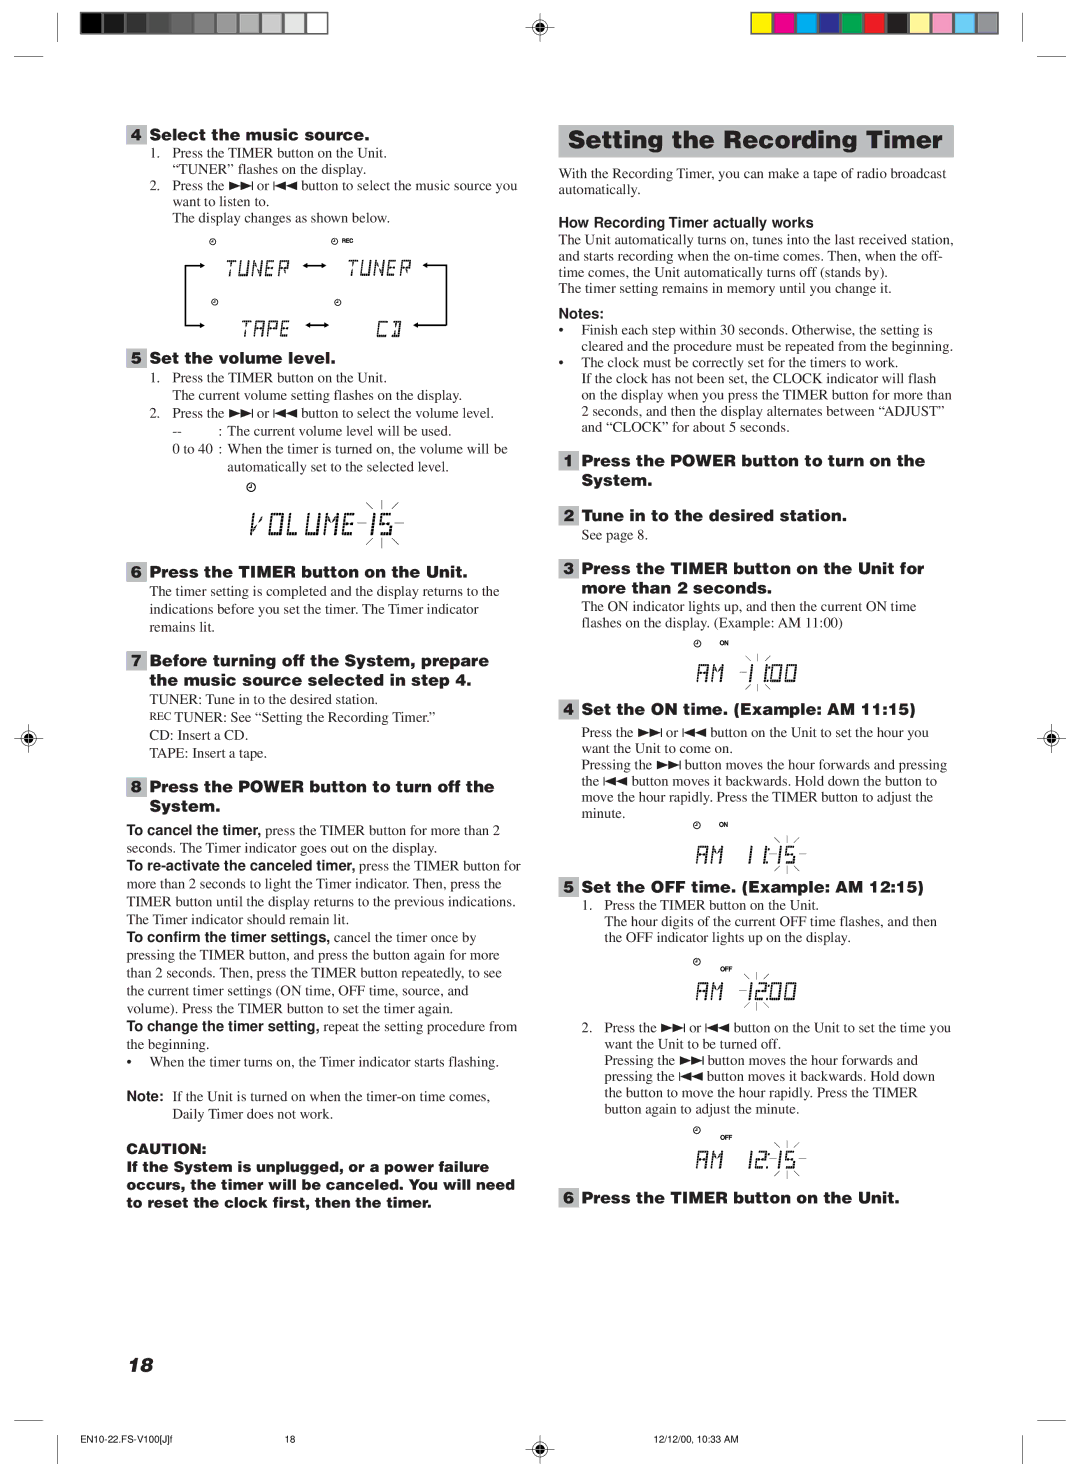
4Select the music source.
1.Press the TIMER button on the Unit. “TUNER” flashes on the display.
2.Press the ¢or 4button to select the music source you want to listen to.
The display changes as shown below.
5Set the volume level.
1.Press the TIMER button on the Unit.
The current volume setting flashes on the display.
2.Press the ¢or 4button to select the volume level.
--: The current volume level will be used.
0 to 40 : When the timer is turned on, the volume will be automatically set to the selected level.
6Press the TIMER button on the Unit.
The timer setting is completed and the display returns to the indications before you set the timer. The Timer indicator remains lit.
7Before turning off the System, prepare the music source selected in step 4.
TUNER: Tune in to the desired station.
REC TUNER: See “Setting the Recording Timer.”
CD: Insert a CD.
TAPE: Insert a tape.
8Press the POWER button to turn off the System.
To cancel the timer, press the TIMER button for more than 2 seconds. The Timer indicator goes out on the display.
To
To confirm the timer settings, cancel the timer once by pressing the TIMER button, and press the button again for more than 2 seconds. Then, press the TIMER button repeatedly, to see the current timer settings (ON time, OFF time, source, and volume). Press the TIMER button to set the timer again.
To change the timer setting, repeat the setting procedure from the beginning.
•When the timer turns on, the Timer indicator starts flashing.
Note: If the Unit is turned on when the
CAUTION:
If the System is unplugged, or a power failure occurs, the timer will be canceled. You will need to reset the clock first, then the timer.
Setting the Recording Timer
With the Recording Timer, you can make a tape of radio broadcast automatically.
How Recording Timer actually works
The Unit automatically turns on, tunes into the last received station, and starts recording when the
The timer setting remains in memory until you change it.
Notes:
•Finish each step within 30 seconds. Otherwise, the setting is cleared and the procedure must be repeated from the beginning.
•The clock must be correctly set for the timers to work.
If the clock has not been set, the CLOCK indicator will flash on the display when you press the TIMER button for more than 2 seconds, and then the display alternates between “ADJUST” and “CLOCK” for about 5 seconds.
1Press the POWER button to turn on the System.
2Tune in to the desired station.
See page 8.
3Press the TIMER button on the Unit for more than 2 seconds.
The ON indicator lights up, and then the current ON time flashes on the display. (Example: AM 11:00)
ON
4Set the ON time. (Example: AM 11:15)
Press the ¢or 4button on the Unit to set the hour you want the Unit to come on.
Pressing the ¢button moves the hour forwards and pressing the 4button moves it backwards. Hold down the button to move the hour rapidly. Press the TIMER button to adjust the
minute.
ON
5Set the OFF time. (Example: AM 12:15)
1.Press the TIMER button on the Unit.
The hour digits of the current OFF time flashes, and then the OFF indicator lights up on the display.
OFF
2.Press the ¢ or 4button on the Unit to set the time you want the Unit to be turned off.
Pressing the ¢button moves the hour forwards and pressing the 4button moves it backwards. Hold down the button to move the hour rapidly. Press the TIMER button again to adjust the minute.
OFF
6 Press the TIMER button on the Unit.
18
18 | 12/12/00, 10:33 AM |
