NOTES:
Fade-in/out cannot be performed during Time-Lapse shooting.
For best results, keep the camcorder secured while shooting.
If, during steps 3 and 4, the PROGRAM AE dial is set to the Self-Timer mode, the Self-Timer mode is engaged with 15S selected.
RELEASE TIME-LAPSE MODE
Press Recording Start/Stop. Recording and intervals alternate automatically.
5
6 To release when the tally lamp is not blinking, press INT. TIME and REC TIME repeatedly until “ ” and “ ” disappear. To release when the tally lamp is blinking, press Recording Start/Stop to stop the blinking, then press INT. TIME and REC TIME repeatedly until “ ” and “ ” disappear.
CHECK YOUR WORK
START TIME-LAPSE RECORDING
4 Press INT. TIME on the remote control. There are four choices available, and they appear in the following order (each time INT. TIME is pressed): 15S, 30S, 1MIN, and 5MIN. Press again to reset.
SET INTERVAL BETWEEN RECORDINGS
SET RECORDING TIME
Set SP/EP to SP (pg. 11).
SET RECORDING SPEED
Make sure the lens cover is open, then set the power switch to CAMERA.
1
2
3 Press REC TIME on the remote control. There are three choices available, and they appear in the following order (each time REC TIME is pressed): 1/4S, 1/2S and 1S. Press again to reset.
ENGAGE RECORD–STANDBY MODE
You need the RM-V705U or RM-V700U remote control unit to perform the following procedure.
NOTE:
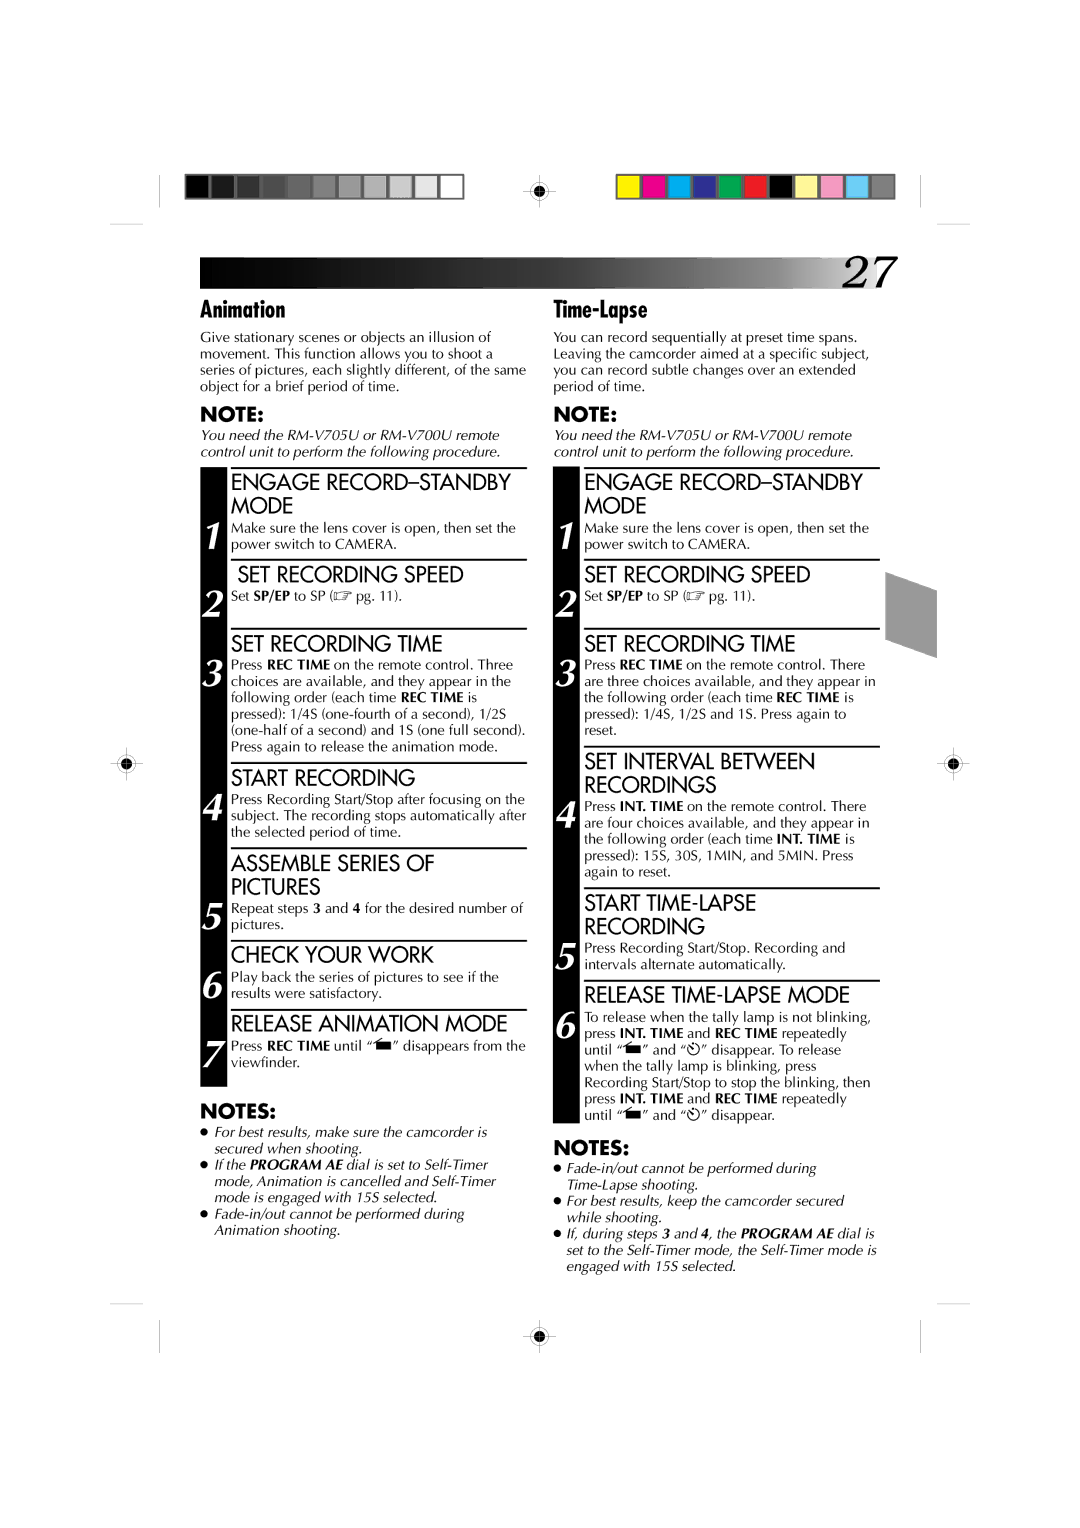
You can record sequentially at preset time spans. Leaving the camcorder aimed at a specific subject, you can record subtle changes over an extended period of time.
Time-Lapse
5 Repeat steps pictures.
ASSEMBLE SERIES OF PICTURES
START RECORDING
4 Press Recording Start/Stop after focusing on the subject. The recording stops automatically after the selected period of time.
3 Press REC TIME on the remote control. Three choices are available, and they appear in the following order (each time REC TIME is pressed): 1/4S (one-fourth of a second), 1/2S (one-half of a second) and 1S (one full second). Press again to release the animation mode.
SET RECORDING TIME
SET RECORDING SPEED
Make sure the lens cover is open, then set the power switch to CAMERA.
1
2 Set SP/EP to SP (pg. 11).
ENGAGE RECORD–STANDBY MODE
You need the RM-V705U or RM-V700U remote control unit to perform the following procedure.
NOTE:
Give stationary scenes or objects an illusion of movement. This function allows you to shoot a series of pictures, each slightly different, of the same object for a brief period of time.
Animation
27

3 and 4 for the desired number of

6 Play back the series of pictures to see if the results were satisfactory.

RELEASE ANIMATION MODE

7 Press REC TIME until “” disappears from the viewfinder.

NOTES:

For best results, make sure the camcorder is secured when shooting.

If the PROGRAM AE dial is set to Self-Timer mode, Animation is cancelled and Self-Timer mode is engaged with 15S selected.

Fade-in/out cannot be performed during Animation shooting.

Page 27
Image 27
JVC GR-AX510, GR-AX710 manual Release Animation Mode

GR-AX510, GR-AX710 specifications

The JVC GR-AX710 and GR-AX510 are highly regarded camcorders that emerged in the late 1990s, known for their innovative features and technologies that captured the imagination of videographers and enthusiasts alike. Both models are part of JVC's compact camcorder lineup, offering a blend of portability, performance, and user-friendly operation.

One of the standout features of the GR-AX710 is its advanced image stabilization technology, which significantly reduces camera shake and ensures smooth, steady recording. This feature is crucial for capturing high-quality video, particularly in dynamic environments or while filming on the move. The GR-AX510, while lacking some of the advanced stabilization functions of its counterpart, still offers impressive stability for everyday use.

Both camcorders utilize 700x digital zoom capabilities, enabling users to capture distant subjects with remarkable clarity. This feature is ideal for events like sports games or wildlife observation, where getting up close may not be possible. Additionally, the 18x optical zoom in both models maintains high image quality during zooming, providing versatility in various shooting situations.

The GR-AX710 and GR-AX510 are designed with ease of use in mind. They come equipped with a user-friendly LCD screen and a convenient viewfinder, offering flexible viewing options for both framing and playback. With intuitive controls, users can quickly navigate through settings and menus, making them accessible for users of all experience levels.

In terms of video quality, both camcorders record in the S-VHS-C format, allowing for higher-resolution video than standard VHS formats. This higher resolution translates to more detailed and vibrant recordings, making them suitable for home use and amateur filmmaking. The ability to play back recordings on standard VHS players adds to their convenience.

For audio, the JVC GR-AX710 and GR-AX510 feature built-in microphones and offer input options for external microphones, ensuring clear sound quality during recordings. The camcorders also come with various audio and video output options, making it easy to connect to televisions or editing equipment.

Overall, the JVC GR-AX710 and GR-AX510 exemplify the era of compact camcorders, blending portability with advanced features. Their robust build quality, combined with user-friendly controls and impressive video capabilities, makes them an enduring choice for amateur filmmakers and home videographers looking to document life's memorable moments. Whether you’re capturing family gatherings or travel adventures, these camcorders offer a reliable and enjoyable recording experience.