36![]()
![]()
![]() EN
EN![]()
![]()
![]()
![]()
![]()
![]()
![]()
![]()
![]()
![]()
![]()
![]()
![]()
![]()
![]()
![]()
![]()
![]()
![]()
![]()
![]()
![]()
![]()
![]()
![]()
![]()
![]()
![]()
![]()
![]()
![]()
![]()
![]()
![]()
![]()
![]()
![]()
![]()
![]()
![]()
RECORDING
 Advanced
 Features
 (cont.)


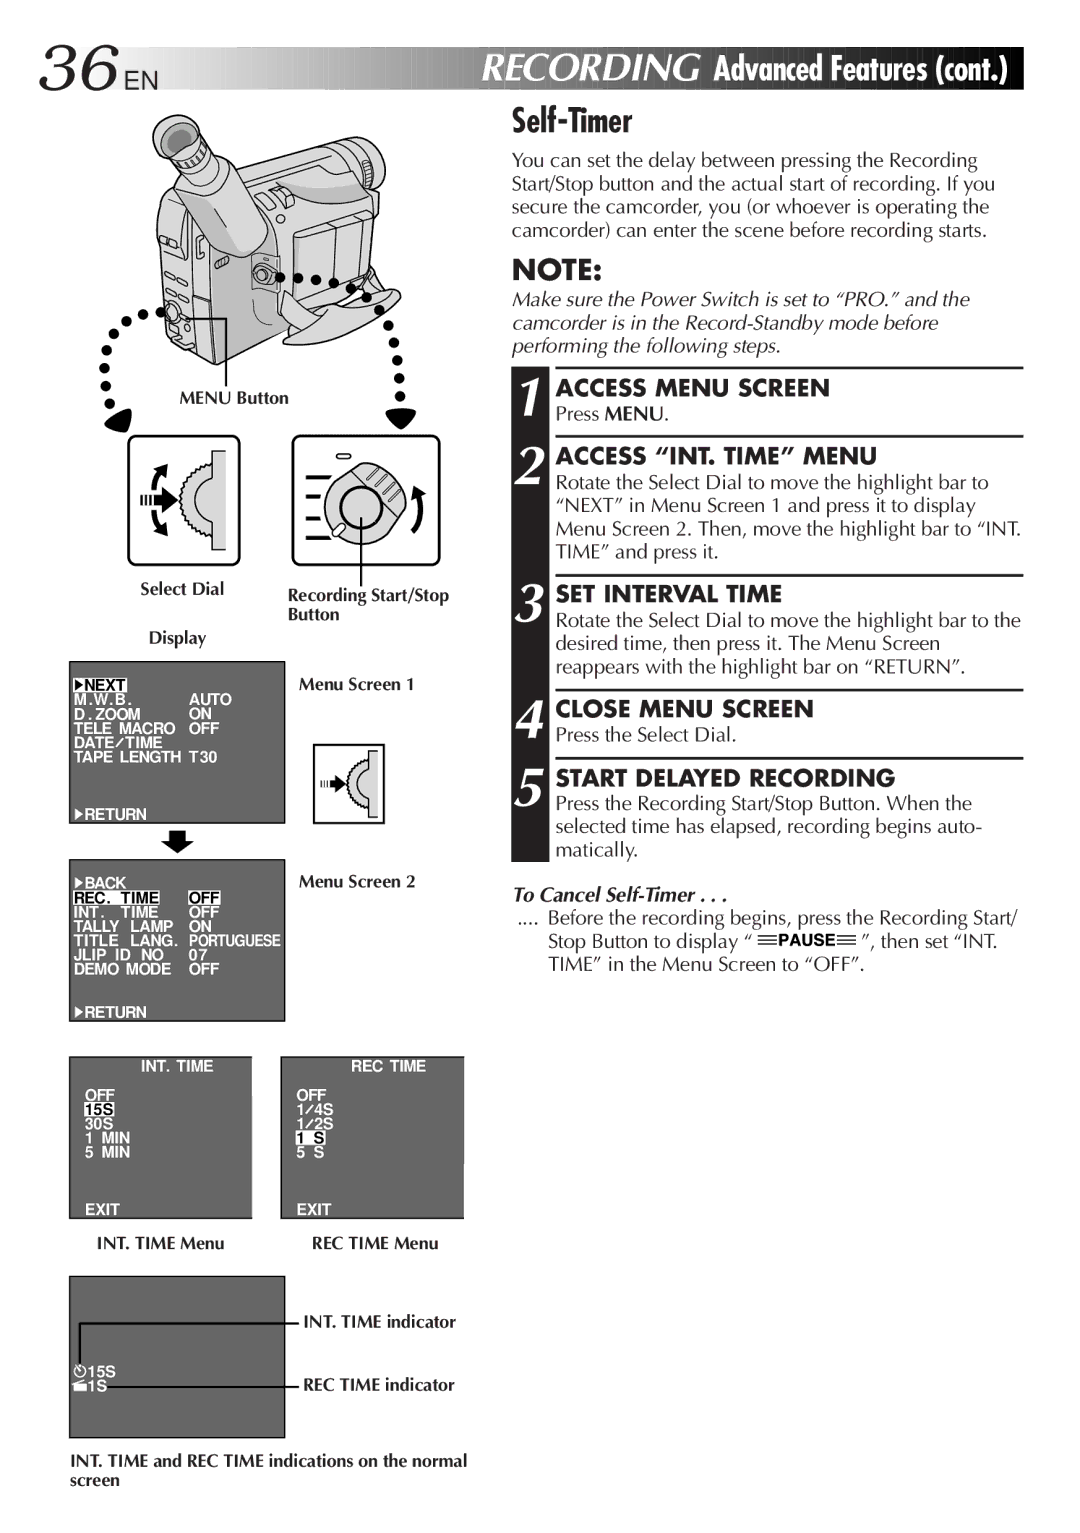
Self-Timer
You can set the delay between pressing the Recording Start/Stop button and the actual start of recording. If you secure the camcorder, you (or whoever is operating the camcorder) can enter the scene before recording starts.
NOTE:
Make sure the Power Switch is set to “PRO.” and the camcorder is in the
MENU Button
1 ACCESS MENU SCREEN
Press MENU.
2 ACCESS “INT. TIME” MENU
Rotate the Select Dial to move the highlight bar to “NEXT” in Menu Screen 1 and press it to display Menu Screen 2. Then, move the highlight bar to “INT. TIME” and press it.
Select Dial
Display
4NEXT
M. W. B. AUTO
D . ZOOM ON TELE MACRO OFF DATE![]() TIME TAPE LENGTH T30
TIME TAPE LENGTH T30
Recording Start/Stop Button
Menu Screen 1
3 SET INTERVAL TIME
Rotate the Select Dial to move the highlight bar to the desired time, then press it. The Menu Screen reappears with the highlight bar on “RETURN”.
4 CLOSE MENU SCREEN
Press the Select Dial.
5 START DELAYED RECORDING
4RETURN
Press the Recording Start/Stop Button. When the selected time has elapsed, recording begins auto- matically.
4BACK
REC. TIME OFF
INT. TIME OFF
TALLY LAMP ON
TITLE LANG. PORTUGUESE JLIP ID NO 07
DEMO MODE OFF
4RETURN
INT. TIME
OFF 15S 30S
1MIN
5MIN
EXIT
Menu Screen 2
REC TIME
OFF 1![]() 4S 1
4S 1![]() 2S
2S
1S
5S
EXIT
To Cancel Self-Timer . . .
.... Before the recording begins, press the Recording Start/
Stop Button to display “ ![]()
![]()
![]()
![]()
![]() ”, then set “INT. TIME” in the Menu Screen to “OFF”.
”, then set “INT. TIME” in the Menu Screen to “OFF”.
INT. TIME Menu
![]() 15S
15S ![]() 1S
1S
REC TIME Menu
INT. TIME indicator
REC TIME indicator
INT. TIME and REC TIME indications on the normal screen