JVC GR-AX957UM, GR-AX857UM, GR-AX657UM manual EN9, Discharged

Models: GR-AX657UM GR-AX857UM GR-AX957UM

1 60
Download 60 pages 2.93 Kb
Page 9
Image 9

EN9


Charge Marker

Charge marker

A charge marker is provided on the battery pack to


help you remember whether it has been charged or


not. Two colors are provided (red and black)—you


choose which one means charged and which means


discharged.

NOTES:

The recording time per charge is affected by such factors as the time spent in Record-Standby mode and the frequency of zooming. It is safer to have spare battery packs to cover 3 times the planned shooting time.

Charging times noted on page 8 are for a fully discharged battery pack, and discharging times are for a fully charged battery pack.

Charging and discharging times vary according to the ambient temperature and the status of the battery pack.

Remember to set the charge marker after charging a battery pack or after detaching a discharged one from your camcorder.

Perform the REFRESH function after no less than 5 chargings.

While the AC Power Adapter/Charger’s power cord is disconnected from the AC outlet, it is possible to discharge the battery by pressing the REFRESH switch. During that time, the AC Power Adapter/Charger does not charge the battery. When discharging is complete, detach the battery from the AC Power Adapter/ Charger to store it.

High temperatures can damage the battery pack, so use only where good ventilation is available. Do not allow it to discharge in a container, such as a bag.

If you stop recharging or discharging part way through, make sure to remove the battery pack before unplugging the adapter’s AC cord.

Remove the battery pack from the adapter immediately after discharging.

To avoid interference with reception, do not use the AC Power Adapter/Charger near a radio.

Make sure you unplug the DC cord before charging or discharging the battery pack.

The CHARGE indicator may not light properly with a brand new battery pack, or with one that has been stored for an extended period. In this case, remove and reattach the battery pack and recharge it. The CHARGE indicator should blink during recharging. If it doesn’t, contact your nearest JVC dealer.

GETTING STARTED

To DC IN jack

To AC outlet


DC OUT


terminal

AC Power

DC Cord Adapter/Charger

AA-V15U

To car’s cigarette lighter

Car Battery Cord socket AP-V7U (optional)

Car Battery

Charger/Adapter

BH-V3U (optional)

USING AC POWER

Use the AC Power Adapter/Charger (connect as shown in the illustration to the left).

NOTES:

The provided AC Power Adapter/Charger features automatic voltage selection in the AC range from 110 V to 240 V.

When using the DC cord, make sure you connect the end of the cord with the core filter to the camcorder. The core filter reduces interference.

USING A CAR BATTERY

Use the optional Car Battery Cord or Car Battery Charger/Adapter (connect as shown in the illustration to the left).

NOTES:

When using the car battery, leave the engine idling.

The optional Car Battery Charger/Adapter (BH- V3U) can also be used to charge the battery pack (except BN-V20U/V856U).

When using the optional Car Battery Charger/ Adapter or Car Battery Cord (AP-V7U), refer to the respective instruction booklet.

Page 9
Image 9
JVC GR-AX957UM, GR-AX857UM, GR-AX657UM manual EN9, Discharged

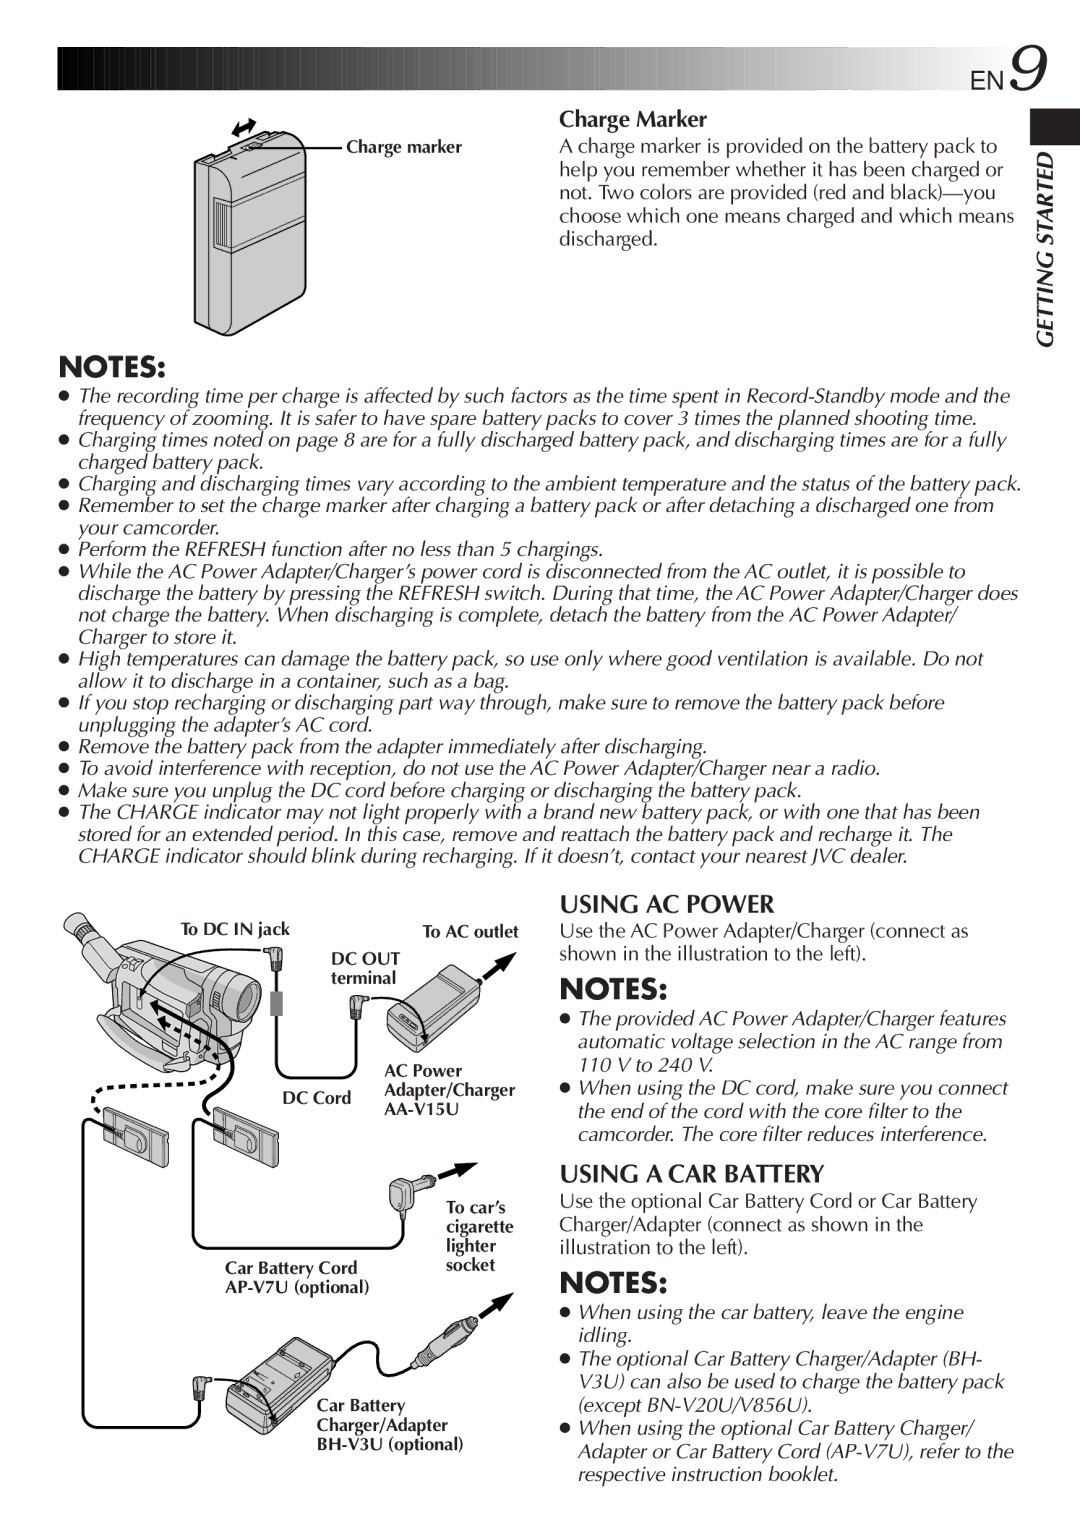
GR-AX657UM, GR-AX857UM, GR-AX957UM specifications

The JVC GR-AX957UM, GR-AX857UM, and GR-AX657UM are part of JVC’s highly regarded line of mini DV camcorders, designed for both amateur and semi-professional videographers looking to capture high-quality footage. Each model offers a unique blend of features and technologies that cater to varying user needs while sharing a common commitment to superior video performance.

One of the standout features of the JVC GR-AX957UM is its advanced image stabilization system. This technology significantly reduces camera shake, allowing users to achieve smooth, stable footage even while filming on the move. The GR-AX857UM follows closely with a reliable stabilization system, ensuring that both casual shoots and more serious filming engagements maintain clarity and focus. The GR-AX657UM, while slightly less sophisticated, still offers commendable stabilization that enhances video quality.

All three models come equipped with a powerful 700x digital zoom, enabling users to capture distant subjects with impressive detail. The optical zoom capabilities further enhance this feature, offering close-up shots without the loss of resolution. Additionally, the GR-AX957UM and GR-AX857UM support high-resolution formats, capturing video at resolutions ideal for both TV playback and editing purposes.

In terms of audio quality, each camcorder features a built-in microphone, but the GR-AX957UM takes it a step further with an external mic input. This allows for greater audio control, making it suitable for more professional uses where sound quality is critical. The GR-AX857UM also has solid audio capabilities, while the GR-AX657UM maintains decent built-in audio for everyday recording needs.

User experience is further enhanced through intuitive controls and a clear viewfinder. The LCD screen is designed for easy navigation, making it user-friendly for those new to video production while still offering enough functionality for experienced users. Each model supports multiple recording modes, allowing users to select the best settings for their specific shooting environment.

In conclusion, the JVC GR-AX957UM, GR-AX857UM, and GR-AX657UM are well-rounded camcorders that harness advanced technology to meet diverse filming requirements. From robust zoom capabilities to impressive image stabilization features, these models deliver quality performance, making them ideal choices for anyone ranging from budding filmmakers to seasoned videographers. Whether shooting personal moments or important events, these camcorders are built to deliver lasting memories in stunning detail.