Set the Power Switch to “ ” while pressing down the Lock Button located on the switch.
Press the MENU/BRIGHT wheel in. The Menu Screen appears.

White Balance Adjustment

A term that refers to the correctness of colour reproduction under various lighting. If the white balance is correct, all other colours will be accurately reproduced.

The white balance is usually adjusted automatically. However, more advanced camcorder operators control this function manually to achieve a more professional colour/tint reproduction.

1

2

3 Rotate the MENU/BRIGHT wheel to select

W.BALANCE”, then press it. The W.BALANCE Menu appears.

4 Rotate the MENU/BRIGHT wheel to select the desired mode.

AUTO” – White balance is adjusted automatically (factory preset).

MWB” – White balance is set manually.

FINE” – Outdoors on a sunny day. “ CLOUD” – Outdoors on a cloudy day.

HALOGEN” – A video light or similar type of lighting is used.

5 Press the MENU/BRIGHT wheel in. Selection is complete. Press the MENU/BRIGHT wheel in again. The Menu Screen closes and the selected mode indicator except “AUTO” appears.

To Return To Automatic White Balance . . .

.... select “AUTO” in step 4. Or, set the Power

Switch to “”.

NOTE:

White balance cannot be used when Sepia or Monotone ( pg. 39) is activated.

EN45

Manual White Balance Operation

Perform Manual White Balance when shooting under various types of lighting.

1 Follow steps 1 through 4 of the white balance adjustment, and select “ MWB”.

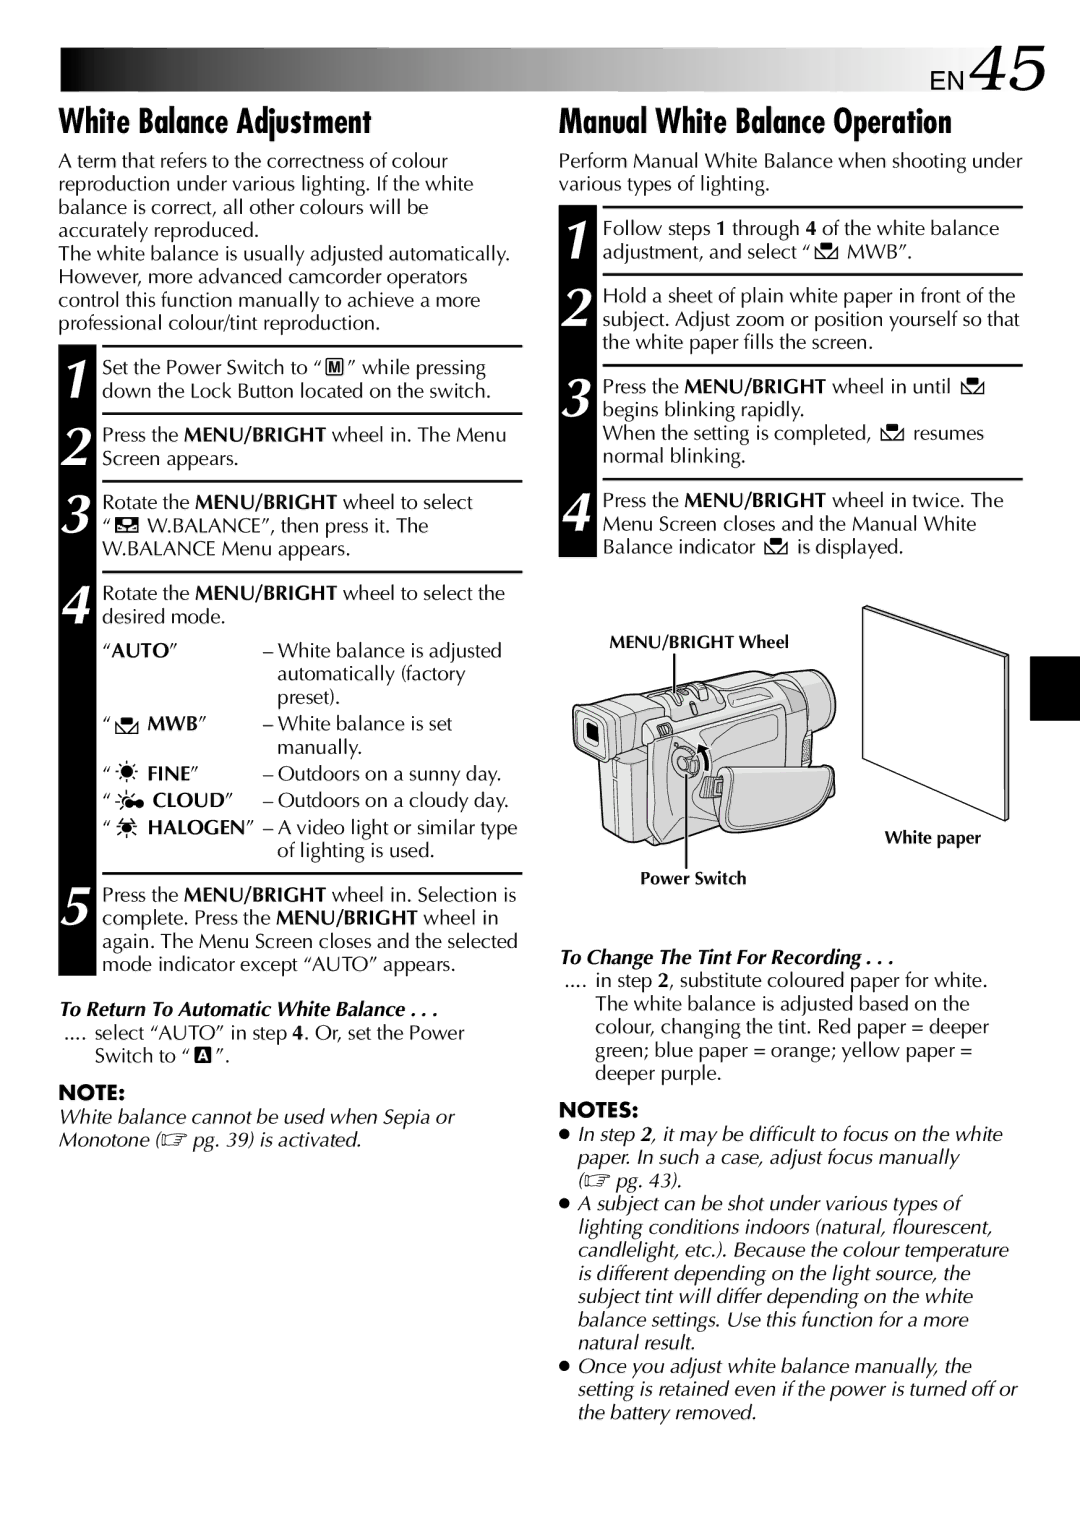
2 Hold a sheet of plain white paper in front of the subject. Adjust zoom or position yourself so that the white paper fills the screen.

3 Press the MENU/BRIGHT wheel in until begins blinking rapidly.

When the setting is completed, resumes normal blinking.

4 Press the MENU/BRIGHT wheel in twice. The Menu Screen closes and the Manual White

Balance indicator is displayed.

MENU/BRIGHT Wheel

White paper

Power Switch

To Change The Tint For Recording . . .

.... in step 2, substitute coloured paper for white.

The white balance is adjusted based on the colour, changing the tint. Red paper = deeper green; blue paper = orange; yellow paper = deeper purple.

NOTES:

In step 2, it may be difficult to focus on the white

paper. In such a case, adjust focus manually (  pg. 43).

A subject can be shot under various types of lighting conditions indoors (natural, flourescent, candlelight, etc.). Because the colour temperature is different depending on the light source, the subject tint will differ depending on the white balance settings. Use this function for a more natural result.

Once you adjust white balance manually, the setting is retained even if the power is turned off or the battery removed.

Page 45
Image 45
JVC GR-DVL310 White Balance Adjustment, Manual White Balance Operation, EN45, To Return To Automatic White Balance

GR-DVL310, GR-DVL715, GR-DVL915, GR-DVL410, GR-DVL515 specifications

The JVC GR-DVL915 is a compact digital camcorder that gained popularity in the early 2000s for its advanced features and impressive image quality. Designed for both amateur and semi-professional videographers, the GR-DVL915 offers a blend of performance, portability, and versatility, making it an appealing choice for those looking to capture life’s important moments.

One of the standout features of the GR-DVL915 is its 800,000-pixel CCD sensor, which ensures sharp image quality and vibrant colors. This camcorder supports both digital video and still image capture, enabling users to switch seamlessly between video recording and photography. The built-in 10x optical zoom allows for close-up shots without sacrificing image quality, while the 800x digital zoom extends this capability for distant subjects.

Equipped with a 2.5-inch LCD display, the GR-DVL915 offers a clear viewfinder that makes framing shots and navigating menus user-friendly. The LCD screen is also rotateable, providing flexibility when capturing from challenging angles. This camcorder is housed in a lightweight and compact body, making it easy to carry during travel or various shooting scenarios.

The GR-DVL915 features JVC's renowned Digital Image Stabilization technology, which significantly reduces the effects of camera shake, resulting in smoother, more professional-looking video recordings. Additionally, it includes various shooting modes and effects, such as fade in/out, backlight compensation, and various scene settings, allowing users to tailor their recordings to specific conditions.

In terms of connectivity, the camcorder is equipped with a FireWire (IEEE 1394) port for fast transfer of video to a computer for editing or archiving. It also supports standard video output formats, making it easy to connect to televisions for playback. The GR-DVL915 records onto miniDV tape, which ensures high-quality video playback and longevity.

Battery life is another important consideration, and the GR-DVL915 uses a rechargeable lithium-ion battery that provides ample recording time, enabling users to shoot extended sessions without frequent recharges.

Overall, the JVC GR-DVL915 represents a well-rounded camcorder that combines ease of use with a solid array of features. Its rigorous design and dependable performance make it an enduring choice for many video enthusiasts seeking to capture their experiences in high quality.