
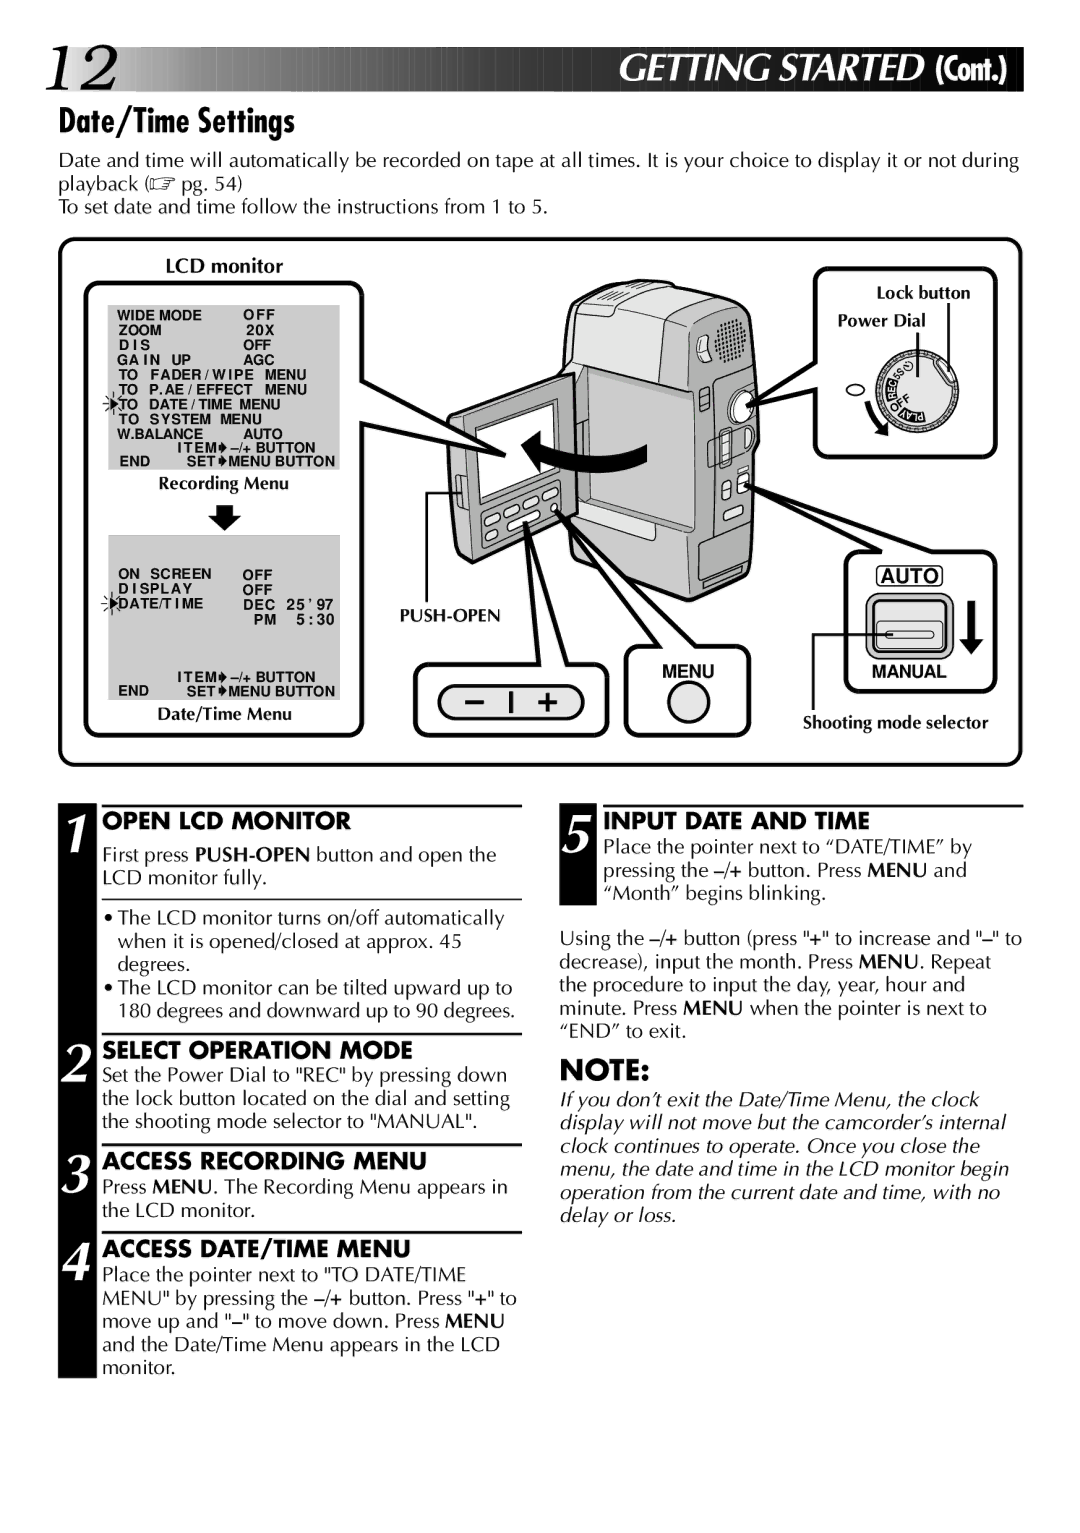
GR-DVM1 specifications
The JVC GR-DVM1 is a remarkable piece of technology that represents a significant leap in the world of digital camcorders. Released in the early 2000s, this compact device quickly gained recognition for its innovative features and user-friendly design, catering to both amateur videographers and seasoned professionals.One of the standout features of the GR-DVM1 is its ability to capture stunning video quality thanks to its advanced Progressive Scan technology. This allows for the recording of smoother video footage, perfect for dynamic scenes. The camcorder utilizes a 1/4-inch CCD sensor, delivering a resolution of up to 680,000 pixels, which translates to sharp, vibrant images that reflect true-to-life colors.
The camcorder's 10x optical zoom lens offers exceptional versatility for capturing distant subjects without sacrificing clarity. Coupled with a digital zoom capability, the GR-DVM1 allows users to get closer to their subjects, whether filming a scenic landscape or a candid moment at a family gathering. The lens is designed to minimize distortion, providing both wide-angle and telephoto capabilities.
Flexibility in shooting styles is further enhanced by the camcorder’s built-in digital effects, which include various transitions and filters that make it easy to add a professional touch to home videos. The ease of use is evident in its intuitive controls, enabling users to navigate settings effortlessly. An LCD screen provides a clear view while composing shots, and it's adjustable for optimum viewing angles.
Another notable characteristic of the JVC GR-DVM1 is its compatibility with various recording media. It supports MiniDV tapes, which were popular at the time for their reliability and quality. This format also makes it possible to obtain recordings that can be transferred to a computer for editing or archiving.
In terms of connectivity, the GR-DVM1 is equipped with FireWire (IEEE 1394) ports, enabling straightforward digital transfers to compatible devices. This allows for seamless integration into a digital editing workflow, where hours of recorded footage can be quickly imported for post-production.
The JVC GR-DVM1 not only excels in video capabilities but also includes a built-in microphone and the option for external mic support, ensuring high-quality audio to complement the impressive visuals. With its combination of advanced technology, user-friendly features, and portability, the JVC GR-DVM1 remains a noteworthy camcorder that played a vital role in the transition to digital video recording. Its legacy continues to influence camcorder design and functionality in subsequent generations.