6![]()
![]() EN
EN![]()
![]()
![]()
![]()
![]()
![]()
![]()
![]()
![]()
![]()
![]()
![]()
![]()
![]()
![]()
![]()
![]()
![]()
![]()
![]()
![]()
![]()
![]()
![]()
![]()
![]()
![]()
![]()
![]()
![]()
![]()
![]()
![]()
![]()
![]()
![]()
![]()
![]()
![]()
![]()
![]()
![]()
![]()
![]()
![]()
![]()
![]()
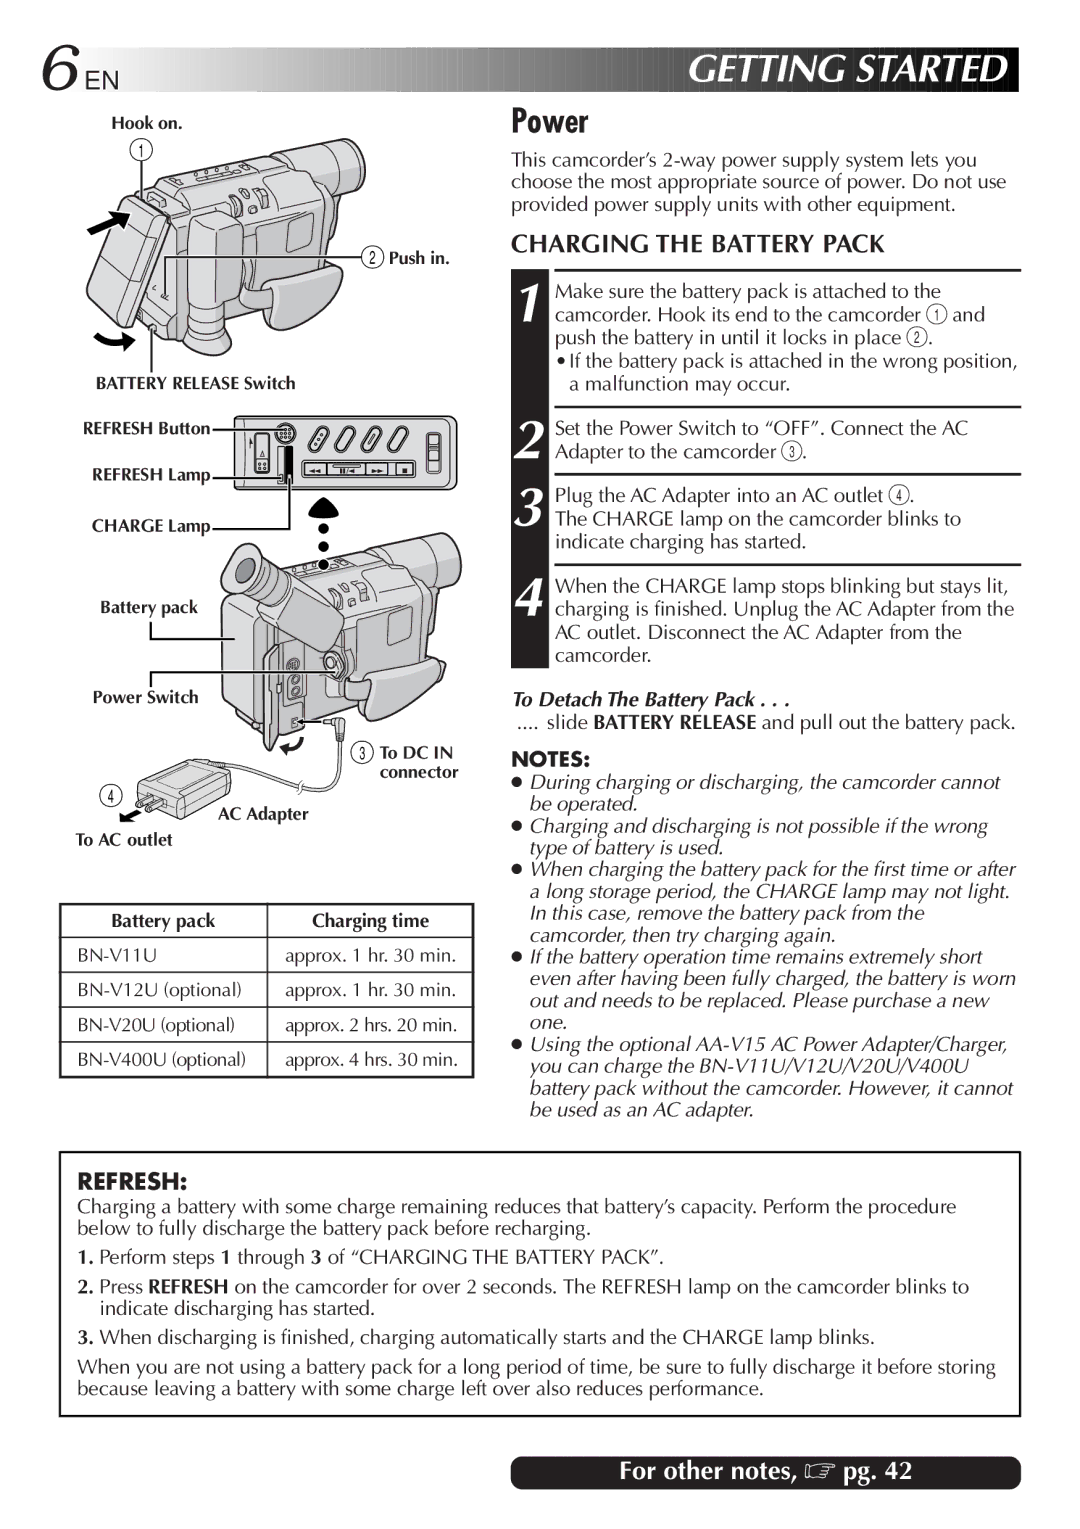
Hook on. | Power |


 GETTING
 STARTED

1![]()
![]() 2 Push in.
2 Push in.
BATTERY RELEASE Switch
REFRESH Button ![]()
REFRESH Lamp ![]()
![]()
![]()
CHARGE Lamp ![]()
![]()
Battery pack
Power Switch
This camcorder’s
CHARGING THE BATTERY PACK
1
2
3 Plug the AC Adapter into an AC outlet 4.
The CHARGE lamp on the camcorder blinks to indicate charging has started.
4 When the CHARGE lamp stops blinking but stays lit, charging is finished. Unplug the AC Adapter from the AC outlet. Disconnect the AC Adapter from the camcorder.
To Detach The Battery Pack . . .
.... slide BATTERY RELEASE and pull out the battery pack.
3 To DC IN connector
4
AC Adapter
To AC outlet
Battery pack | Charging time |
|
|
| approx. 1 hr. 30 min. |
|
|
approx. 1 hr. 30 min. | |
|
|
approx. 2 hrs. 20 min. | |
|
|
approx. 4 hrs. 30 min. | |
|
|
NOTES:
●During charging or discharging, the camcorder cannot be operated.
●Charging and discharging is not possible if the wrong type of battery is used.
●When charging the battery pack for the first time or after a long storage period, the CHARGE lamp may not light. In this case, remove the battery pack from the camcorder, then try charging again.
●If the battery operation time remains extremely short even after having been fully charged, the battery is worn out and needs to be replaced. Please purchase a new one.
●Using the optional
REFRESH:
Charging a battery with some charge remaining reduces that battery’s capacity. Perform the procedure below to fully discharge the battery pack before recharging.
1.Perform steps 1 through 3 of “CHARGING THE BATTERY PACK”.
2.Press REFRESH on the camcorder for over 2 seconds. The REFRESH lamp on the camcorder blinks to indicate discharging has started.
3.When discharging is finished, charging automatically starts and the CHARGE lamp blinks.
When you are not using a battery pack for a long period of time, be sure to fully discharge it before storing because leaving a battery with some charge left over also reduces performance.
