Copying/Moving Still Image Files
Check which buttons to use in the illustration of “Controls in this section” on page 49.
You can copy or move still image files between the HDD and SD card using the
Preparation:
●Set the power switch to ![]() or
or ![]() .
.
●Make sure that SD card is inserted in the SD slot.
●Make sure that enough free space is left in the copy/move destination medium.
1
![]() GAIN UP
GAIN UP
CAMERA SETTING
![]() BASIC SETTING
BASIC SETTING
![]() REC MEDIA SETTING
REC MEDIA SETTING
![]() DATE/DISPLAY
DATE/DISPLAY
QUALITY
![]()
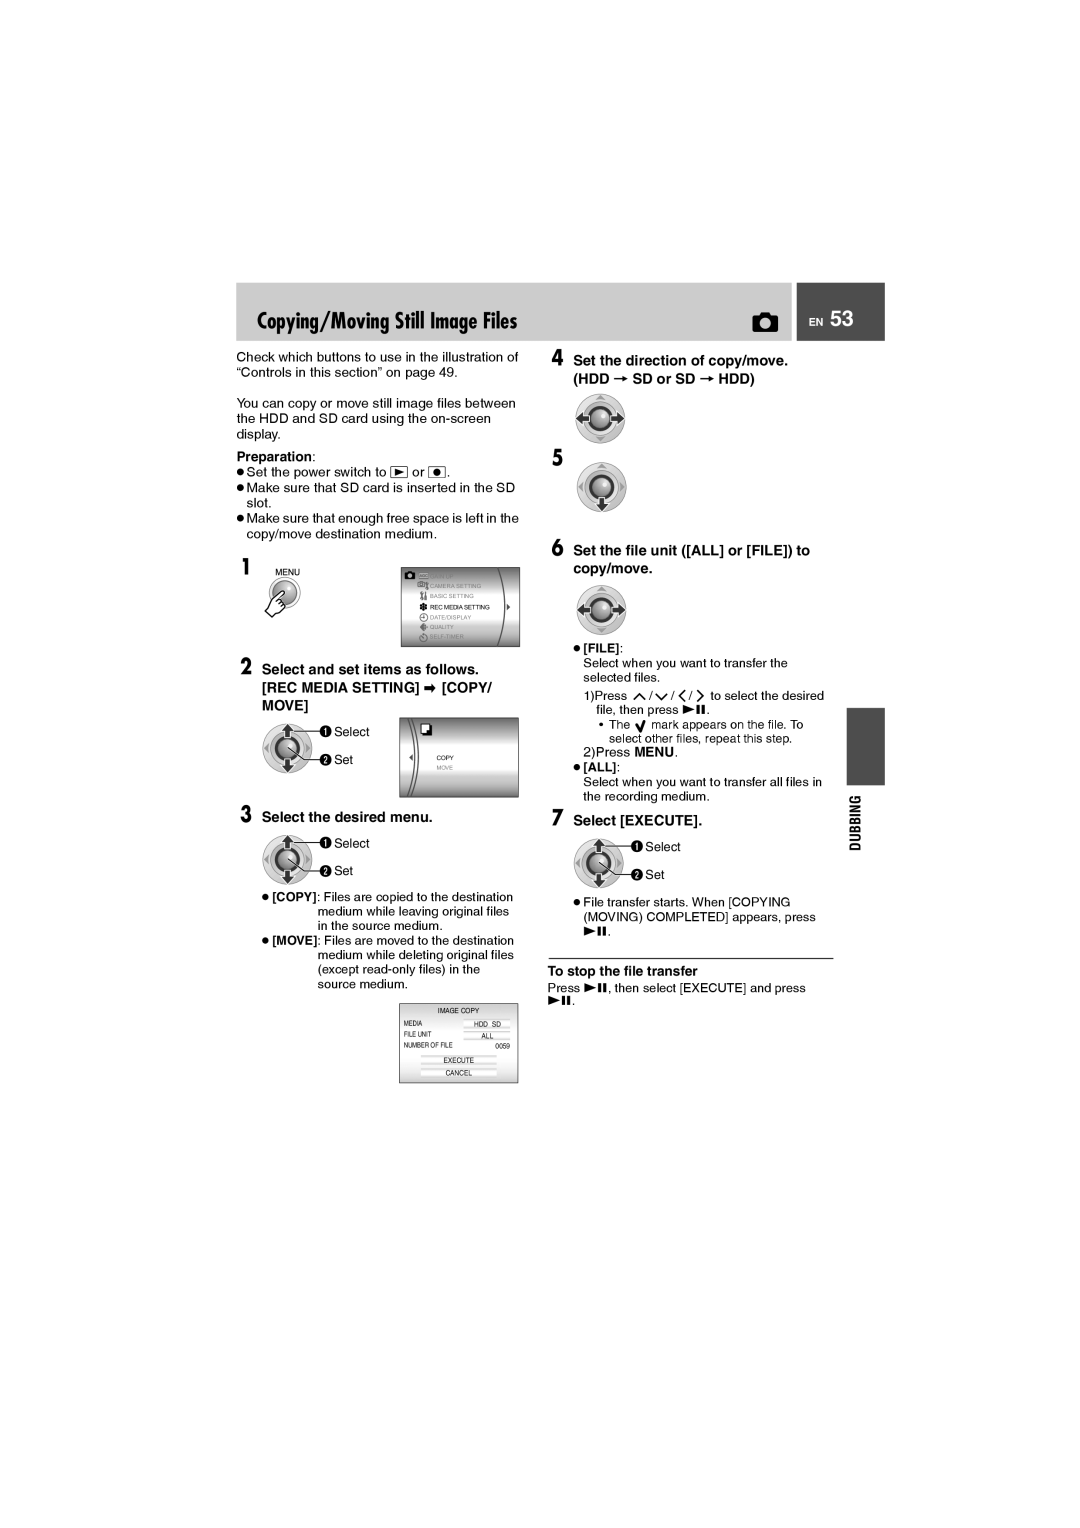
2 Select and set items as follows.
[REC MEDIA SETTING]  [COPY/ MOVE]
![]() Select
Select
Set | COPY |
| |
| MOVE |
3 Select the desired menu.
![]() Select
Select
![]() Set
Set
●[COPY]: Files are copied to the destination medium while leaving original files in the source medium.
●[MOVE]: Files are moved to the destination medium while deleting original files (except
IMAGE COPY
MEDIA | HDD SD |
FILE UNIT | ALL |
NUMBER OF FILE | 0059 |
EXECUTE
CANCEL
EN 53
4 Set the direction of copy/move. (HDD ] SD or SD ] HDD)
5
6 Set the file unit ([ALL] or [FILE]) to copy/move.
●[FILE]:
Select when you want to transfer the selected files.
1)Press ![]() /
/ ![]() /
/ ![]() /
/ ![]() to select the desired file, then press 49.
to select the desired file, then press 49.
•The ![]() mark appears on the file. To select other files, repeat this step.
mark appears on the file. To select other files, repeat this step.
2)Press MENU.
| ● [ALL]: |
|
| Select when you want to transfer all files in |
|
7 | the recording medium. | DUBBING |
Select | ||
Select [EXECUTE]. |
|
![]() Set
Set
●File transfer starts. When [COPYING (MOVING) COMPLETED] appears, press
49.
To stop the file transfer
Press 49, then select [EXECUTE] and press 49.
