8![]()
![]()
![]()
![]()
![]()
![]()
![]()
![]()
![]()
![]()
![]()
![]()
![]()
![]()
![]()
![]()
![]()
![]()
![]()
![]()
![]()
![]()
![]()
![]()
![]()
![]()
![]()
![]()
![]()
![]()
![]()
![]()
![]()
![]()
![]()
![]()
![]()
![]()
![]()
![]()
![]()
![]()


 INITIAL
 SETTINGS
 (cont.)


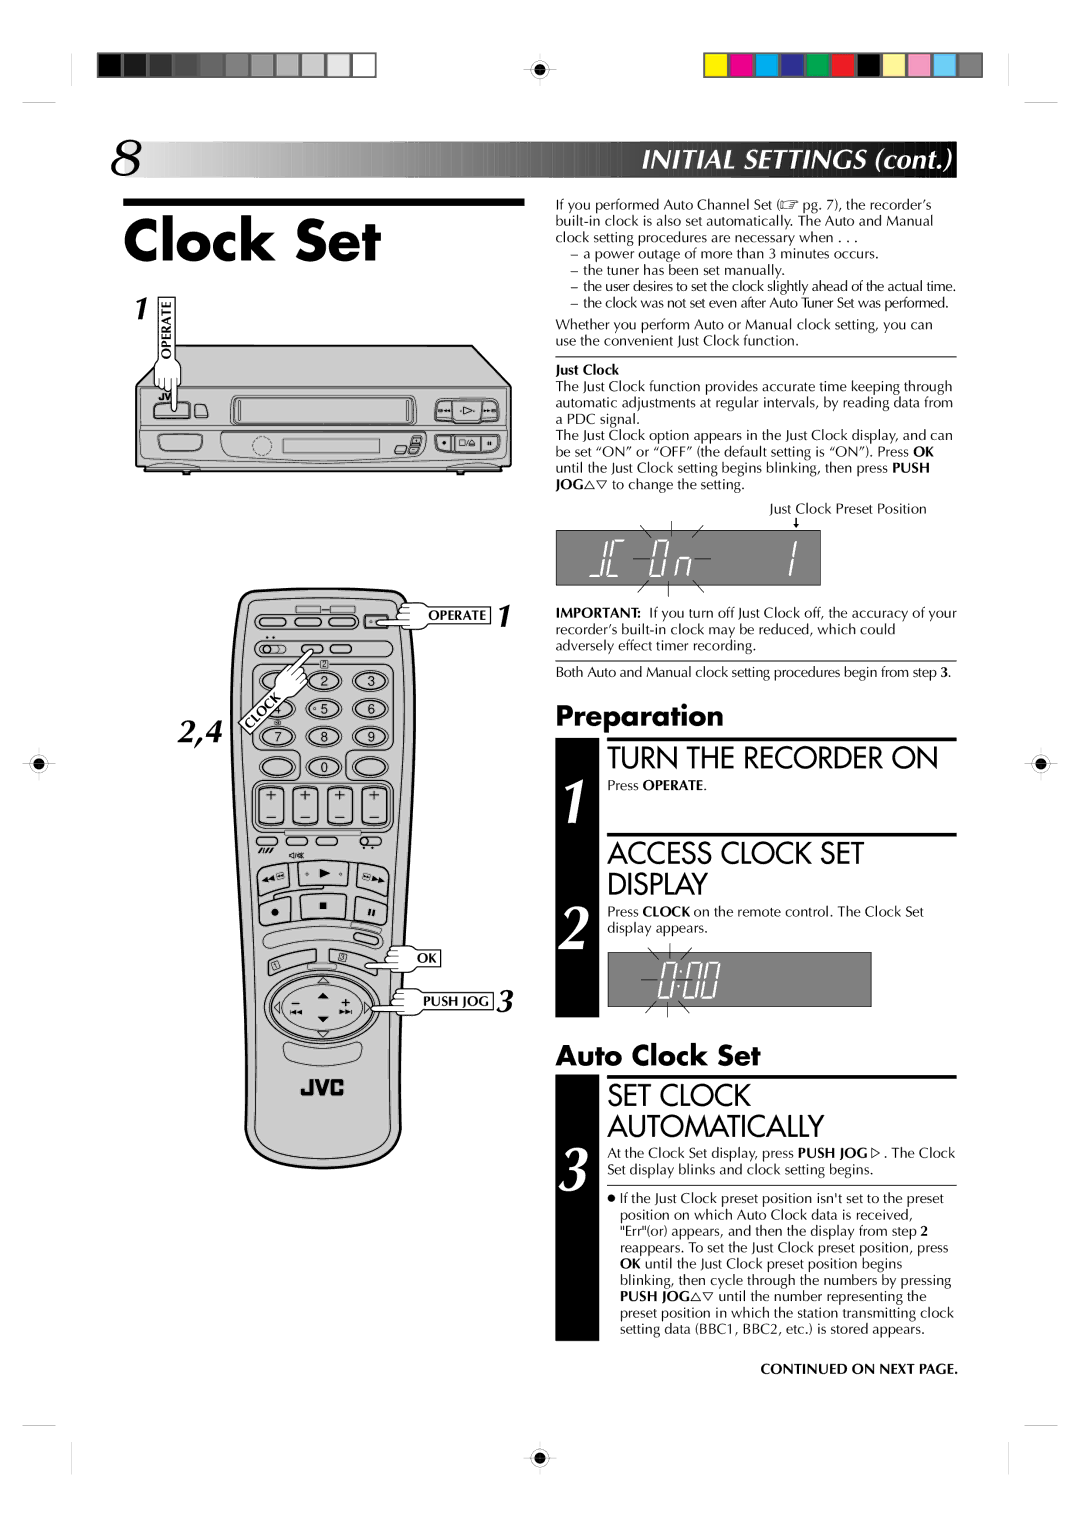
Clock Set
1 | OPERATE |
|
If you performed Auto Channel Set (☞ pg. 7), the recorder’s
–a power outage of more than 3 minutes occurs.
–the tuner has been set manually.
–the user desires to set the clock slightly ahead of the actual time.
–the clock was not set even after Auto Tuner Set was performed.
Whether you perform Auto or Manual clock setting, you can use the convenient Just Clock function.
Just Clock
The Just Clock function provides accurate time keeping through automatic adjustments at regular intervals, by reading data from a PDC signal.
The Just Clock option appears in the Just Clock display, and can
q | 6 |
| be set “ON” or “OFF” (the default setting is “ON”). Press OK |
| until the Just Clock setting begins blinking, then press PUSH |
| JOG%Þ to change the setting. |
| Just Clock Preset Position |
| - |
OPERATE 1
| 2 |
|
1 | 2 | 3 |
| CLOCK | 5 | 6 |
2,4 | 4 | ||
7 | 8 | 9 | |
|
| 0 |
|
3 | OK |
1
PUSH JOG 3
IMPORTANT: If you turn off Just Clock off, the accuracy of your recorder’s
Both Auto and Manual clock setting procedures begin from step 3.
Preparation
TURN THE RECORDER ON
1 Press OPERATE.
ACCESS CLOCK SET
DISPLAY
2 Press CLOCK on the remote control. The Clock Set display appears.
Auto Clock Set
|
|
| SET CLOCK |
| 3 |
| AUTOMATICALLY |
|
| At the Clock Set display, press PUSH JOG%. The Clock | |
|
| Set display blinks and clock setting begins. | |
|
| ● If the Just Clock preset position isn't set to the preset | |
|
|
| |
|
|
| position on which Auto Clock data is received, |
|
|
| "Err"(or) appears, and then the display from step 2 |
|
|
| reappears. To set the Just Clock preset position, press |
|
|
| OK until the Just Clock preset position begins |
|
|
| blinking, then cycle through the numbers by pressing |
|
|
| PUSH JOG%Þ until the number representing the |
|
|
| preset position in which the station transmitting clock |
|
|
| setting data (BBC1, BBC2, etc.) is stored appears. |
|
|
|
|
CONTINUED ON NEXT PAGE.