Timer Recording
Timer recording can be programmed
NOTES:
•After timer recording is completed, the VCR turns off automatically.
•You can program the timer recording while a regular recording is in progress; the menu screens will not be recorded.
•The timer recording will start at 5 seconds before the time you predetermined.
EXAMPLE: Program a timer recording for the 26th day, channel 125 (CATV), 11:00 - 11:30 PM on timer program number 1 (Tape speed: EP).
When a TV is connected with an audio/video cable, turn the TV and this VCR on and select the video input mode on the TV.
TO CORRECT THE SETTINGS
When setting the Timer Recording, press ENTER until the desired setting blinks, then
NOTES: • The VCR cannot be used while the TIMER REC indicator ( ![]()
![]() ) is lit.
) is lit.
•After a power failure or disconnection of the power plug, all programmed recording settings must be reset upon resumption of power. In this case, reset the clock and reprogram any timer recordings.
•Press CANCEL to move cursor backward for correction.
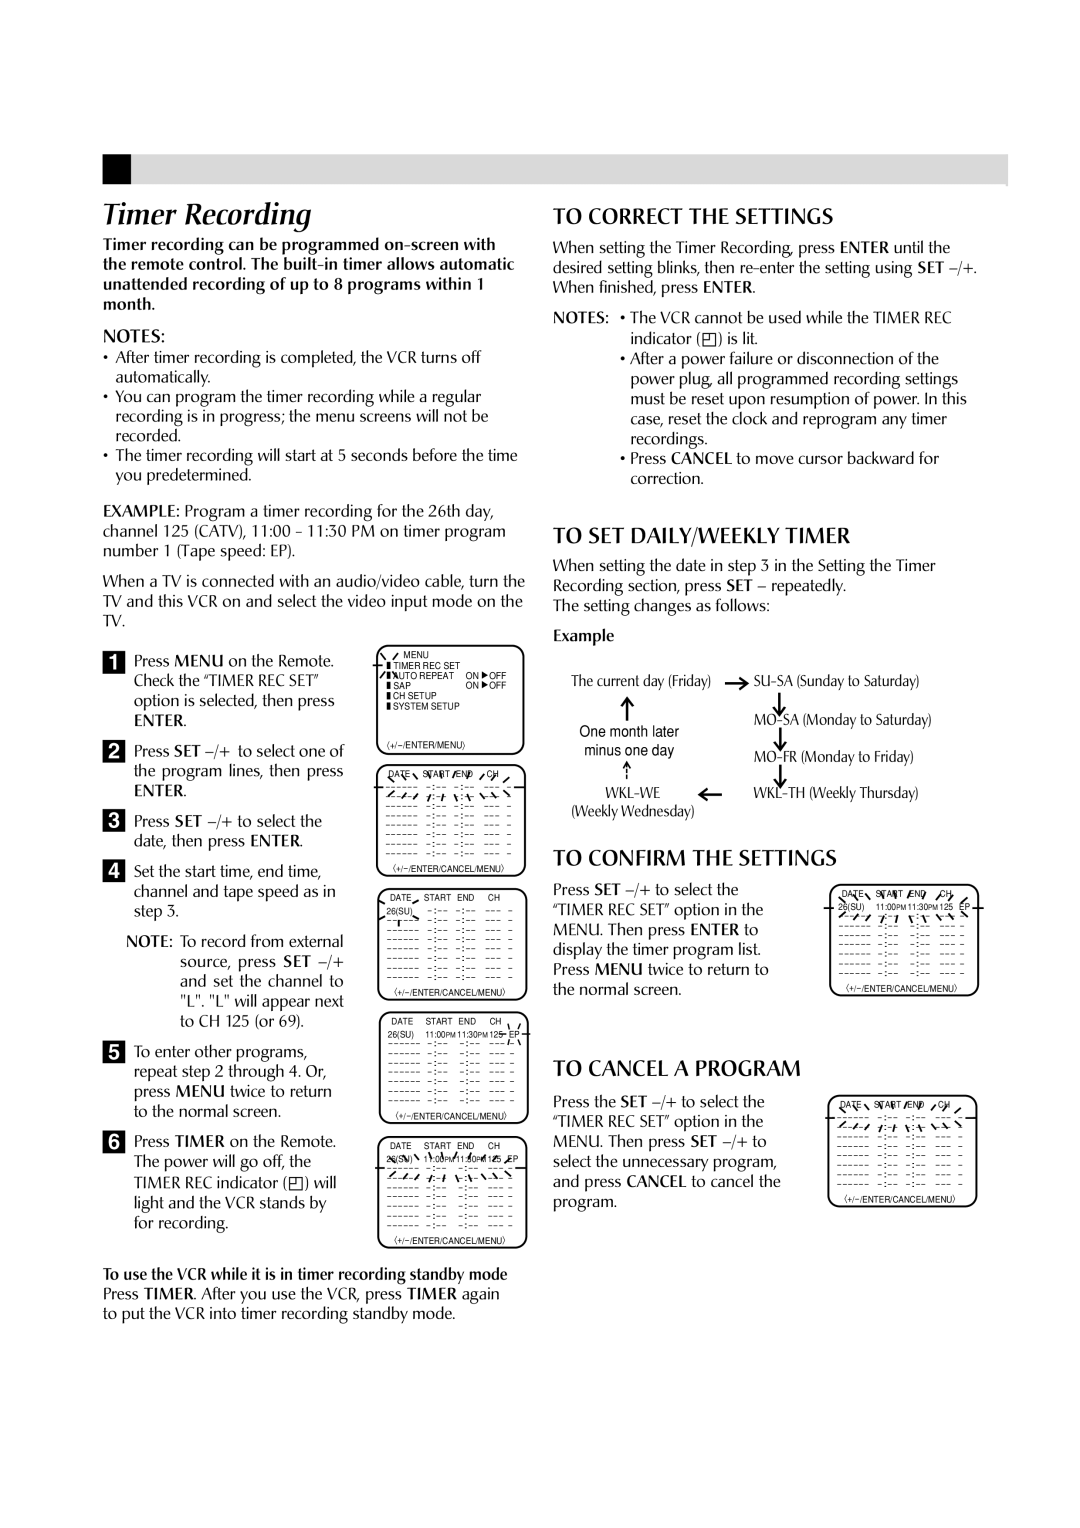
TO SET DAILY/WEEKLY TIMER
When setting the date in step 3 in the Setting the Timer Recording section, press SET – repeatedly.
The setting changes as follows:
Example
1
2
3
4
Press MENU on the Remote. Check the “TIMER REC SET” option is selected, then press
ENTER.
Press SET
ENTER.
Press SET
Set the start time, end time,
| MENU |
|
|
| TIMER REC SET |
| |
|
| ||
| AUTO REPEAT | ON | OFF |
| |||
| SAP | ON | OFF |
| |||
| CH SETUP |
|
|
|
|
| |
| SYSTEM SETUP |
| |
|
| ||
| |||
DATE START END | CH | ||
:- | |||
:- | |||
:- | |||
:- | |||
:- | |||
:- | |||
:- | |||
:- | |||
| |||
The current day (Friday) | |
One month later | |
| |
minus one day | |
| |
(Weekly Wednesday) |
|
TO CONFIRM THE SETTINGS
channel and tape speed as in step 3.
NOTE: To record from external source, press SET
DATE | START END CH | |
26(SU) | ||
DATE | START END CH | |
26(SU) | 11:00PM 11:30PM 125 EP | |
Press SET
“TIMER REC SET” option in the MENU. Then press ENTER to display the timer program list.
Press MENU twice to return to the normal screen.
DATE | START END CH | |
26(SU) | 11:00PM 11:30PM 125 EP | |
5
6
To enter other programs, repeat step 2 through 4. Or, press MENU twice to return to the normal screen.
Press TIMER on the Remote. The power will go off, the TIMER REC indicator ( ![]() ) will light and the VCR stands by for recording.
) will light and the VCR stands by for recording.
DATE | START END CH | |
26(SU) | 11:00PM 11:30PM 125 EP | |
TO CANCEL A PROGRAM
Press the SET
DATE START END CH
To use the VCR while it is in timer recording standby mode Press TIMER. After you use the VCR, press TIMER again to put the VCR into timer recording standby mode.