MANUAL CLOCK SET
DATE 1/ 1/97 WED TIME – –:– AM
D.S.T. ON
PRESS NUMBER KEY (O–9)
OR (5,°), THEN (OK)
PRESS (MENU) TO END

8

SELECT TIME ZONE

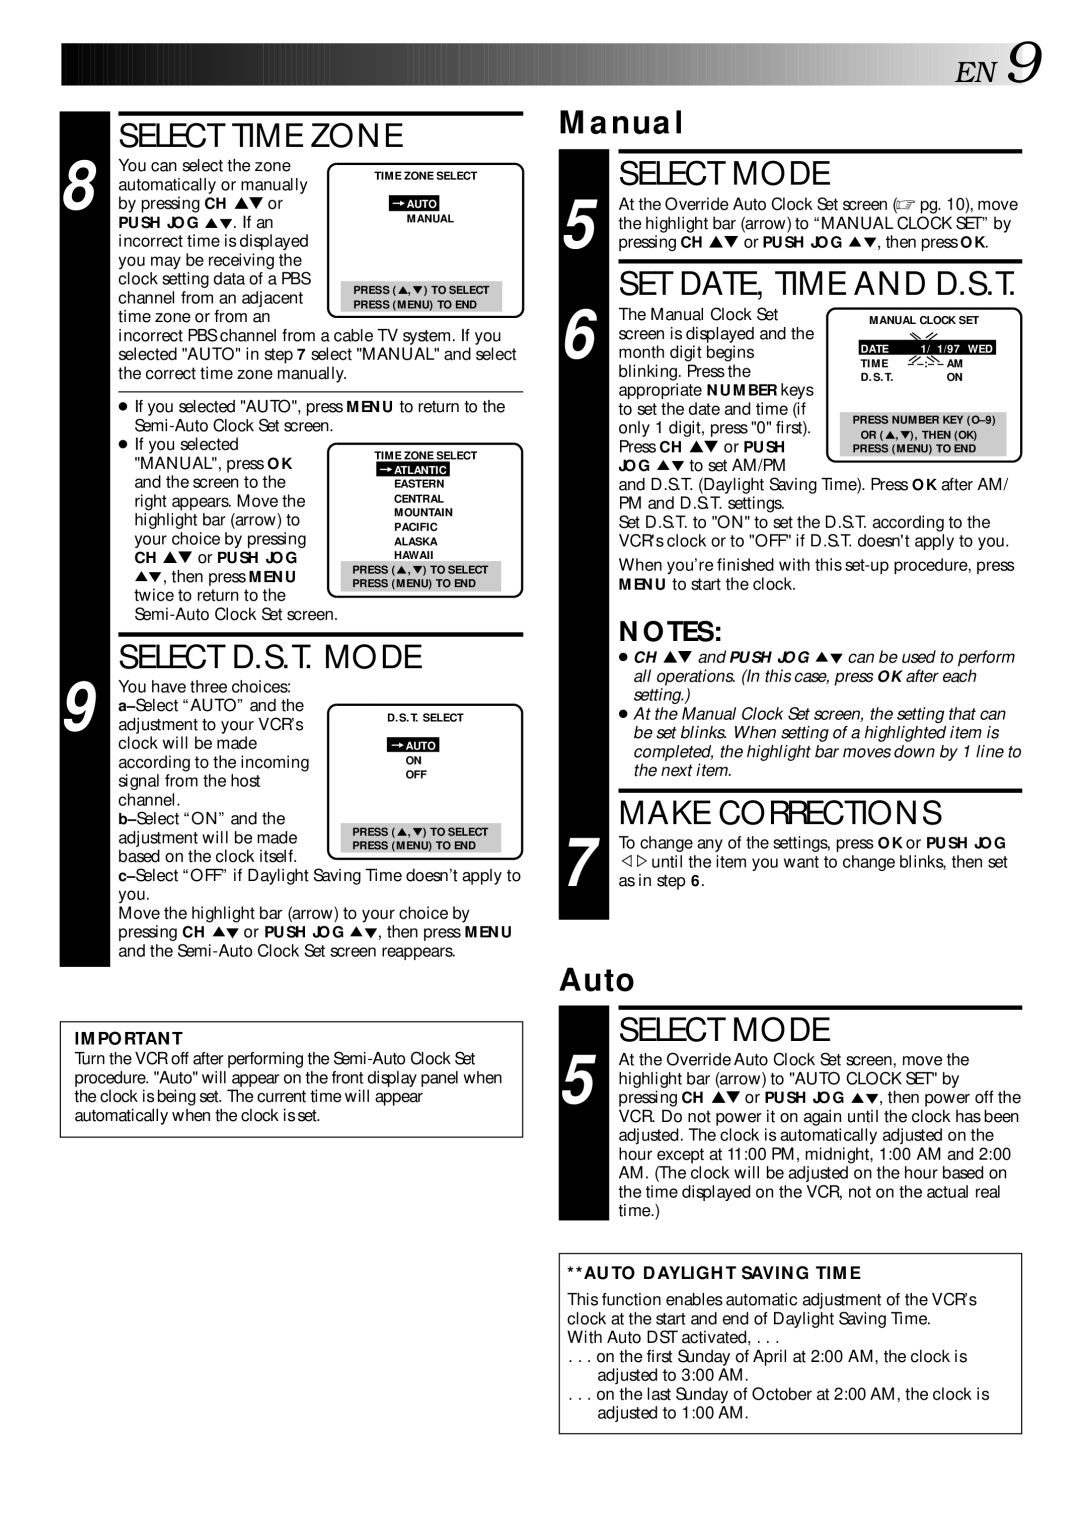
You can select the zone

TIME ZONE SELECT

automatically or manually


by pressing CH

▲▼

or


=AUTO


MANUAL


PUSH JOG

. If an


incorrect time is displayed


you may be receiving the


clock setting data of a PBS


PRESS (5,°) TO SELECT


channel from an adjacent


PRESS (MENU) TO END


time zone or from an


incorrect PBS channel from a cable TV system. If you


selected "AUTO" in step 7 select "MANUAL" and select


the correct time zone manually.


If you selected "AUTO", press MENU to return to the


Semi-Auto Clock Set screen.


If you selected


TIME ZONE SELECT


"MANUAL", press OK


=ATLANTIC


and the screen to the


EASTERN


right appears. Move the


CENTRAL


highlight bar (arrow) to


MOUNTAIN


PACIFIC


your choice by pressing


ALASKA


CH ▲▼ or PUSH JOG


HAWAII


5°, then press MENU


PRESS (5,°) TO SELECT


PRESS (MENU) TO END


twice to return to the


Semi-Auto Clock Set screen.


9

SELECT D.S.T. MODE

You have three choices:


a–Select “AUTO” and the


D.S.T. SELECT

adjustment to your VCR’s


clock will be made


=AUTO


according to the incoming


ON


signal from the host


OFF


channel.


b–Select “ON” and the


adjustment will be made


PRESS (5,°) TO SELECT


PRESS (MENU) TO END


based on the clock itself.


c–Select “OFF” if Daylight Saving Time doesn’t apply to


you.


Move the highlight bar (arrow) to your choice by


pressing CH 5° or PUSH JOG 5°, then press MENU


and the Semi-Auto Clock Set screen reappears.


IMPORTANT

Turn the VCR off after performing the Semi-Auto Clock Set procedure. "Auto" will appear on the front display panel when the clock is being set. The current time will appear automatically when the clock is set.

EN9

Manual

SELECT MODE

5 At the Override Auto Clock Set screen (pg. 10), move the highlight bar (arrow) to “MANUAL CLOCK SET” by pressing CH ▲▼ or PUSH JOG 5°, then press OK.

SET DATE, TIME AND D.S.T.

6 The Manual Clock Set

screen is displayed and the

month digit begins blinking. Press the

appropriate NUMBER keys to set the date and time (if only 1 digit, press "0" first). Press CH ▲▼ or PUSH JOG 5° to set AM/PM

and D.S.T. (Daylight Saving Time). Press OK after AM/ PM and D.S.T. settings.

Set D.S.T. to "ON" to set the D.S.T. according to the VCR's clock or to "OFF" if D.S.T. doesn't apply to you.

When you’re finished with this set-up procedure, press MENU to start the clock.

NOTES:

CH ▲▼ and PUSH JOG can be used to perform all operations. (In this case, press OK after each setting.)

At the Manual Clock Set screen, the setting that can be set blinks. When setting of a highlighted item is completed, the highlight bar moves down by 1 line to the next item.

MAKE CORRECTIONS

7 To change any of the settings, press OK or PUSH JOG Þ%until the item you want to change blinks, then set as in step 6.

Auto

SELECT MODE

5 At the Override Auto Clock Set screen, move the highlight bar (arrow) to "AUTO CLOCK SET" by pressing CH ▲▼ or PUSH JOG 5°, then power off the VCR. Do not power it on again until the clock has been adjusted. The clock is automatically adjusted on the hour except at 11:00 PM, midnight, 1:00 AM and 2:00 AM. (The clock will be adjusted on the hour based on the time displayed on the VCR, not on the actual real time.)

**AUTO DAYLIGHT SAVING TIME

This function enables automatic adjustment of the VCR’s clock at the start and end of Daylight Saving Time. With Auto DST activated, . . .

. . . on the first Sunday of April at 2:00 AM, the clock is adjusted to 3:00 AM.

. . . on the last Sunday of October at 2:00 AM, the clock is adjusted to 1:00 AM.

Page 9
Image 9
JVC HR-DD840KR manual Select Time Zone, Select D.S.T. Mode, SET DATE, Time and D.S.T, Make Corrections

HR-DD840KR specifications

The JVC HR-DD840KR is a standout VCR that exemplifies the brand's commitment to high-quality home entertainment. This device, widely recognized for its durability and efficiency, brings together several key features and technologies that cater to both avid video enthusiasts and casual viewers.

One of the most notable attributes of the HR-DD840KR is its advanced dual-head recording system. This technology enhances picture quality, ensuring that the recordings are vibrant and clear. The dual-head design allows for smoother playback and more reliable recordings, minimizing the risk of dropouts or degradation, which can be a common issue with lower-quality devices.

The HR-DD840KR also includes an integrated digital tuner, which provides access to a wide array of channels without the need for an external set-top box. This feature enhances convenience, allowing users to easily explore and record their favorite shows. Coupled with a versatile timer recording function, users can set the VCR to capture programs at specified times, making it easy to manage viewing schedules.

Another significant characteristic of the JVC HR-DD840KR is its ability to playback several formats. In addition to standard VHS tapes, this model supports S-VHS playback, which delivers superior video quality due to its higher resolution. As a result, users can enjoy their old home movies with enhanced clarity or revisit classic films with improved detail.

The user interface of the HR-DD840KR is designed for simplicity, ensuring that even those who are not tech-savvy can navigate its features with ease. The on-screen display provides straightforward instructions for programming and playback, while the remote control puts all functions at the user's fingertips.

Additionally, the VCR boasts several connectivity options, including composite video and audio outputs, ensuring compatibility with various TVs and audio equipment. This compatibility is crucial for those who wish to integrate the VCR into a modern home theater setup.

Durability is another hallmark of the JVC HR-DD840KR, with a robust build that can withstand the test of time. This reliability, combined with its excellent performance in both recording and playback, makes it a solid choice for anyone looking to preserve their video collection or enjoy classic tapes.

Overall, the JVC HR-DD840KR is a well-rounded VCR that merges traditional video recording capabilities with modern conveniences, keeping it relevant in today's fast-paced digital landscape. Its combination of quality, flexibility, and user-friendly design ensures that it remains a top choice among home entertainment devices.