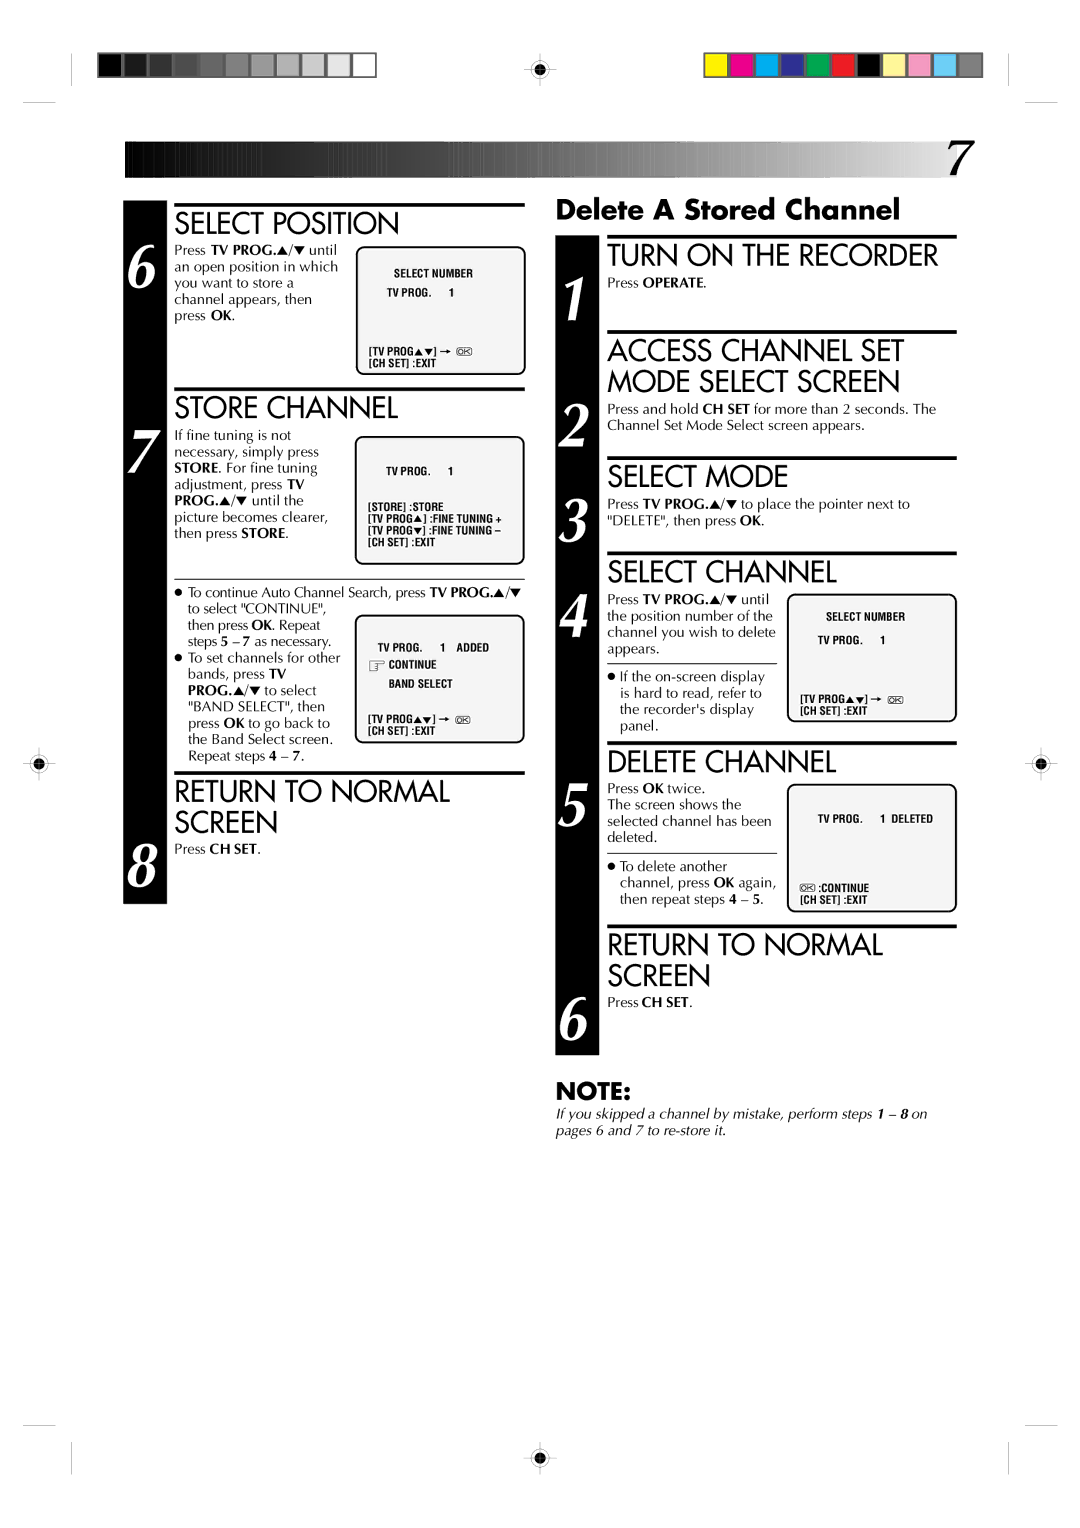
SELECT POSITION
![]()
![]()
![]()
![]()
![]() 7
7![]()
Delete A Stored Channel
6
Press TV PROG.5/° until an open position in which you want to store a channel appears, then press OK.
SELECT NUMBER
TV PROG. 1
[TV PROG5°] = ![]() [CH SET] :EXIT
[CH SET] :EXIT
TURN ON THE RECORDER |
1 Press OPERATE. |
ACCESS CHANNEL SET |
MODE SELECT SCREEN |
STORE CHANNEL
2 | Press and hold CH SET for more than 2 seconds. The |
Channel Set Mode Select screen appears. |
7
If fine tuning is not necessary, simply press STORE. For fine tuning adjustment, press TV PROG.5/° until the picture becomes clearer, then press STORE.
TV PROG. 1
[STORE] :STORE
[TV PROG5] :FINE TUNING + [TV PROG°] :FINE TUNING – [CH SET] :EXIT
3 | SELECT MODE |
Press TV PROG.5/° to place the pointer next to | |
"DELETE", then press OK. | |
| SELECT CHANNEL |
●To continue Auto Channel Search, press to select "CONTINUE",
then press OK. Repeat
steps 5 – 7 as necessary.
●To set channels for other bands, press TV PROG.5/° to select "BAND SELECT", then press OK to go back to the Band Select screen. Repeat steps 4 – 7.
TV PROG.5/°
1 ADDED
Press TV PROG.5/° until |
|
the position number of the | SELECT NUMBER |
4 channel you wish to delete | TV PROG. 1 |
appears. |
|
●If the
is hard to read, refer to | [TV PROG5°] = | |
the recorder's display | ||
[CH SET] :EXIT | ||
panel. |
|
DELETE CHANNEL |
8
RETURN TO NORMAL SCREEN
Press CH SET.
Press OK twice. |
|
The screen shows the |
|
5 selected channel has been | TV PROG. 1 DELETED |
| |
deleted. |
|
●To delete another
channel, press OK again, | :CONTINUE |
then repeat steps 4 – 5. | [CH SET] :EXIT |
RETURN TO NORMAL
SCREEN
6 Press CH SET.
NOTE:
If you skipped a channel by mistake, perform steps 1 – 8 on pages 6 and 7 to