RECORDING![]()
![]()
![]()
![]()
![]()
![]()
![]()
![]()
![]()
![]()
![]()
![]()
![]()
![]()
![]()
![]()
![]()
![]()
![]()
![]()
![]()
![]()
![]()
![]()
![]()
![]()
![]()
![]()
![]()
![]()
![]()
![]()
![]()
![]()
![]()
![]()
![]()
![]()
![]()
![]()
![]()
![]()
![]()
![]()
![]()
![]()
![]()
![]()
![]()
![]()
![]()
![]()
![]()
![]()
![]()
![]()
![]()
![]()
![]()
![]()
![]()
![]()
![]()
![]()
![]()
![]()
![]()
![]()
![]()
![]()
![]()
![]()
![]()
![]()
![]()
![]()
![]() E
E![]() N
N![]()
![]() 11
11![]()
Basic
Recording
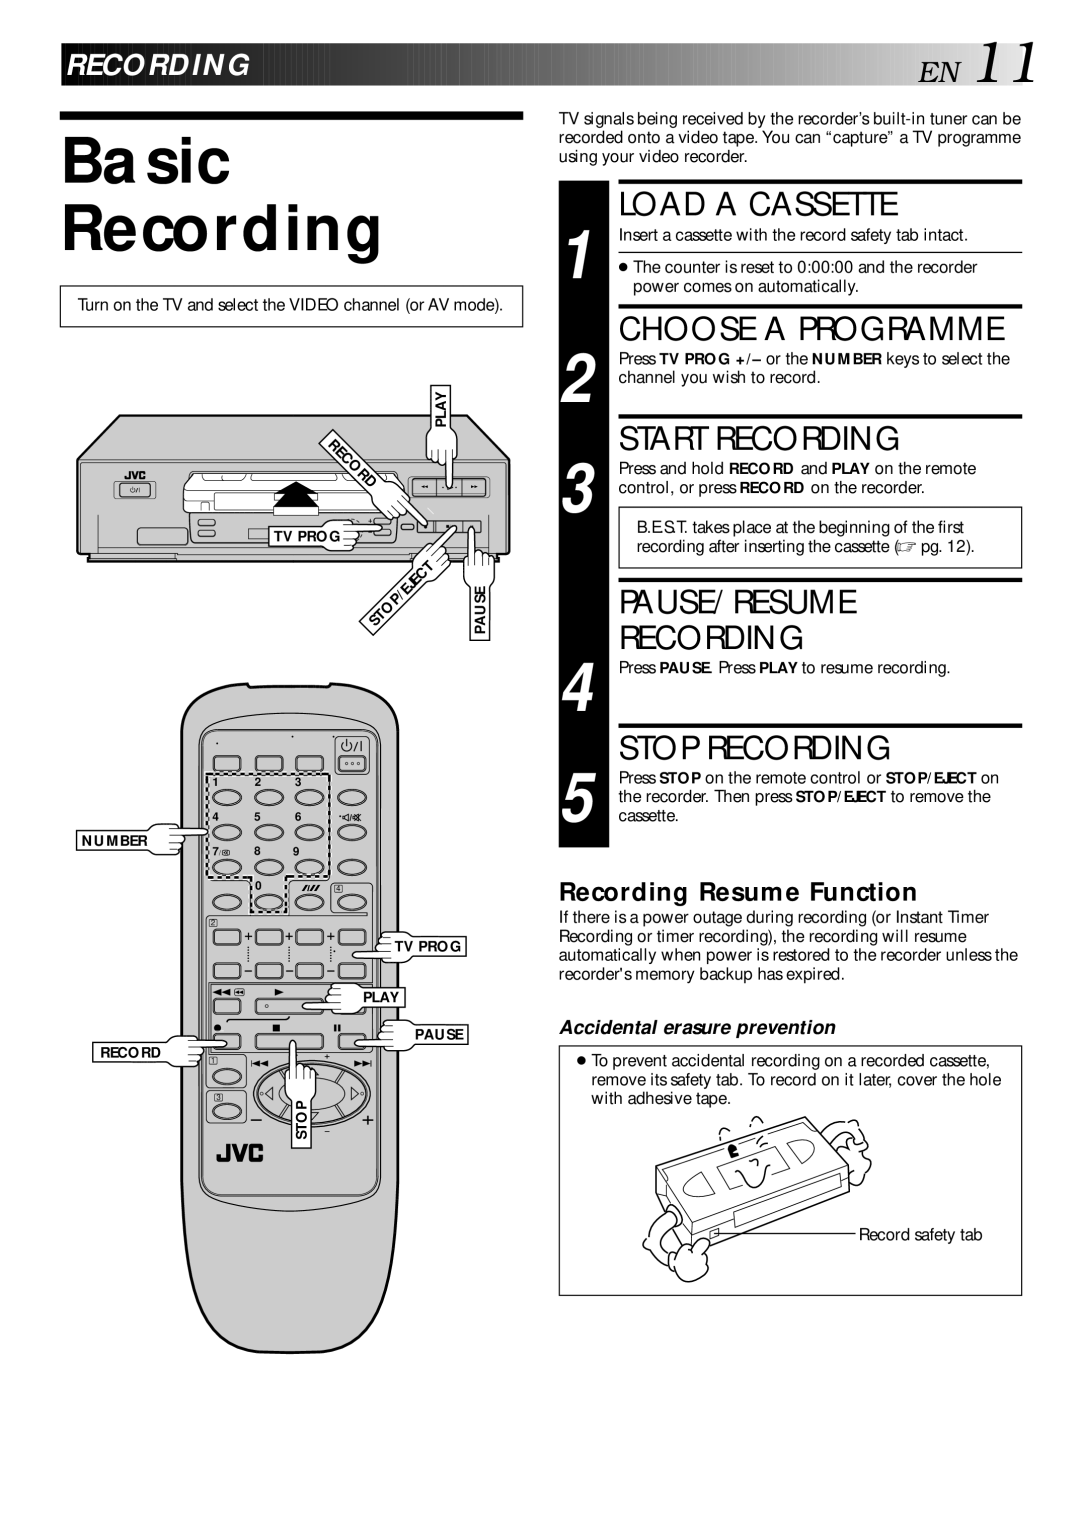
Turn on the TV and select the VIDEO channel (or AV mode).
| PLAY |
|
ECORD |
|
|
2 |
| 3 |
q | 5/8 | 6 |
TV PROG |
|
|
STOP/EJECT |
| PAUSE |
1 | 2 | 3 |
4 | 5 | 6 |
NUMBER | 8 | 9 |
7/ | ||
| 0 | 4 |
2 |
|
|
TV PROG
TV signals being received by the recorder’s
1 |
| LOAD A CASSETTE |
| Insert a cassette with the record safety tab intact. | |
|
| |
| ● The counter is reset to 0:00:00 and the recorder | |
| power comes on automatically. | |
|
|
|
2 |
| CHOOSE A PROGRAMME |
| Press TV PROG +/– or the NUMBER keys to select the | |
| channel you wish to record. | |
3 |
| START RECORDING |
| Press and hold RECORD and PLAY on the remote | |
control, or press RECORD on the recorder. | ||
| B.E.S.T. takes place at the beginning of the first | |
|
| |
|
| recording after inserting the cassette (☞ pg. 12). |
|
|
|
|
|
|
|
| PAUSE/RESUME |
4 |
| RECORDING |
| Press PAUSE. Press PLAY to resume recording. | |
5 |
| STOP RECORDING |
| Press STOP on the remote control or STOP/EJECT on | |
| the recorder. Then press STOP/EJECT to remove the | |
| cassette. | |
|
|
|
Recording Resume Function
If there is a power outage during recording (or Instant Timer Recording or timer recording), the recording will resume automatically when power is restored to the recorder unless the recorder's memory backup has expired.
1 | 3 |
| ÁPLAY |
¦ | 7 | 8 | PAUSE |
RECORD |
|
| |
4 |
| ¢ | |
1 |
| ||
|
| ||
3 |
| STOP |
|
|
|
|
Accidental erasure prevention
●To prevent accidental recording on a recorded cassette, remove its safety tab. To record on it later, cover the hole with adhesive tape.
Record safety tab