![]()
![]()
![]()
![]()
![]()
![]()
![]()
![]()
![]()
![]()
![]()
![]()
![]()
![]()
![]()
![]()
![]()
![]()
![]()
![]()
![]()
![]()
![]()
![]()
![]()
![]()
![]()
![]()
![]()
![]()
![]()
![]()
![]()
![]()
![]()
![]()
![]()
![]()
![]()
![]()
![]()
![]()
![]()
![]()
![]()
![]()
![]()
![]()
![]()
![]()
![]()
![]()
![]()
![]()
![]()
![]()
![]()
![]()
![]()
![]()
![]()
![]()
![]()
![]()
![]()
![]()
![]()
![]()
![]()
![]()
![]()
![]()
![]()
![]()
![]()
![]()
![]()
![]()
![]()
![]()
![]()
![]()
![]()
![]()
![]()
![]()
![]()
![]()
![]()
![]()
![]()
![]()
![]()
![]()
![]()
![]()
![]()
![]()
![]()
![]()
![]()
![]()
![]() 33
33![]()
A
TV Receiver | Player | Your recorder | ||||||
|
|
|
|
|
|
|
|
|
|
|
|
|
|
|
|
|
|
|
|
|
|
|
|
|
|
|
|
|
|
|
|
|
|
|
|
|
|
|
|
|
|
|
|
|
|
|
|
|
|
|
|
|
|
B
Recorder |
|
|
| Your recorder |
| TV Receiver | |||||||
|
|
|
|
|
|
|
|
|
|
|
|
|
|
|
|
|
|
|
|
|
|
|
|
|
|
|
|
|
|
|
|
|
|
|
|
|
|
|
|
|
|
|
|
|
|
|
|
|
|
|
|
|
|
|
|
|
|
|
|
|
|
|
|
|
|
|
|
|
|
|
|
|
|
|
|
|
|
|
|
|
|
|
|
| |
VIDEO | (not provided) |
CHAN- |
|
NEL or | RF Cable |
AV mode | |
| (provided) |
RF Cable ![]() (provided)
(provided)
VIDEO CHAN- NEL or AV mode
Another recorder
Recorder
Another recorder
Player
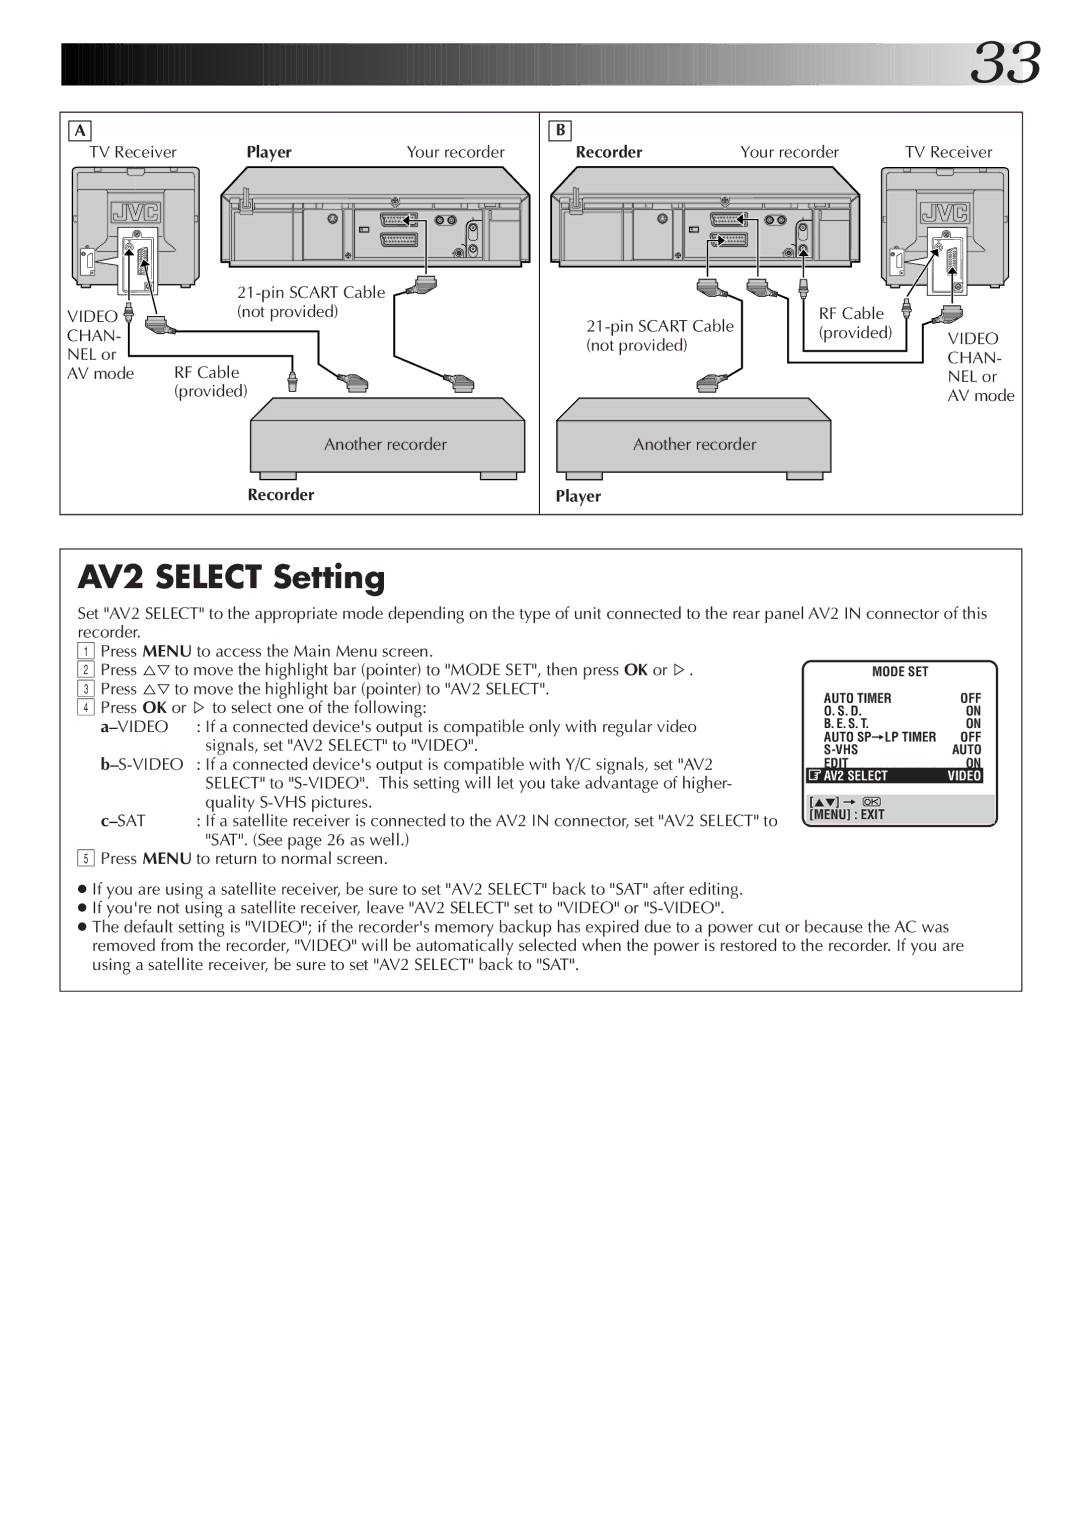
AV2 SELECT Setting
Set "AV2 SELECT" to the appropriate mode depending on the type of unit connected to the rear panel AV2 IN connector of this recorder.
1Press MENU to access the Main Menu screen.
2 Press %Þto move the highlight bar (pointer) to "MODE SET", then press OK or Þ .
3Press %Þto move the highlight bar (pointer) to "AV2 SELECT".
4 Press OK or Þ to select one of the following:
: If a connected device's output is compatible only with regular video | |
| signals, set "AV2 SELECT" to "VIDEO". |
: If a connected device's output is compatible with Y/C signals, set "AV2 | |
| SELECT" to |
| quality |
: If a satellite receiver is connected to the AV2 IN connector, set "AV2 SELECT" to | |
| "SAT". (See page 26 as well.) |
5 Press MENU to return to normal screen.
MODE SET |
|
|
AUTO TIMER | OFF | |
O. S. D. | ON | |
B. E. S. T. | ON | |
AUTO SP=LP TIMER | OFF | |
AUTO | ||
EDIT | ON | |
AV2 SELECT | VIDEO |
|
|
|
|
[5°] = |
|
|
[MENU] : EXIT |
|
|
●If you are using a satellite receiver, be sure to set "AV2 SELECT" back to "SAT" after editing.
●If you're not using a satellite receiver, leave "AV2 SELECT" set to "VIDEO" or
●The default setting is "VIDEO"; if the recorder's memory backup has expired due to a power cut or because the AC was removed from the recorder, "VIDEO" will be automatically selected when the power is restored to the recorder. If you are using a satellite receiver, be sure to set "AV2 SELECT" back to "SAT".