EN 11

Setting clock semiautomatically

— Semiauto Clock Set

You can change the host channel/D.S.T. /time zone setting manually.

First follow steps 1 to 3 on page 10, then go to the following steps.

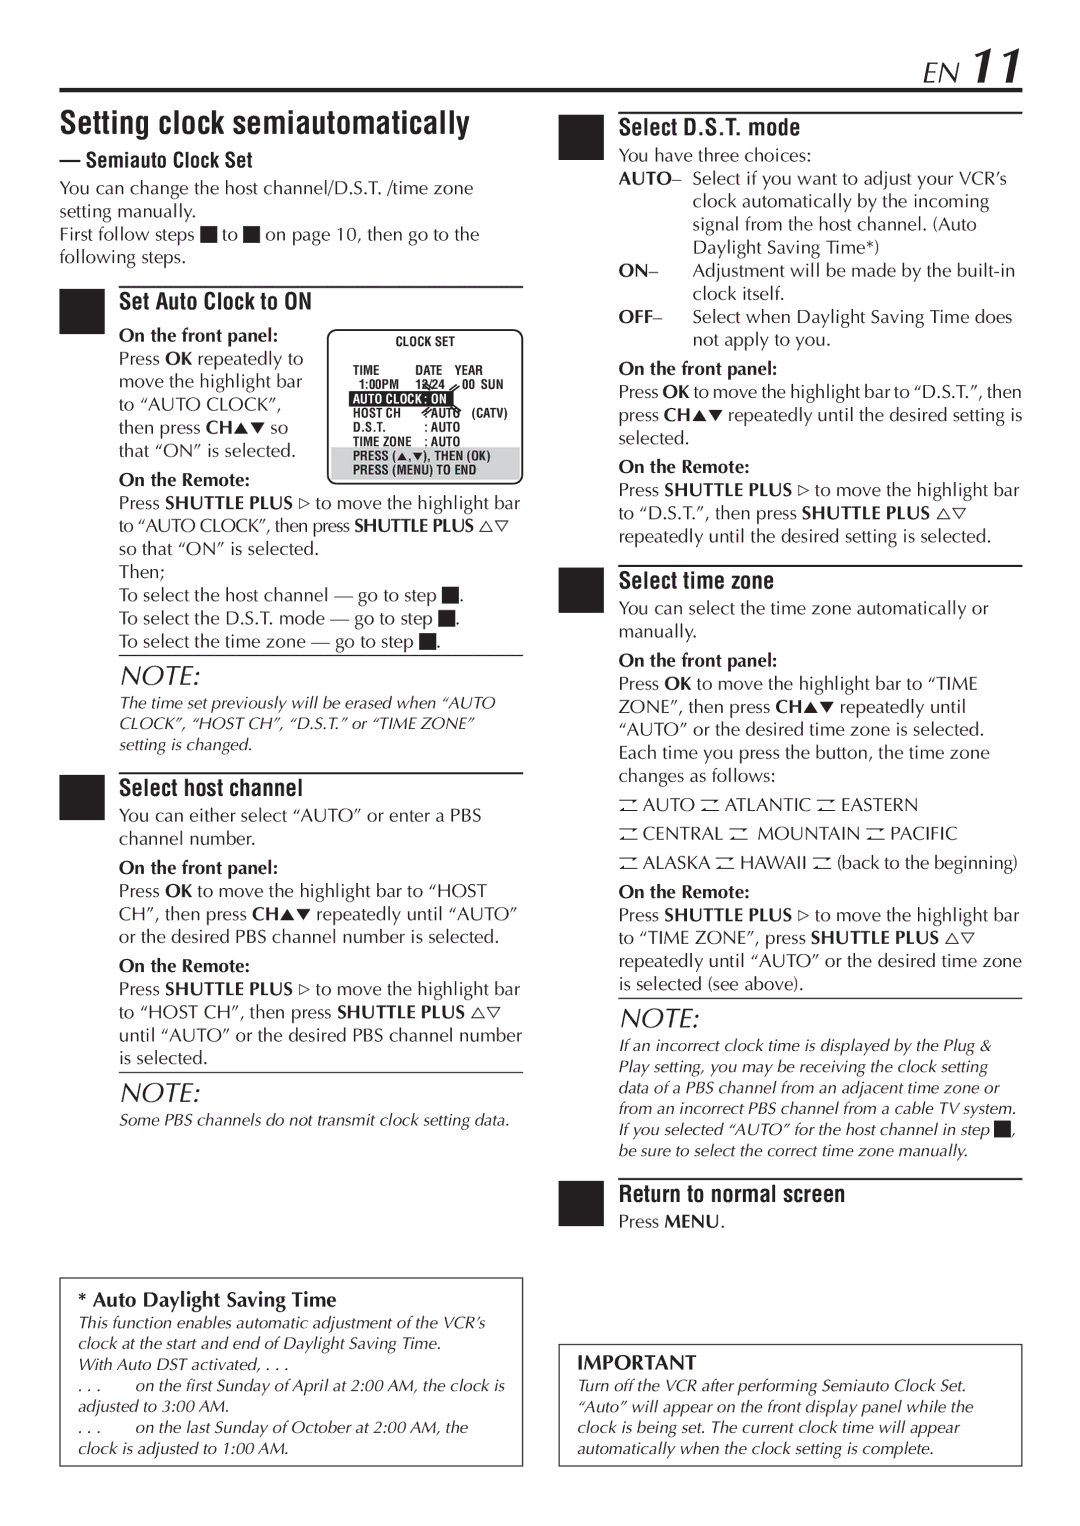
4Set Auto Clock to ON

On the front panel:

CLOCK SET


Press OK repeatedly to

TIME

DATE YEAR

move the highlight bar

1:00PM

12/24


00 SUN

to “AUTO CLOCK”,

AUTO CLOCK : ON


HOST CH

: AUTO

(CATV)

then press CHso

D.S.T.

: AUTO


that “ON” is selected.

TIME ZONE

: AUTO


PRESS (5,°), THEN (OK)

6Select D.S.T. mode

You have three choices:

AUTO– Select if you want to adjust your VCR’s clock automatically by the incoming signal from the host channel. (Auto Daylight Saving Time*)

ON– Adjustment will be made by the built-in clock itself.

OFF– Select when Daylight Saving Time does not apply to you.

On the front panel:

Press OK to move the highlight bar to “D.S.T.”, then press CHrepeatedly until the desired setting is selected.

On the Remote:

PRESS (MENU) TO END

On the Remote:

Press SHUTTLE PLUS # to move the highlight bar

Press SHUTTLE PLUS # to move the highlight bar to “AUTO CLOCK”, then press SHUTTLE PLUS so that “ON” is selected.

Then;

To select the host channel — go to step 5. To select the D.S.T. mode — go to step 6. To select the time zone — go to step 7.

NOTE:

The time set previously will be erased when “AUTO CLOCK”, “HOST CH”, “D.S.T.” or “TIME ZONE” setting is changed.

5 Select host channel

You can either select “AUTO” or enter a PBS channel number.

On the front panel:

Press OK to move the highlight bar to “HOST CH”, then press CHrepeatedly until “AUTO” or the desired PBS channel number is selected.

On the Remote:

Press SHUTTLE PLUS # to move the highlight bar to “HOST CH”, then press SHUTTLE PLUS until “AUTO” or the desired PBS channel number is selected.

NOTE:

Some PBS channels do not transmit clock setting data.

to “D.S.T.”, then press SHUTTLE PLUS repeatedly until the desired setting is selected.

7 Select time zone

You can select the time zone automatically or manually.

On the front panel:

Press OK to move the highlight bar to “TIME ZONE”, then press CHrepeatedly until “AUTO” or the desired time zone is selected. Each time you press the button, the time zone changes as follows:

OAUTO O ATLANTIC O EASTERN

OCENTRAL O MOUNTAIN O PACIFIC

OALASKA O HAWAII O (back to the beginning)

On the Remote:

Press SHUTTLE PLUS # to move the highlight bar to “TIME ZONE”, press SHUTTLE PLUS repeatedly until “AUTO” or the desired time zone is selected (see above).

NOTE:

If an incorrect clock time is displayed by the Plug & Play setting, you may be receiving the clock setting data of a PBS channel from an adjacent time zone or from an incorrect PBS channel from a cable TV system. If you selected “AUTO” for the host channel in step 5, be sure to select the correct time zone manually.

* Auto Daylight Saving Time

This function enables automatic adjustment of the VCR’s clock at the start and end of Daylight Saving Time.

With Auto DST activated, . . .

. . .

on the first Sunday of April at 2:00 AM, the clock is

adjusted to 3:00 AM.

. . .

on the last Sunday of October at 2:00 AM, the

clock is adjusted to 1:00 AM.

8Return to normal screen

Press MENU.

IMPORTANT

Turn off the VCR after performing Semiauto Clock Set. “Auto” will appear on the front display panel while the clock is being set. The current clock time will appear automatically when the clock setting is complete.

Page 11
Image 11
JVC HR-S7800U manual Setting clock semiautomatically, Set Auto Clock to on, Select D.S.T. mode, Select host channel

HR-S7800U specifications

The JVC HR-S7800U is a distinguished VHS VCR that emerged as a significant player in the realm of video recording during its time. Known for its advanced technology and robust performance, the HR-S7800U is celebrated for delivering high-quality video playback and recording, ensuring that users get the most out of their home entertainment experience.

One of the standout features of the JVC HR-S7800U is its S-VHS capabilities. This model supports S-VHS recording, which significantly improves picture quality by offering enhanced resolution over standard VHS. The S-VHS feature is particularly appreciated by videographers and enthusiasts who wish to capture videos with superior clarity and detail, providing a more cinematic experience.

Additionally, the HR-S7800U showcases JVC's proprietary DIGITALLY ENHANCED IMAGE processor (DEI). This technology automatically optimizes the picture quality during playback, ensuring that colors are more vibrant and contrast is more pronounced. The result is a visually engaging experience, whether viewing home movies or recorded television shows.

The VCR comes equipped with a versatile set of playback options. It supports various tape formats, including S-VHS, VHS, VHS-C, and even provides an adapter for Video8 and Hi8 formats, catering to a wide range of users with different tape collections. This versatility makes the HR-S7800U an all-in-one solution for anyone looking to convert or archive their video tapes.

Furthermore, the JVC HR-S7800U boasts a user-friendly interface, with intuitive controls that make it easy to navigate through menus and settings. Its remote control enhances convenience, allowing users to manage playback and recording from a distance.

The build quality of the HR-S7800U is another highlight, designed to withstand the test of time. Its durable construction ensures longevity, making it a reliable choice for any home theater setup.

In conclusion, the JVC HR-S7800U is a powerful VCR that combines advanced technology with user-friendly features. With its S-VHS capability, DIGITALLY ENHANCED IMAGE processor, extensive playback options, and solid build quality, it stands out as a versatile choice for both casual users and video enthusiasts. Whether archiving cherished memories or enjoying classic films, the HR-S7800U remains an enduring favorite for video lovers.