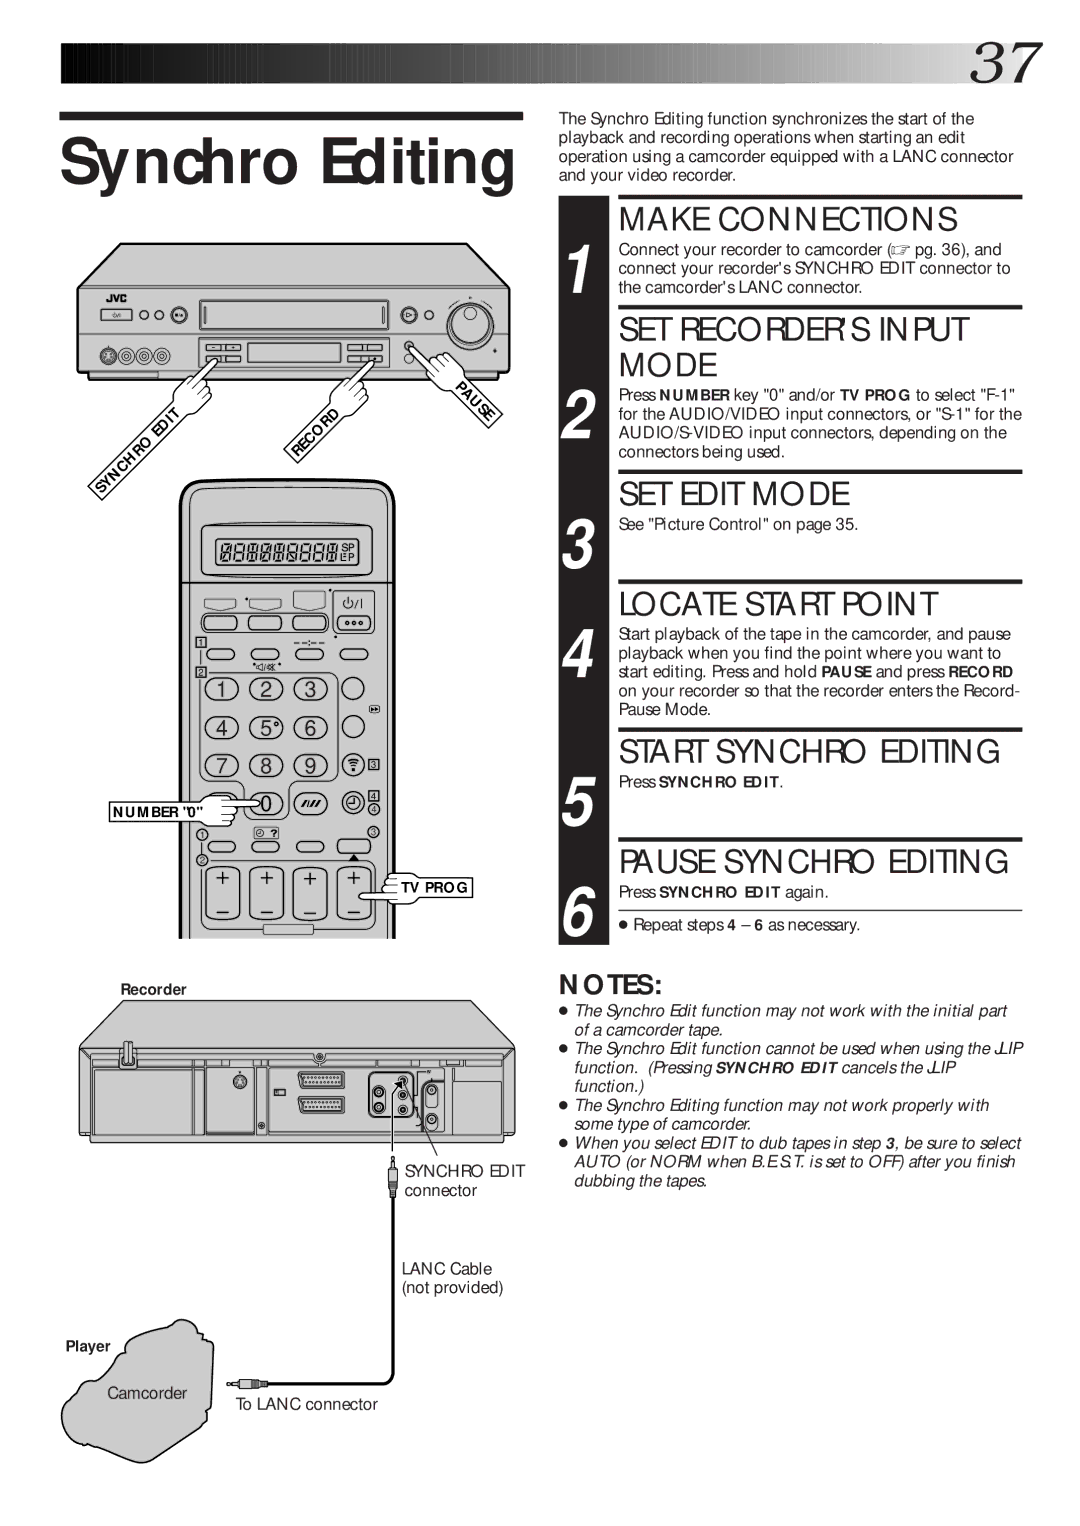
See "Picture Control" on page 35.
LOCATE START POINT
Start playback of the tape in the camcorder, and pause playback when you find the point where you want to start editing. Press and hold PAUSE and press RECORD on your recorder so that the recorder enters the Record- Pause Mode.
START SYNCHRO EDITING
Press SYNCHRO EDIT.
PAUSE SYNCHRO EDITING
3
4
Press NUMBER key "0" and/or TV PROG to select "F-1" for the AUDIO/VIDEO input connectors, or "S-1" for the AUDIO/S-VIDEO input connectors, depending on the connectors being used.
SET EDIT MODE
2
Connect your recorder to camcorder (☞ pg. 36), and connect your recorder's SYNCHRO EDIT connector to the camcorder's LANC connector.
SET RECORDER'S INPUT MODE
1
37
The Synchro Editing function synchronizes the start of the playback and recording operations when starting an edit operation using a camcorder equipped with a LANC connector and your video recorder.
MAKE CONNECTIONS
Synchro Editing
8
| EDIT | RECORD | PAUSE |
SYNCHRO |
| ||
|
| ||
|
|
|
1–
2 |
|
|
|
1 | 2 | 3 |
|
4 | 5 | 6 |
|
7 | 8 | 9 | 3 |
| 0 |
| 4 |
NUMBER "0" |
| 4 | |
|
|
|
1 | 3 |
| |
2 |
|
![]() TV PROG
TV PROG
Recorder
5
6 Press SYNCHRO EDIT again.
●Repeat steps 4 – 6 as necessary.
NOTES:
Player
Camcorder
SYNCHRO EDIT
 connector
LANC Cable (not provided)
To LANC connector
●The Synchro Edit function may not work with the initial part of a camcorder tape.
●The Synchro Edit function cannot be used when using the JLIP function. (Pressing SYNCHRO EDIT cancels the JLIP function.)
●The Synchro Editing function may not work properly with some type of camcorder.
●When you select EDIT to dub tapes in step 3, be sure to select AUTO (or NORM when B.E.S.T. is set to OFF) after you finish dubbing the tapes.