EN 11

Setting clock semiautomatically

— Semiauto Clock Set

You can change the host channel/D.S.T. /time zone setting manually.

First follow steps 1 to 3 on page 10, then go to the following steps.

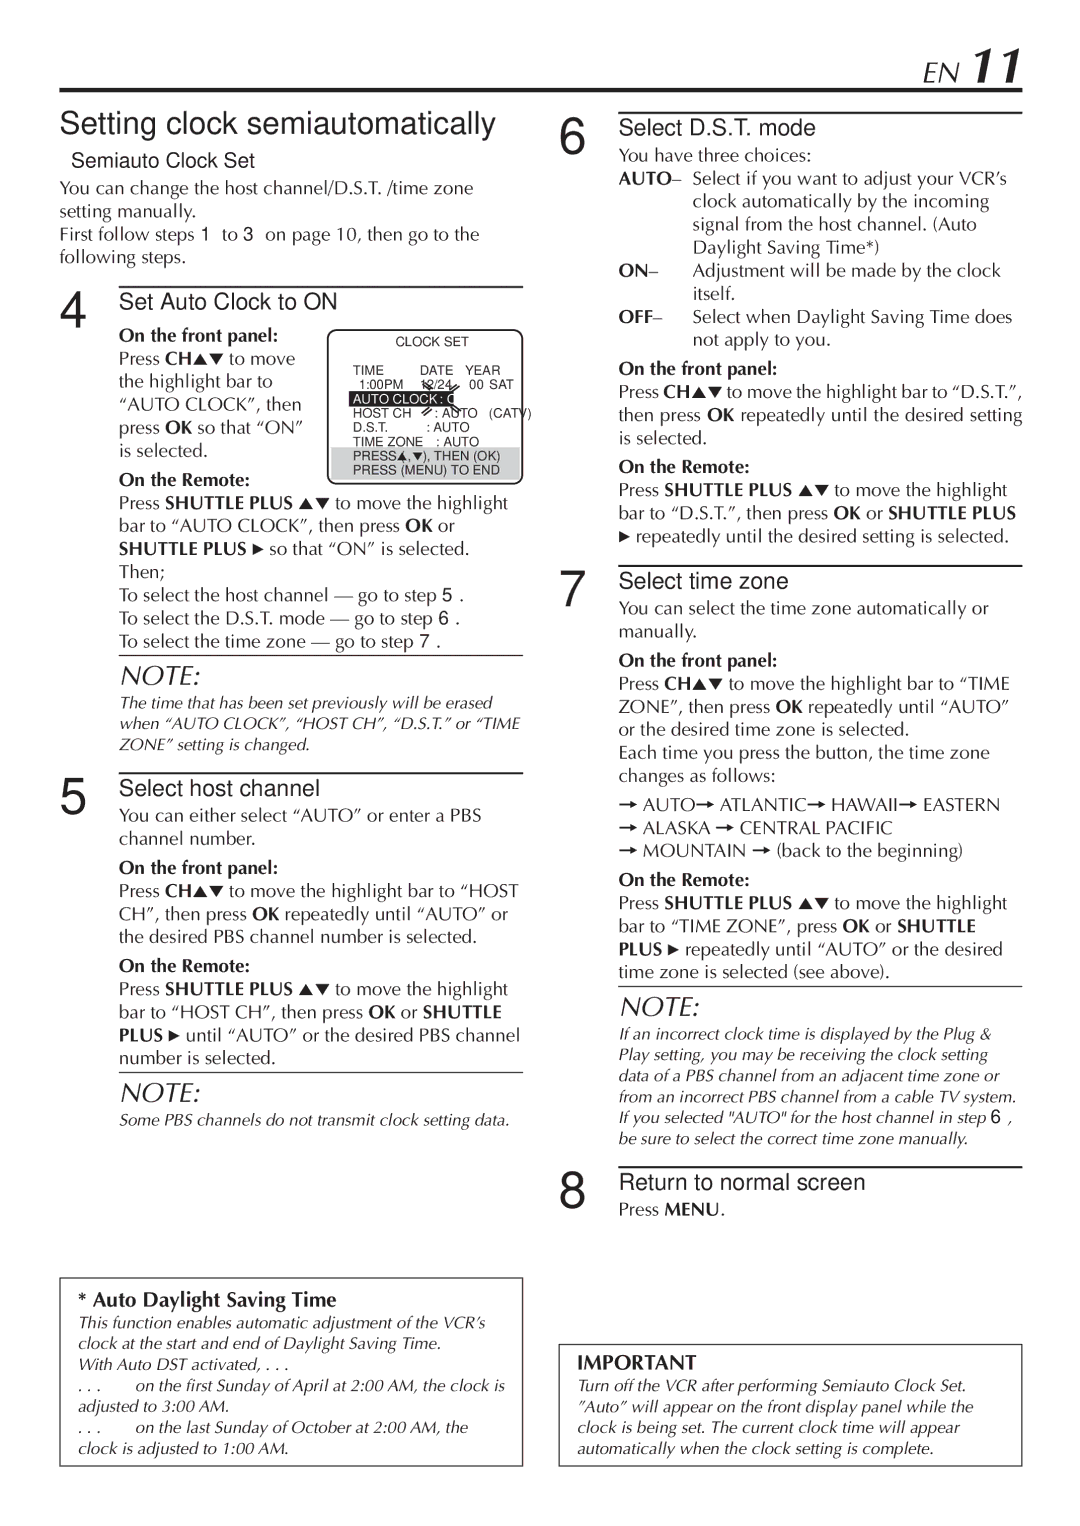
4Set Auto Clock to ON

On the front panel:

CLOCK SET


Press CHto move

TIME

DATE YEAR

the highlight bar to

1:00PM

12/24


00 SAT

“AUTO CLOCK”, then

AUTO CLOCK : ON


HOST CH

: AUTO

(CATV)

press OK so that “ON”

D.S.T.

: AUTO


is selected.

TIME ZONE

: AUTO


PRESS (5,°), THEN (OK)

6 Select D.S.T. mode You have three choices:

AUTO– Select if you want to adjust your VCR’s clock automatically by the incoming signal from the host channel. (Auto Daylight Saving Time*)

ON– Adjustment will be made by the clock itself.

OFF– Select when Daylight Saving Time does not apply to you.

On the front panel:

Press CHto move the highlight bar to “D.S.T.”, then press OK repeatedly until the desired setting is selected.

On the Remote:

PRESS (MENU) TO END

On the Remote:

Press SHUTTLE PLUS to move the highlight

Press SHUTTLE PLUS to move the highlight bar to “AUTO CLOCK”, then press OK or SHUTTLE PLUS 3 so that “ON” is selected. Then;

To select the host channel — go to step 5. To select the D.S.T. mode — go to step 6. To select the time zone — go to step 7.

NOTE:

The time that has been set previously will be erased when “AUTO CLOCK”, “HOST CH”, “D.S.T.” or “TIME ZONE” setting is changed.

5 Select host channel

You can either select “AUTO” or enter a PBS channel number.

On the front panel:

Press CHto move the highlight bar to “HOST CH”, then press OK repeatedly until “AUTO” or the desired PBS channel number is selected.

On the Remote:

Press SHUTTLE PLUS to move the highlight bar to “HOST CH”, then press OK or SHUTTLE PLUS 3 until “AUTO” or the desired PBS channel number is selected.

NOTE:

Some PBS channels do not transmit clock setting data.

* Auto Daylight Saving Time

This function enables automatic adjustment of the VCR’s clock at the start and end of Daylight Saving Time.

With Auto DST activated, . . .

. . .

on the first Sunday of April at 2:00 AM, the clock is

adjusted to 3:00 AM.

. . .

on the last Sunday of October at 2:00 AM, the

clock is adjusted to 1:00 AM.

bar to “D.S.T.”, then press OK or SHUTTLE PLUS

3repeatedly until the desired setting is selected.

7 Select time zone

You can select the time zone automatically or manually.

On the front panel:

Press CHto move the highlight bar to “TIME ZONE”, then press OK repeatedly until “AUTO” or the desired time zone is selected.

Each time you press the button, the time zone changes as follows:

=AUTO= ATLANTIC= HAWAII= EASTERN

=ALASKA = CENTRAL PACIFIC

=MOUNTAIN = (back to the beginning)

On the Remote:

Press SHUTTLE PLUS to move the highlight bar to “TIME ZONE”, press OK or SHUTTLE PLUS 3 repeatedly until “AUTO” or the desired time zone is selected (see above).

NOTE:

If an incorrect clock time is displayed by the Plug & Play setting, you may be receiving the clock setting data of a PBS channel from an adjacent time zone or from an incorrect PBS channel from a cable TV system. If you selected "AUTO" for the host channel in step 6, be sure to select the correct time zone manually.

8Return to normal screen

Press MENU.

IMPORTANT

Turn off the VCR after performing Semiauto Clock Set. ”Auto” will appear on the front display panel while the clock is being set. The current clock time will appear automatically when the clock setting is complete.

Page 11
Image 11
JVC HR-VP48U manual Setting clock semiautomatically, Set Auto Clock to on, Select host channel, Select time zone

HR-VP48U specifications

The JVC HR-VP48U is a versatile and reliable VHS player/recorder that stands out for its impressive array of features and technologies tailored for home entertainment enthusiasts. Recognized for its robust build quality, this model offers exceptional playback and recording capabilities, making it a popular choice among both casual users and dedicated collectors.

One of the standout features of the HR-VP48U is its advanced video processing technology, which ensures that users experience high-quality playback. The player benefits from JVC's proprietary Super VHS (S-VHS) support, allowing for superior resolution and clarity compared to standard VHS. This enhancement is particularly appreciated by those who cherish their classic video collections. The model also supports various VHS formats, ensuring compatibility with a wide range of tapes, including standard VHS and S-VHS cassettes.

Another key characteristic of the HR-VP48U is its recording capabilities. The unit features a reliable time-shifting function, enabling users to record shows while watching others. The built-in tuner allows users to capture broadcasts in a range of formats, offering flexibility when scheduling recordings. Moreover, the ability to program recordings via the on-screen menu and timer makes it user-friendly, providing convenience for even the most technologically challenged users.

The design of the JVC HR-VP48U is straightforward, featuring an intuitive remote control that simplifies navigation through its various functions. The player provides accessibility options that cater to users seeking ease of use, including straightforward playback controls and a clear display panel.

The HR-VP48U is also equipped with multiple connectivity options, including composite video outputs, RF inputs, and audio outputs, allowing for seamless integration into existing home entertainment setups. This versatility ensures that users can easily connect the unit to modern TVs and audio systems, maximizing their viewing and listening experience.

In summary, the JVC HR-VP48U stands out as a reliable and feature-rich VHS player/recorder that effectively combines advanced technologies with user-friendly design. With its superior playback capabilities, robust recording features, and versatile connectivity options, it's an ideal choice for anyone looking to relive their favorite memories captured on tape while enjoying the convenience of modern functionality.