EN 11

Setting clock semiautomatically

— Semiauto Clock Set

You can change the host channel/D.S.T. /time zone setting manually.

First follow steps 1 to 3 on page 10, then go to the following steps.

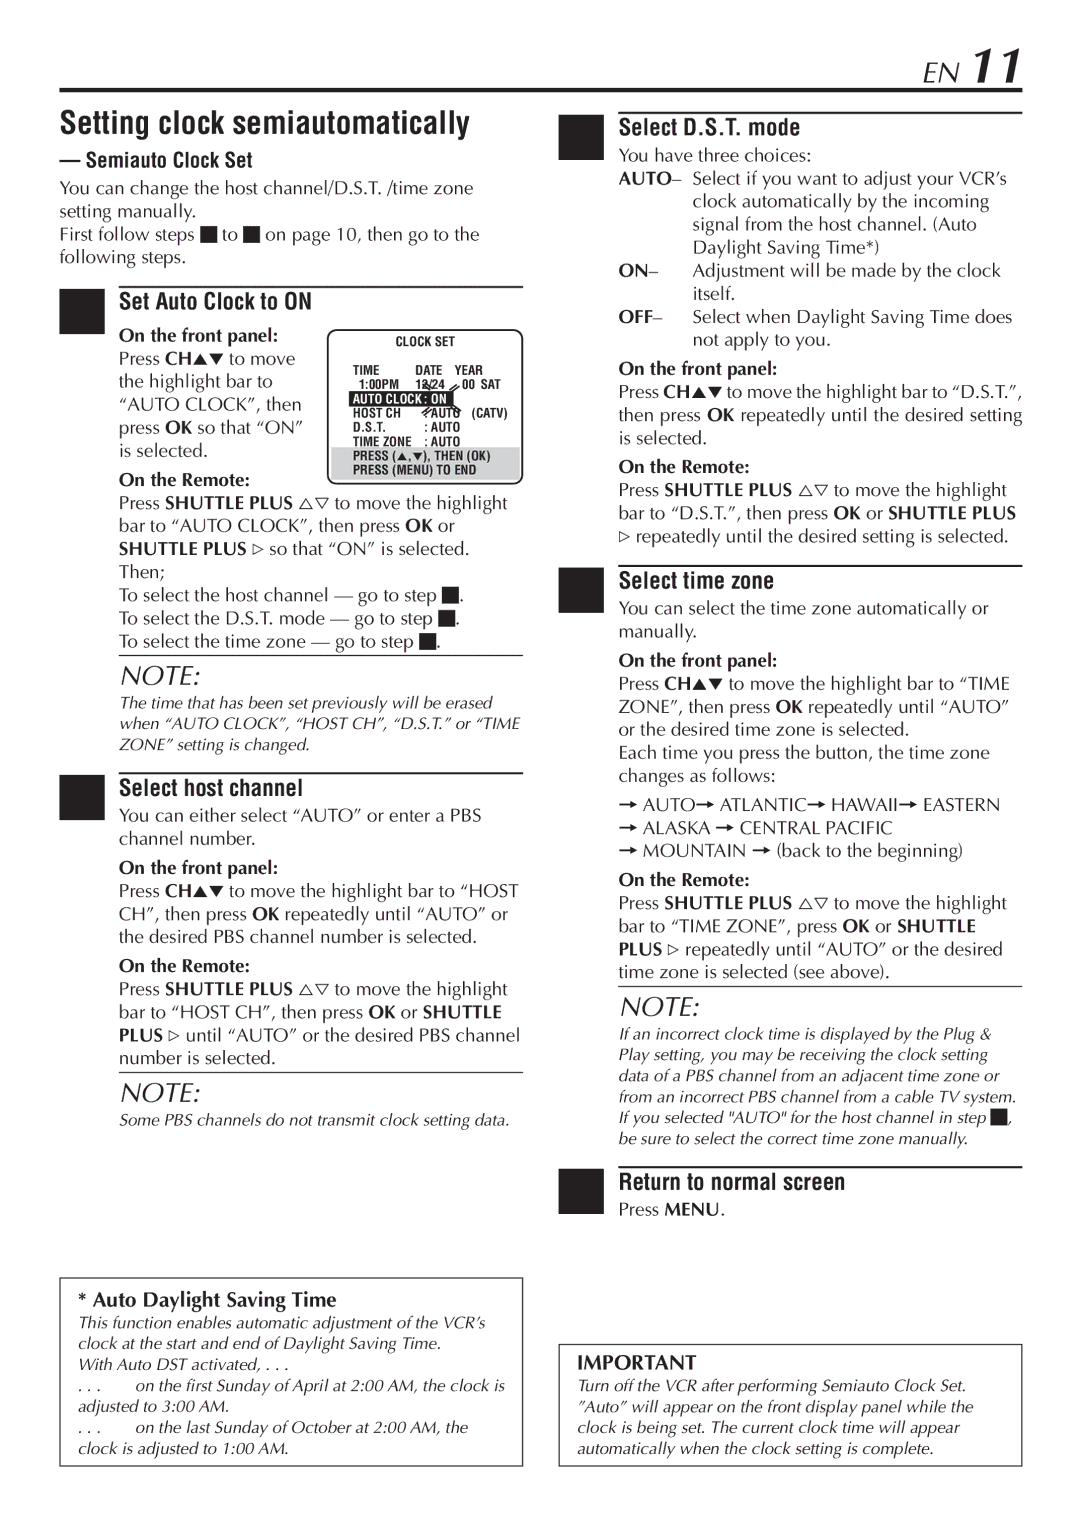
4Set Auto Clock to ON

On the front panel:

CLOCK SET


Press CHto move

TIME

DATE YEAR

the highlight bar to

1:00PM

12/24


00 SAT

“AUTO CLOCK”, then

AUTO CLOCK : ON


HOST CH

: AUTO

(CATV)

press OK so that “ON”

D.S.T.

: AUTO


is selected.

TIME ZONE

: AUTO


PRESS (5,°), THEN (OK)

6 Select D.S.T. mode You have three choices:

AUTO– Select if you want to adjust your VCR’s clock automatically by the incoming signal from the host channel. (Auto Daylight Saving Time*)

ON– Adjustment will be made by the clock itself.

OFF– Select when Daylight Saving Time does not apply to you.

On the front panel:

Press CHto move the highlight bar to “D.S.T.”, then press OK repeatedly until the desired setting is selected.

On the Remote:

PRESS (MENU) TO END

On the Remote:

Press SHUTTLE PLUS to move the highlight

Press SHUTTLE PLUS to move the highlight bar to “AUTO CLOCK”, then press OK or SHUTTLE PLUS # so that “ON” is selected. Then;

To select the host channel — go to step 5. To select the D.S.T. mode — go to step 6. To select the time zone — go to step 7.

NOTE:

The time that has been set previously will be erased when “AUTO CLOCK”, “HOST CH”, “D.S.T.” or “TIME ZONE” setting is changed.

5 Select host channel

You can either select “AUTO” or enter a PBS channel number.

On the front panel:

Press CHto move the highlight bar to “HOST CH”, then press OK repeatedly until “AUTO” or the desired PBS channel number is selected.

On the Remote:

Press SHUTTLE PLUS to move the highlight bar to “HOST CH”, then press OK or SHUTTLE PLUS # until “AUTO” or the desired PBS channel number is selected.

NOTE:

Some PBS channels do not transmit clock setting data.

* Auto Daylight Saving Time

This function enables automatic adjustment of the VCR’s clock at the start and end of Daylight Saving Time.

With Auto DST activated, . . .

. . .

on the first Sunday of April at 2:00 AM, the clock is

adjusted to 3:00 AM.

. . .

on the last Sunday of October at 2:00 AM, the

clock is adjusted to 1:00 AM.

bar to “D.S.T.”, then press OK or SHUTTLE PLUS

#repeatedly until the desired setting is selected.

7 Select time zone

You can select the time zone automatically or manually.

On the front panel:

Press CHto move the highlight bar to “TIME ZONE”, then press OK repeatedly until “AUTO” or the desired time zone is selected.

Each time you press the button, the time zone changes as follows:

=AUTO= ATLANTIC= HAWAII= EASTERN

=ALASKA = CENTRAL PACIFIC

=MOUNTAIN = (back to the beginning)

On the Remote:

Press SHUTTLE PLUS to move the highlight bar to “TIME ZONE”, press OK or SHUTTLE PLUS # repeatedly until “AUTO” or the desired time zone is selected (see above).

NOTE:

If an incorrect clock time is displayed by the Plug & Play setting, you may be receiving the clock setting data of a PBS channel from an adjacent time zone or from an incorrect PBS channel from a cable TV system. If you selected "AUTO" for the host channel in step 6, be sure to select the correct time zone manually.

8Return to normal screen

Press MENU.

IMPORTANT

Turn off the VCR after performing Semiauto Clock Set. ”Auto” will appear on the front display panel while the clock is being set. The current clock time will appear automatically when the clock setting is complete.

Page 11
Image 11
JVC HR-VP783U manual Setting clock semiautomatically, Set Auto Clock to on, Select host channel, Select time zone

HR-VP783U specifications

The JVC HR-VP783U is a remarkable VCR that encapsulates the best of video recording technology from its era. Known for its reliability and advanced features, this model was a favorite for both casual viewers and avid videophiles. Designed for versatility, the HR-VP783U supports multiple formats, allowing users to play both VHS and S-VHS tapes. This capability is essential for those who wish to enjoy a vast library of content or transfer old home videos.

One of the standout features of the HR-VP783U is its Super VHS (S-VHS) compatibility. S-VHS provides increased resolution and improved image quality compared to standard VHS, making it an excellent choice for recording and playing back high-quality video. Additionally, the VCR supports S-VHS ET, which allows users to play standard VHS tapes while still benefiting from enhanced quality in S-VHS format.

The HR-VP783U is equipped with JVC's advanced picture enhancement technologies. One notable feature is the Time Base Corrector (TBC), which helps eliminate signal irregularities, resulting in smoother and clearer picture playback. This is especially beneficial for old tapes with signs of wear and tear.

In terms of convenience, the VCR boasts a programmable timer that allows users to schedule recordings effortlessly. The easy programmable timer makes it simple to record your favorite shows while you're out, ensuring you never miss an episode. The unit also features a comprehensive remote control that provides straightforward navigation of its various functions and settings.

Connectivity is another strong point of the JVC HR-VP783U. It offers multiple input and output options, including composite video, S-Video, and audio jacks, ensuring compatibility with a range of devices. This enhanced connectivity allows users to connect to televisions, cameras, and even editing equipment with ease.

Furthermore, the HR-VP783U is designed with user-friendliness in mind, featuring an intuitive on-screen display and straightforward controls that appeal to users of all ages. With its robust build and reliable performance, the JVC HR-VP783U has earned a reputation for durability, making it a dependable choice for anyone seeking a comprehensive VCR solution. Whether for home use or professional applications, the JVC HR-VP783U remains a noteworthy model in the world of video recording.