Using the Timers
There are four timers
•Before using these timers, make sure the
Using Daily Timer and Recording Timer
You can set the timer whether the unit is on or off.
On the remote control ONLY:
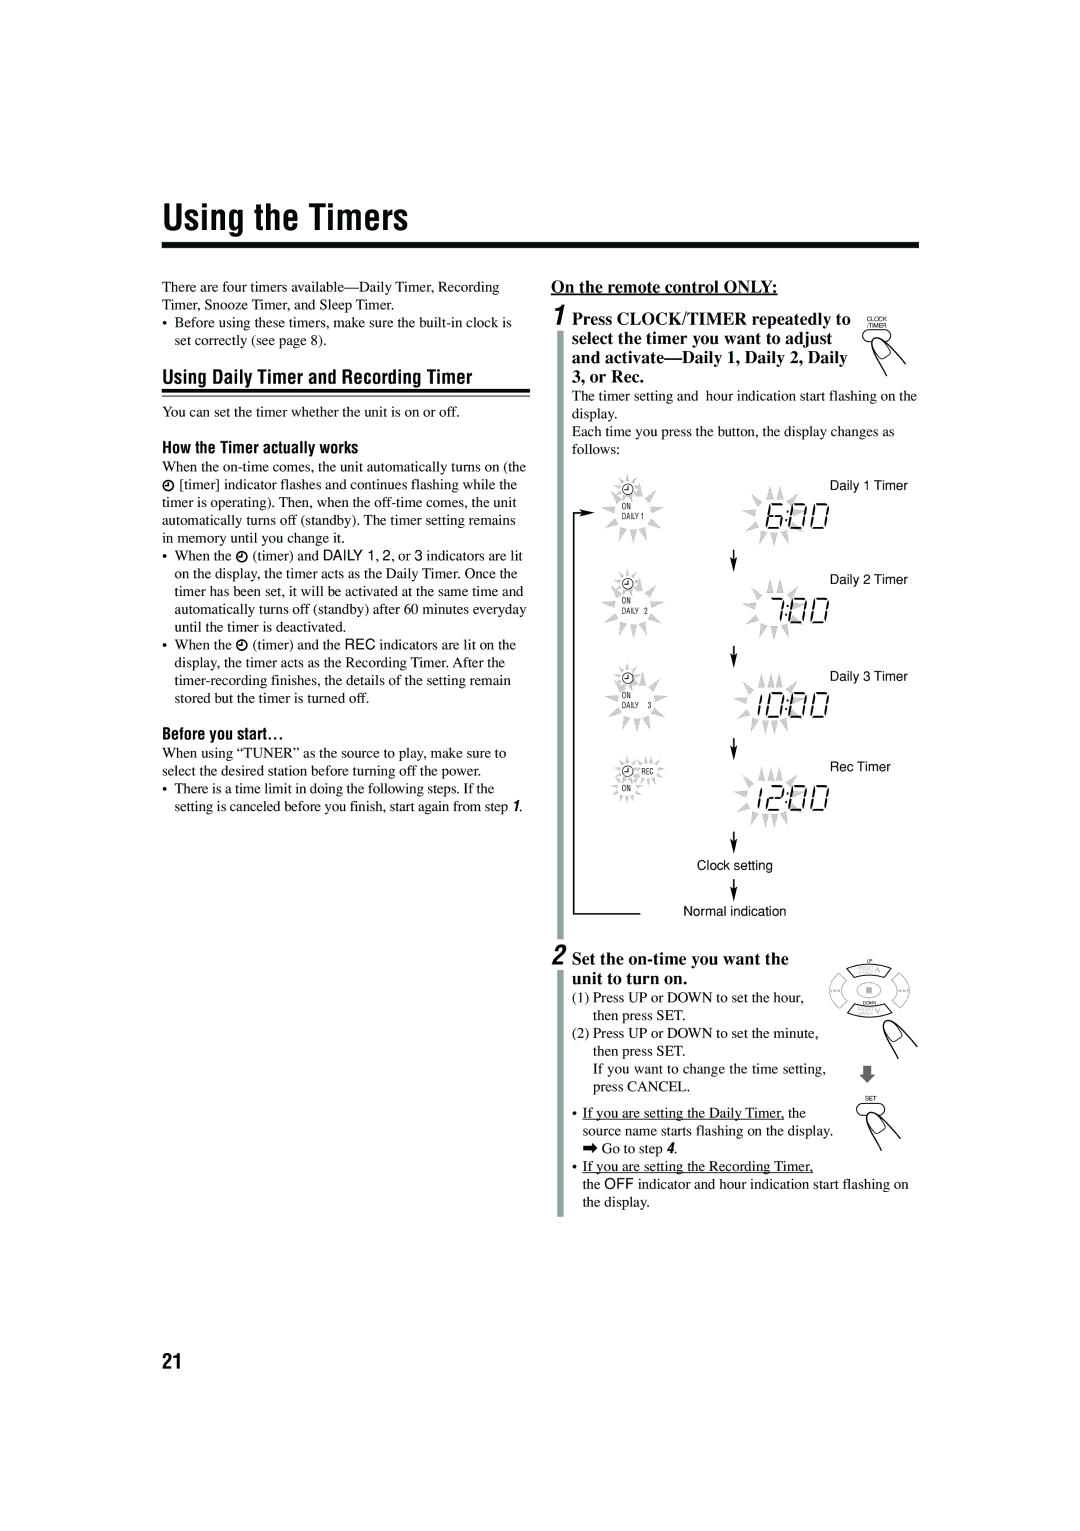
1 Press CLOCK/TIMER repeatedly to CLOCK/TIMER select the timer you want to adjust ![]()
and activate—Daily 1, Daily 2, Daily 3, or Rec.
The timer setting and hour indication start flashing on the display.
Each time you press the button, the display changes as
How the Timer actually works
When the ![]() [timer] indicator flashes and continues flashing while the timer is operating). Then, when the
[timer] indicator flashes and continues flashing while the timer is operating). Then, when the
•When the ![]() (timer) and DAILY 1, 2, or 3 indicators are lit on the display, the timer acts as the Daily Timer. Once the timer has been set, it will be activated at the same time and automatically turns off (standby) after 60 minutes everyday until the timer is deactivated.
(timer) and DAILY 1, 2, or 3 indicators are lit on the display, the timer acts as the Daily Timer. Once the timer has been set, it will be activated at the same time and automatically turns off (standby) after 60 minutes everyday until the timer is deactivated.
•When the ![]() (timer) and the REC indicators are lit on the display, the timer acts as the Recording Timer. After the
(timer) and the REC indicators are lit on the display, the timer acts as the Recording Timer. After the
Before you start...
When using “TUNER” as the source to play, make sure to select the desired station before turning off the power.
•There is a time limit in doing the following steps. If the setting is canceled before you finish, start again from step 1.
follows: |
|
ON |
|
DAILY 1 | |
ON |
|
DAILY | 2 |
ON |
|
DAILY | 3 |
| REC |
ON |
|
Clock setting
Normal indication
Daily 1 Timer
Daily 2 Timer
Daily 3 Timer
Rec Timer
2 Set the | PRESET | ||
|
| UP | |
unit to turn on. | GROUP | ||
|
|
| |
(1) Press UP or DOWN to set the hour, |
|
|
|
DOWN | |||
then press SET. | PRESET | ||
GROUP | |||
(2) Press UP or DOWN to set the minute, |
|
|
|
then press SET. |
|
|
|
If you want to change the time setting, |
|
|
|
press CANCEL. |
|
|
|
| SET | ||
• If you are setting the Daily Timer, the source name starts flashing on the display.
\ Go to step 4.
•If you are setting the Recording Timer,
the OFF indicator and hour indication start flashing on the display.
21
