MENU
6
q
CH
9
![]()
![]()
![]()
![]()
![]()
![]() 11
11![]()
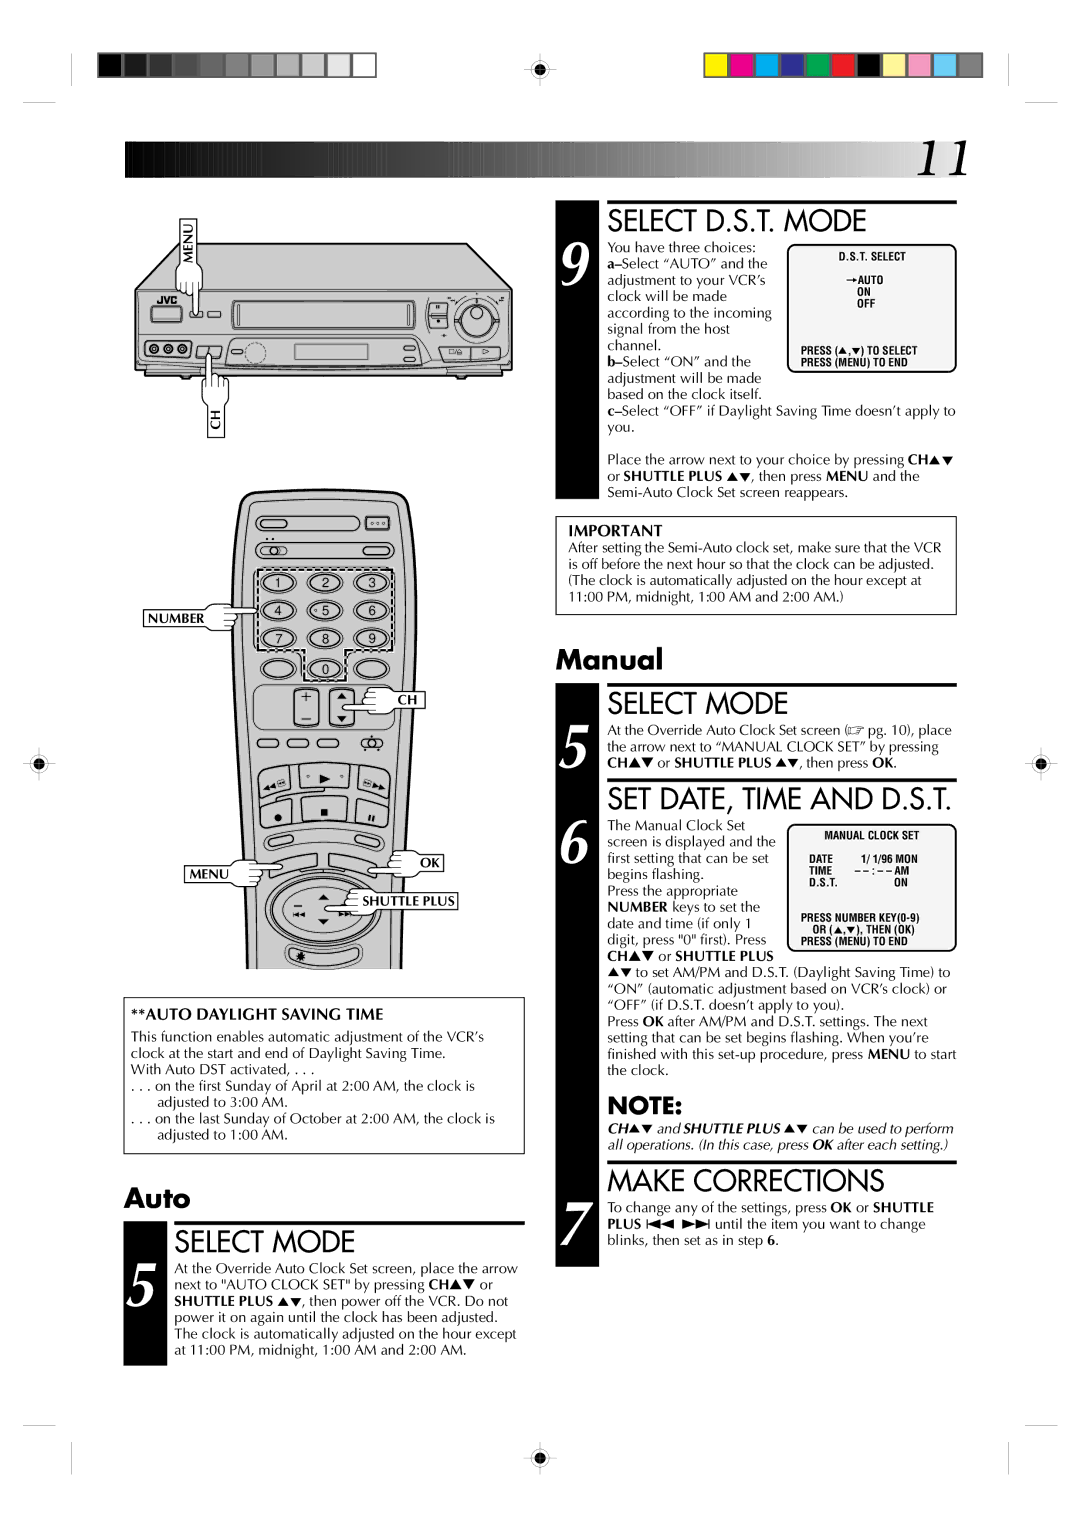
SELECT D.S.T. MODE
You have three choices:
Place the arrow next to your choice by pressing CH5° or SHUTTLE PLUS 5°, then press MENU and the
| 1 | 2 | 3 |
NUMBER | 4 | 5 | 6 |
|
|
| |
| 7 | 8 | 9 |
|
| 0 |
|
CH
OK
MENU
![]() SHUTTLE PLUS
SHUTTLE PLUS
**AUTO DAYLIGHT SAVING TIME
This function enables automatic adjustment of the VCR’s clock at the start and end of Daylight Saving Time. With Auto DST activated, . . .
. . . on the first Sunday of April at 2:00 AM, the clock is adjusted to 3:00 AM.
. . . on the last Sunday of October at 2:00 AM, the clock is adjusted to 1:00 AM.
Auto
5 |
| SELECT MODE |
| At the Override Auto Clock Set screen, place the arrow | |
| next to "AUTO CLOCK SET" by pressing CH▲▼ or | |
SHUTTLE PLUS 5°, then power off the VCR. Do not | ||
| power it on again until the clock has been adjusted. | |
| The clock is automatically adjusted on the hour except | |
| at 11:00 PM, midnight, 1:00 AM and 2:00 AM. | |
|
|
|
IMPORTANT
After setting the
Manual
5 |
| SELECT MODE |
|
| |
| At the Override Auto Clock Set screen (☞ pg. 10), place | ||||
| the arrow next to “MANUAL CLOCK SET” by pressing | ||||
| CH▲▼ or SHUTTLE PLUS | 5 | , then press OK. | ||
|
| ° |
|
| |
6 |
| SET DATE, TIME AND D.S.T. | |||
| The Manual Clock Set |
| MANUAL CLOCK SET | ||
| screen is displayed and the | ||||
|
|
| |||
| first setting that can be set |
| DATE | 1/ 1/96 MON | |
|
| TIME | – | ||
|
| begins flashing. |
| D.S.T. | ON |
|
| Press the appropriate |
| ||
|
|
|
|
| |
|
| NUMBER keys to set the |
| PRESS NUMBER | |
|
| date and time (if only 1 |
| ||
|
|
| OR (5,°), THEN (OK) | ||
|
| digit, press "0" first). Press |
| ||
|
|
| PRESS (MENU) TO END | ||
|
| CH▲▼ or SHUTTLE PLUS |
|
|
|
| 5° to set AM/PM and D.S.T. (Daylight Saving Time) to | ||||
|
| “ON” (automatic adjustment based on VCR’s clock) or | |||
|
| “OFF” (if D.S.T. doesn’t apply to you). |
| ||
|
| Press OK after AM/PM and D.S.T. settings. The next | |||
|
| setting that can be set begins flashing. When you’re | |||
|
| finished with this | |||
|
| the clock. |
|
|
|
|
| NOTE: |
|
|
|
|
| CH5° and SHUTTLE PLUS 5° can be used to perform | |||
|
| all operations. (In this case, press OK after each setting.) | |||
|
|
| |||
7 |
| MAKE CORRECTIONS | |||
| To change any of the settings, press OK or SHUTTLE | ||||
PLUS ª£ until the item you want to change | |||||
blinks, then set as in step 6. |
|
| |||
|
|
|
|
|
|