Continued

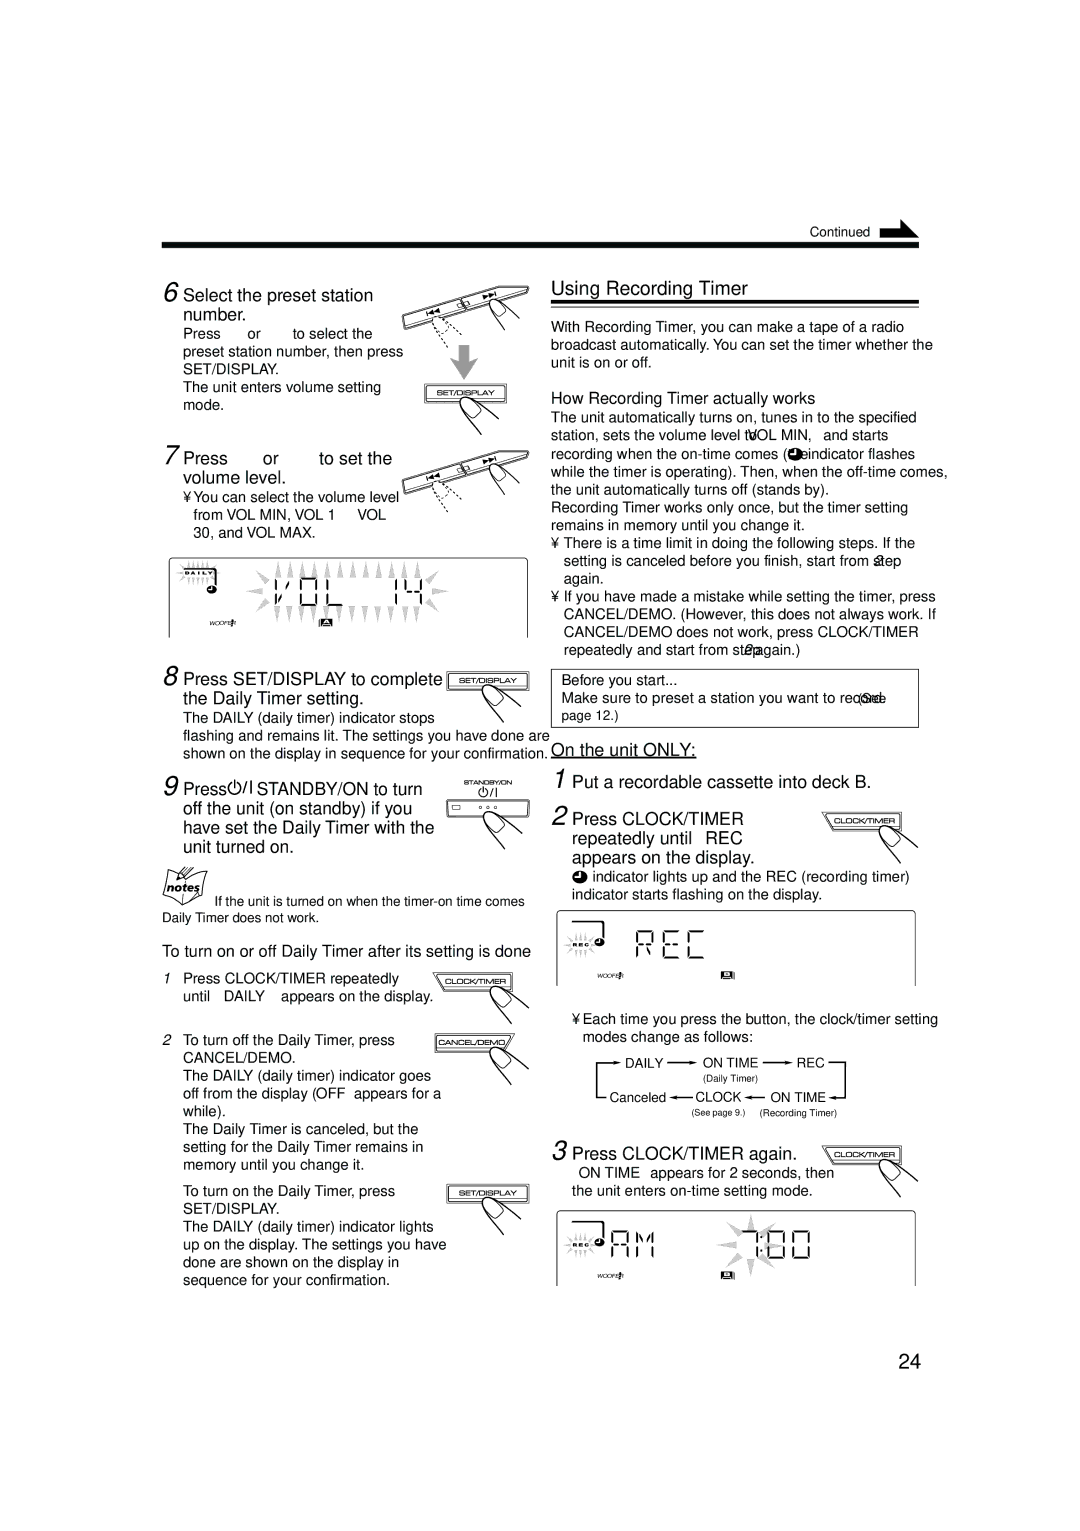
6 Select the preset station number.

Press ¢ or 4 to select the preset station number, then press

SET/DISPLAY.

The unit enters volume setting mode.

7 Press ¢or 4to set the volume level.

You can select the volume level from VOL MIN, VOL 1 — VOL 30, and VOL MAX.

WOOFER

8 Press SET/DISPLAY to complete the Daily Timer setting.

The DAILY (daily timer) indicator stops

flashing and remains lit. The settings you have done are shown on the display in sequence for your confirmation.

9 Press STANDBY/ON to turn off the unit (on standby) if you have set the Daily Timer with the unit turned on.

If the unit is turned on when the timer-on time comes

Daily Timer does not work.

To turn on or off Daily Timer after its setting is done

1 Press CLOCK/TIMER repeatedly until “DAILY” appears on the display.

2 To turn off the Daily Timer, press

CANCEL/DEMO.

The DAILY (daily timer) indicator goes off from the display (“OFF” appears for a while).

The Daily Timer is canceled, but the setting for the Daily Timer remains in memory until you change it.

To turn on the Daily Timer, press

SET/DISPLAY.

The DAILY (daily timer) indicator lights up on the display. The settings you have done are shown on the display in sequence for your confirmation.

Using Recording Timer

With Recording Timer, you can make a tape of a radio broadcast automatically. You can set the timer whether the unit is on or off.

How Recording Timer actually works

The unit automatically turns on, tunes in to the specified station, sets the volume level to “VOL MIN,” and starts recording when the on-time comes (the indicator flashes while the timer is operating). Then, when the off-time comes, the unit automatically turns off (stands by).

Recording Timer works only once, but the timer setting remains in memory until you change it.

There is a time limit in doing the following steps. If the setting is canceled before you finish, start from step 2 again.

If you have made a mistake while setting the timer, press CANCEL/DEMO. (However, this does not always work. If CANCEL/DEMO does not work, press CLOCK/TIMER repeatedly and start from step 2 again.)

Before you start...

Make sure to preset a station you want to record. (See

page 12.)

On the unit ONLY:

1 Put a recordable cassette into deck B.

2 Press CLOCK/TIMER repeatedly until “REC” appears on the display.

indicator lights up and the REC (recording timer) indicator starts flashing on the display.

WOOFER

Each time you press the button, the clock/timer setting modes change as follows:

DAILY ON TIME REC

(Daily Timer)

Canceled CLOCK ON TIME

(See page 9.) (Recording Timer)

3 Press CLOCK/TIMER again.

“ON TIME” appears for 2 seconds, then the unit enters on-time setting mode.

WOOFER

24

Page 27
Image 27
JVC MX-GB5C manual Using Recording Timer, Select the preset station number, Press ¢or 4to set the volume level

MX-GB5C specifications

The JVC MX-GB5C is a versatile and powerful mini stereo system that brings a robust audio experience to any environment. Designed for music lovers who appreciate high-quality sound, this model combines functionality, style, and advanced technologies.

One of the standout features of the MX-GB5C is its impressive sound output. With a compact design, it packs a punch with a total power output of 80 watts RMS. This enables users to enjoy rich bass and clear treble, enhancing the listening experience. The system is equipped with a high-performance speaker system that ensures sound quality is never compromised, no matter the genre of music.

The MX-GB5C supports multiple audio sources, catering to a variety of preferences. It comes with a CD player that reads various formats, including CD-R and CD-RW. This ensures compatibility with a wide range of audio discs for those who still enjoy physical media. Additionally, the system includes a built-in FM/AM tuner, allowing users to access their favorite radio stations easily.

In the digital age, connectivity is crucial, and the JVC MX-GB5C excels in this area. It features Bluetooth technology, enabling users to wirelessly stream music from their smartphones, tablets, or other compatible devices. This seamless integration enhances the versatility of the system and makes it easy to enjoy a personal playlist without the hassle of wires.

For those who enjoy listening to music from USB drives, the MX-GB5C includes a USB port. This allows for easy playback of digital music files, supporting various file formats for convenience. Moreover, the system features an auxiliary input, ensuring compatibility with a wider range of external audio devices.

The design of the MX-GB5C is both sleek and functional, making it an attractive addition to any room. Its compact size means it can fit comfortably on shelves or countertops without taking up too much space while not sacrificing audio quality.

Overall, the JVC MX-GB5C is a mini stereo system that combines powerful sound, modern connectivity, and user-friendly features. Whether it's for everyday use, parties, or casual listening, it caters to various audio needs, making it a great investment for any music enthusiast looking for quality and convenience in one package.