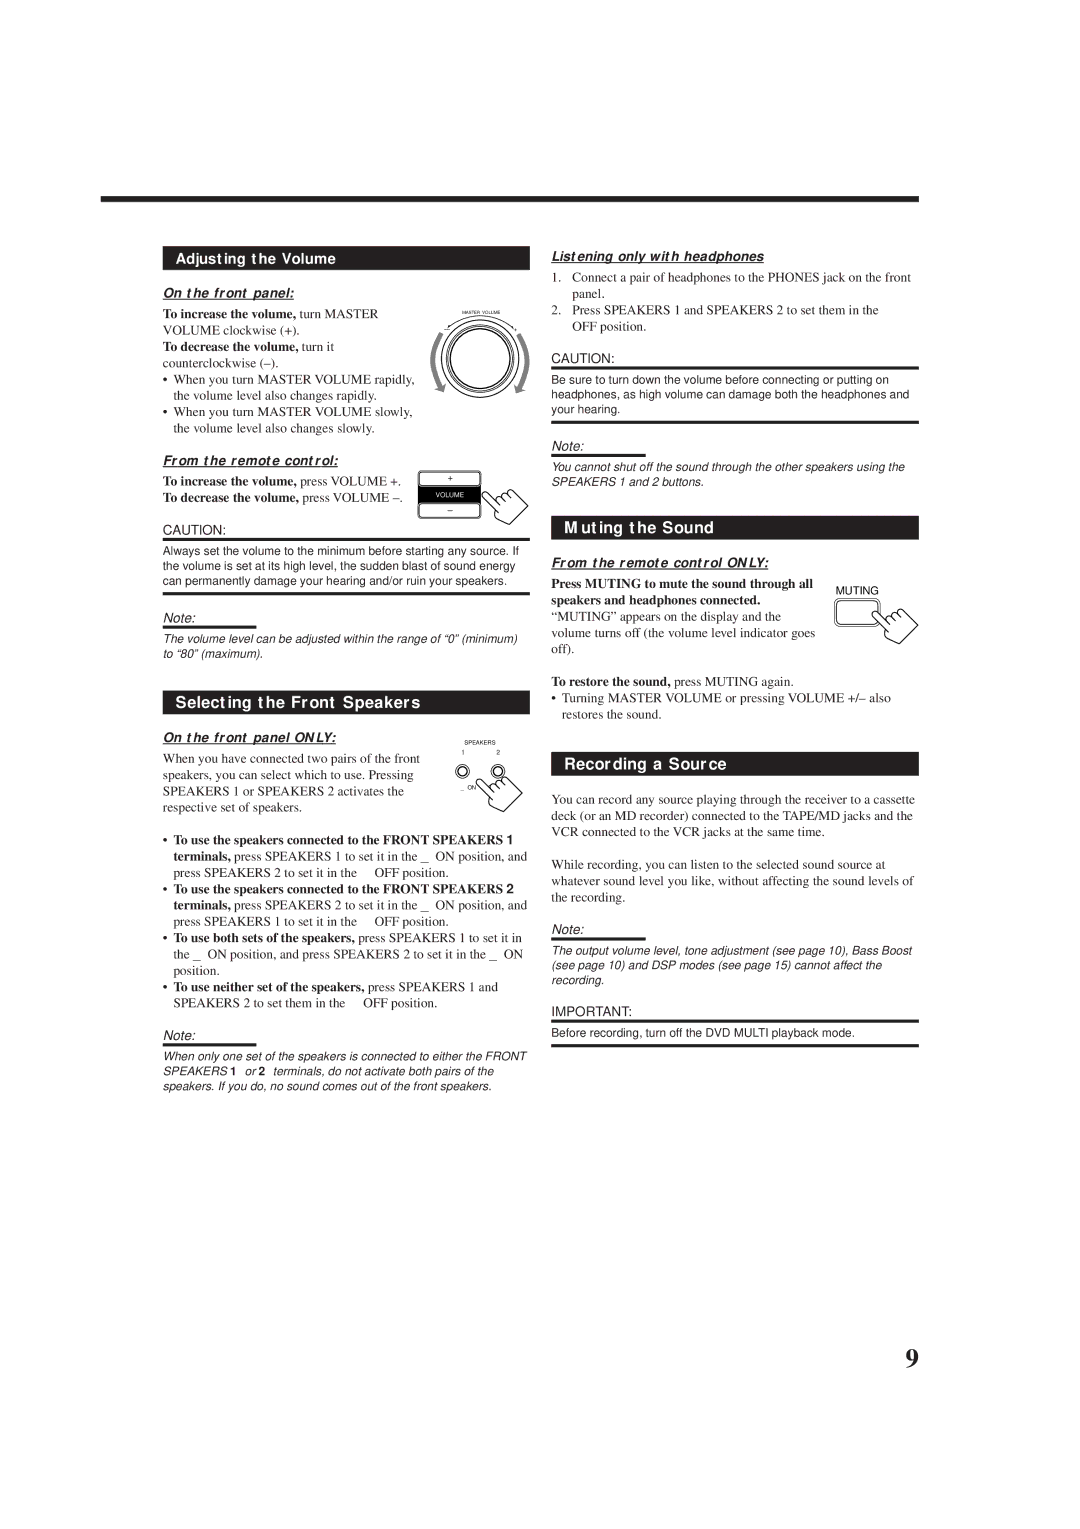
Adjusting the Volume

Listening only with headphones

On the front panel:

To increase the volume, turn MASTER VOLUME clockwise (+).

To decrease the volume, turn it counterclockwise (–).

When you turn MASTER VOLUME rapidly, the volume level also changes rapidly.

When you turn MASTER VOLUME slowly, the volume level also changes slowly.

From the remote control:

To increase the volume, press VOLUME +. To decrease the volume, press VOLUME –.

CAUTION:

MASTER VOLUME

+

+

VOLUME

1.Connect a pair of headphones to the PHONES jack on the front panel.

2.Press SPEAKERS 1 and SPEAKERS 2 to set them in the Ñ OFF position.

CAUTION:

Be sure to turn down the volume before connecting or putting on headphones, as high volume can damage both the headphones and your hearing.

Note:

You cannot shut off the sound through the other speakers using the SPEAKERS 1 and 2 buttons.

Muting the Sound

Always set the volume to the minimum before starting any source. If the volume is set at its high level, the sudden blast of sound energy can permanently damage your hearing and/or ruin your speakers.

From the remote control ONLY:

Press MUTING to mute the sound through all speakers and headphones connected.

MUTING

Note:

The volume level can be adjusted within the range of “0” (minimum) to “80” (maximum).

Selecting the Front Speakers

On the front panel ONLY:

SPEAKERS


When you have connected two pairs of the front

1

2


speakers, you can select which to use. Pressing

SPEAKERS 1 or SPEAKERS 2 activates the

_ ON Ñ OFF


respective set of speakers.


To use the speakers connected to the FRONT SPEAKERS 1 terminals, press SPEAKERS 1 to set it in the _ON position, and press SPEAKERS 2 to set it in the ÑOFF position.

To use the speakers connected to the FRONT SPEAKERS 2 terminals, press SPEAKERS 2 to set it in the _ON position, and press SPEAKERS 1 to set it in the ÑOFF position.

To use both sets of the speakers, press SPEAKERS 1 to set it in the _ON position, and press SPEAKERS 2 to set it in the _ON position.

To use neither set of the speakers, press SPEAKERS 1 and SPEAKERS 2 to set them in the ÑOFF position.

Note:

When only one set of the speakers is connected to either the FRONT SPEAKERS 1 or 2 terminals, do not activate both pairs of the speakers. If you do, no sound comes out of the front speakers.

“MUTING” appears on the display and the volume turns off (the volume level indicator goes off).

To restore the sound, press MUTING again.

Turning MASTER VOLUME or pressing VOLUME +/– also restores the sound.

Recording a Source

You can record any source playing through the receiver to a cassette deck (or an MD recorder) connected to the TAPE/MD jacks and the VCR connected to the VCR jacks at the same time.

While recording, you can listen to the selected sound source at whatever sound level you like, without affecting the sound levels of the recording.

Note:

The output volume level, tone adjustment (see page 10), Bass Boost (see page 10) and DSP modes (see page 15) cannot affect the recording.

IMPORTANT:

Before recording, turn off the DVD MULTI playback mode.

9

Page 11
Image 11
JVC RX-5000VBK manual Muting the Sound, Selecting the Front Speakers, Recording a Source

RX-5000VBK specifications

The JVC RX-5000VBK is a powerful and versatile audio receiver that offers a rich set of features for both home theater enthusiasts and casual listeners. This unit is designed to deliver excellent sound quality, impressive connectivity options, and user-friendly operation.

One of the standout features of the RX-5000VBK is its ability to deliver high-fidelity audio with clarity and depth, making it an ideal choice for those who value sound quality. With an output of 100 watts per channel, this receiver can drive a variety of speakers, ensuring that users get the best possible performance whether they are enjoying music or watching movies.

The RX-5000VBK integrates advanced surround sound processing capabilities, supporting formats like Dolby Digital and DTS. This processing allows users to experience immersive audio, bringing movies and music to life in a way that's rich and engaging. The unit also includes a built-in equalizer, which allows users to customize their listening experience by adjusting bass and treble settings to their preference.

Connectivity is another strong point of the JVC RX-5000VBK. The receiver comes equipped with multiple HDMI inputs that support 4K video pass-through, enabling users to connect their favorite devices such as Blu-ray players, gaming consoles, and streaming devices without sacrificing video quality. Additionally, there are various analog and digital audio inputs, including optical and coaxial options, making it easy to connect vintage components as well.

The user interface of the RX-5000VBK is designed for simplicity, featuring an intuitive layout that makes it easy to navigate through settings and modes. The included remote control enhances this convenience, allowing users to make adjustments from the comfort of their seating area. Furthermore, the receiver features a built-in AM/FM tuner with programmable presets, enabling users to enjoy their favorite radio stations with ease.

The design of the RX-5000VBK is both stylish and functional, featuring a sleek black finish that can fit well with any home décor. The unit’s compact form factor ensures it can be integrated into various home setups without taking up too much space.

In summary, the JVC RX-5000VBK is a feature-rich audio receiver that excels in delivering high-quality sound, versatile connectivity options, and user-friendly operation. With its combination of advanced technologies and thoughtful design, it stands as an excellent choice for anyone looking to enhance their audio experience at home.