
RX-5030VBK specifications
The JVC RX-5030VBK is a remarkable stereo receiver that exemplifies quality and versatility, catering to both music enthusiasts and casual listeners. Launched as part of JVC's esteemed audio line-up, this model combines classic design with modern technology to deliver powerful audio performance.One of the key features of the RX-5030VBK is its robust power output. The receiver boasts 100 watts per channel, ensuring that it can drive a wide range of speakers and fill any room with rich, immersive sound. This level of power is essential for providing clear audio even at higher volumes, making it suitable for everything from relaxed listening sessions to lively gatherings.
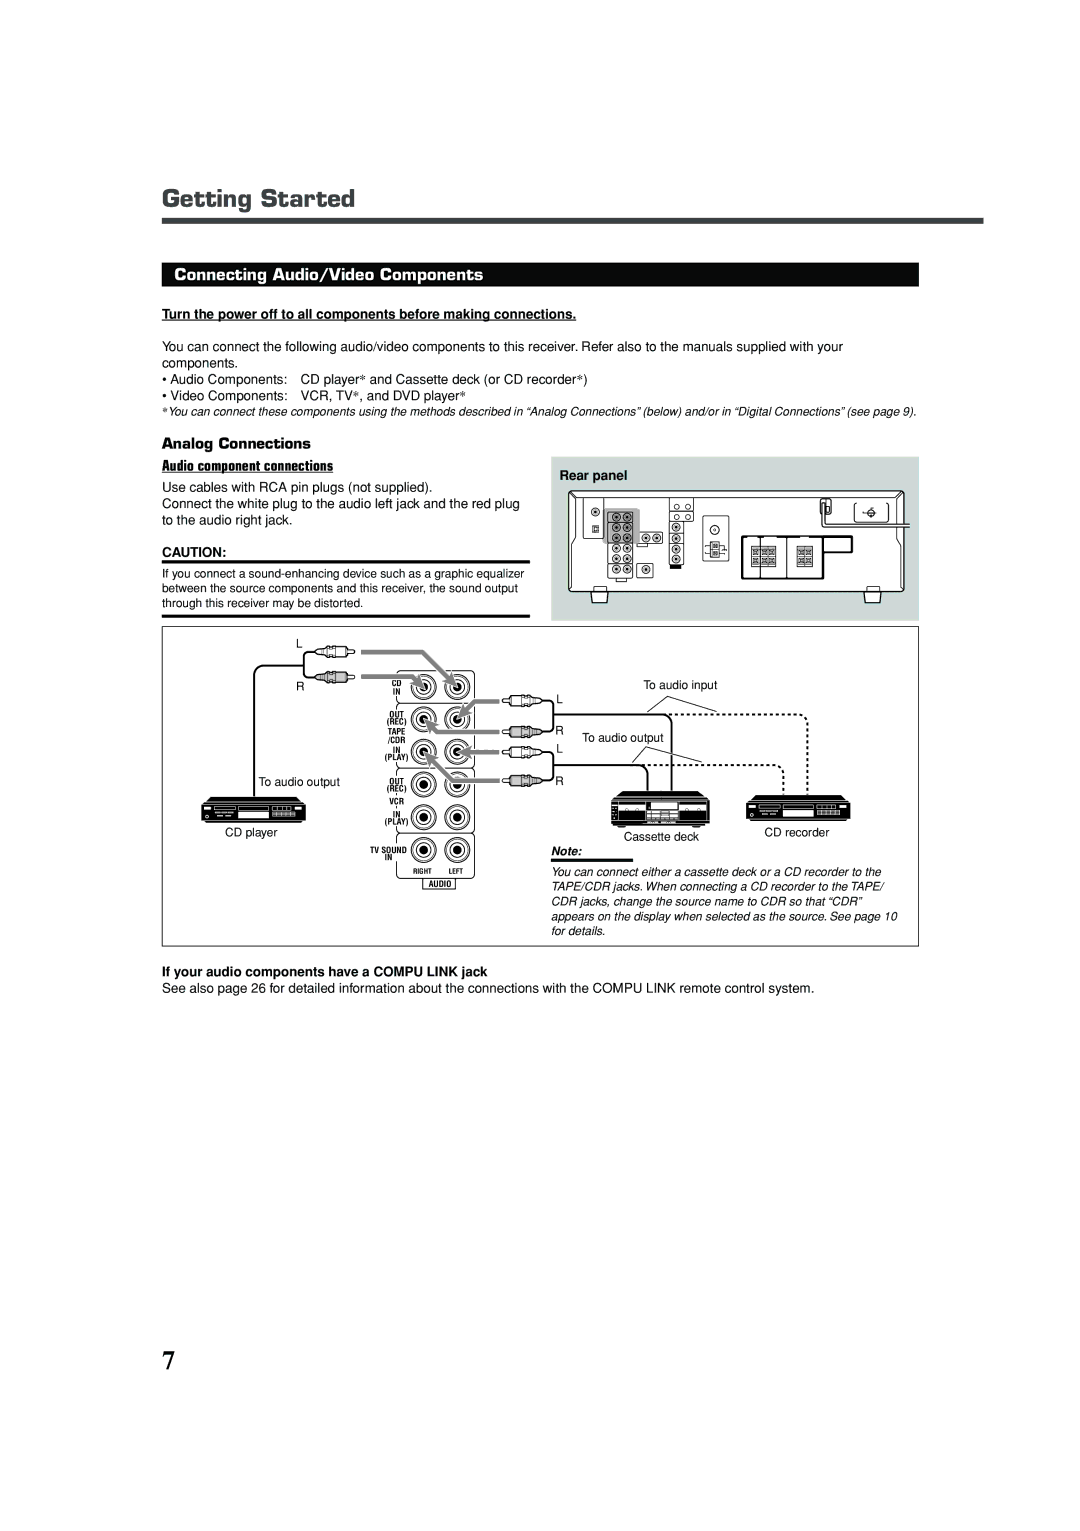
The RX-5030VBK also includes a variety of connectivity options, allowing for seamless integration with multiple audio sources. It features multiple stereo inputs, including phono, which is a bonus for vinyl lovers who appreciate the warmth and depth of analog sound. Additionally, the device includes inputs for CD players, cassette decks, and other auxiliary devices, making it a versatile addition to any home audio setup.
Modern technology is also present in this receiver with its built-in AM/FM tuner, giving users access to a wide range of radio stations. The digital tuner offers easy station tuning and preset memory options, ensuring quick access to favorite channels. Furthermore, the receiver is designed with user-friendly controls, making navigation straightforward, even for those who may not be tech-savvy.
Another standout characteristic is the RX-5030VBK's functionality with home theater systems. This stereo receiver can enhance the audio experience when paired with compatible surround sound setups, offering a more immersive experience for movies and games. Its versatility makes it an ideal choice for those looking to enhance their entertainment systems without needing multiple separate components.
In conclusion, the JVC RX-5030VBK showcases a harmonious blend of power, versatility, and user-friendliness. With its impressive sound output, multiple connectivity options, and modern features, it stands out as a reliable choice for anyone seeking to elevate their audio experience. Whether you're spinning vinyl, tuning into your favorite radio station, or enjoying a movie night, the RX-5030VBK delivers quality sound that meets a variety of listening needs.