Manuals
/
JVC
/
Home Audio
/
Stereo System
JVC
RX-6018VBK
manual
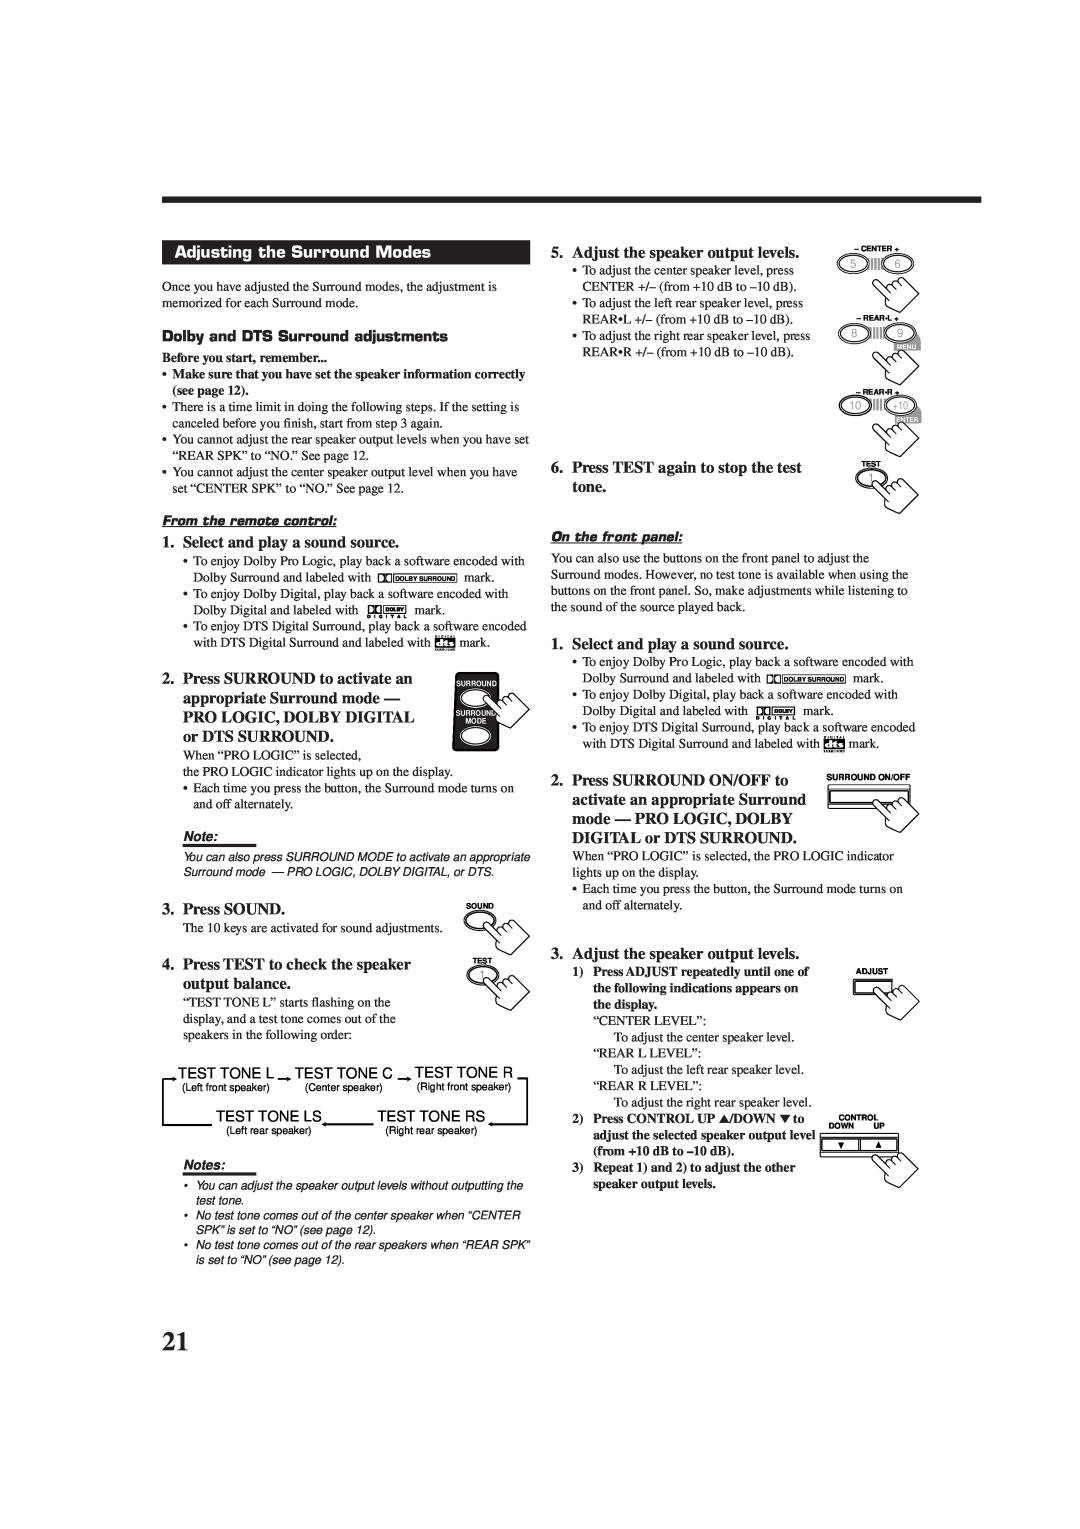
Adjusting the Surround Modes, Adjust the speaker output levels
Models:
RX-6018VBK
1
24
36
36
Download
36 pages
15.05 Kb
21
22
23
24
25
26
27
28
Troubleshooting
Specification
Install
Attenuating the Input Signal
Basic connecting procedure
Warranty
To tune in a preset station
Accessories
Adjusting the Surround Modes
Tuning in Stations Manually
Page 24
Image 24
Page 23
Page 25
Page 24
Image 24
Page 23
Page 25
Contents
POWER
RX-6010VBK / RX-6018VBK
AUDIO/VIDEO CONTROL RECEIVER
INSTRUCTIONS
Caution --POWER switch
Attention --Commutateur POWER
Warnings, Cautions and Others
WARNING TO REDUCE THE RISK OF FIRE
For Canada/pour Le Canada
For Canada/pour le Canada
For U.S.A
Caution Proper Ventilation
Table of Contents
Basic Settings
Using the DSP Modes
COMPU LINK Remote Control System
Parts Identification
Remote Control
q w e r t y
1 2 3 4 5 6 7 8 9 p
Before Installation
Checking the Supplied Accessories
Connecting the FM and AM Antennas
Getting Started
Connecting the Speakers
Basic connecting procedure
Connecting the front speakers
Connecting the rear and center speakers
Connecting Audio/Video Components
Connecting the subwoofer speaker
Powered subwoofer
Audio component connections
Video component connections
DVD player
To audio
output
Connecting the Power Cord
Putting Batteries in the Remote Control
Digital connections
CAUTIONS
Turning the Power On and Off Standby
Basic Operations
S.WFR LFE LS S RS
From the remote control
Listening Only with Headphones
Muting the Sound
Adjusting the Volume
From the remote control
Adjusting the Subwoofer Output Level
Adjusting the Tone
Attenuating the Input Signal
Basic Settings
Setting the Subwoofer Information
Adjusting the Front Speaker Output Balance
Recording a Source
Setting the Speakers for the DSP Modes
1. Press SETTING repeatedly until
1. Press SETTING repeatedly until
Digital Input DIGITAL IN Terminal Setting
Selecting the Analog or Digital Input Mode
1. Press SETTING repeatedly until
Storing the Basic Settings and Adjustments
Using the Sleep Timer
From the remote control ONLY
From the remote control
Tuning in Stations Manually
Using Preset Tuning
Receiving Radio Broadcasts
To tune in a preset station
From the remote control
Selecting the FM Reception Mode
On the front panel
Using the DSP Modes
What are the DSP Modes?
Surround modes
Dolby Surround Dolby Digital and Dolby Pro Logic
Reproducing the Sound Field
DAP modes
Available DSP modes according to the input mode
Available DSP modes
By pressing DSP MODE
By pressing SURROUND MODE
To activate the Surround
Adjusting the Surround Modes
5.Adjust the speaker output levels
1. Press SURROUND MODE
repeatedly until “THEATER”
appears on the display
JVC Theater Surround adjustments
Adjusting the DAP Modes
on the display
Activating the DSP Modes
1. Press SURROUND ON/OFF
COMPU LINK Remote Control System
Automatic Source Selection
Synchronized Recording
Operating JVC’s Audio/Video Components
Operating Audio Components
Tuner
Sound control section Amplifier
Operating Video Components
CD changer
Cassette deck
CD recorder
Troubleshooting
PROBLEM
SOLUTION
POSSIBLE CAUSE
Specifications
100 W per channel, min. RMS, driven into 8 Ω
40 Hz to 20 kHz with no more than 0.8% total
harmonic distortion
FM tuner IHF
AM tuner
General
JVC SERVICE & ENGINEERING COMPANY OF AMERICA
HOW TO LOCATE YOUR JVC SERVICE CENTER
QUALITYSERVICE
FACTORY SERVICE CENTER LOCATIONS
LIMITED WARRANTY AUDIO-2
0101NHMMDWJEIN
VICTOR COMPANY OF JAPAN, LIMITED
Top
Page
Image
Contents