
RX-DV3SL specifications
The JVC RX-DV3SL is a versatile and compact Home Theater Receiver designed to enhance your audio-visual experience. This model stands out for its remarkable sound quality and user-friendly features, making it an ideal choice for both casual listeners and serious audiophiles.One of the main features of the RX-DV3SL is its powerful amplification system, which delivers clear and dynamic audio performance. With a total power output of around 100 watts per channel, it ensures that you can enjoy movies and music with rich soundscapes that fill your room. The receiver is equipped with a high-efficiency digital amplifier, which not only provides robust output but also contributes to energy savings.
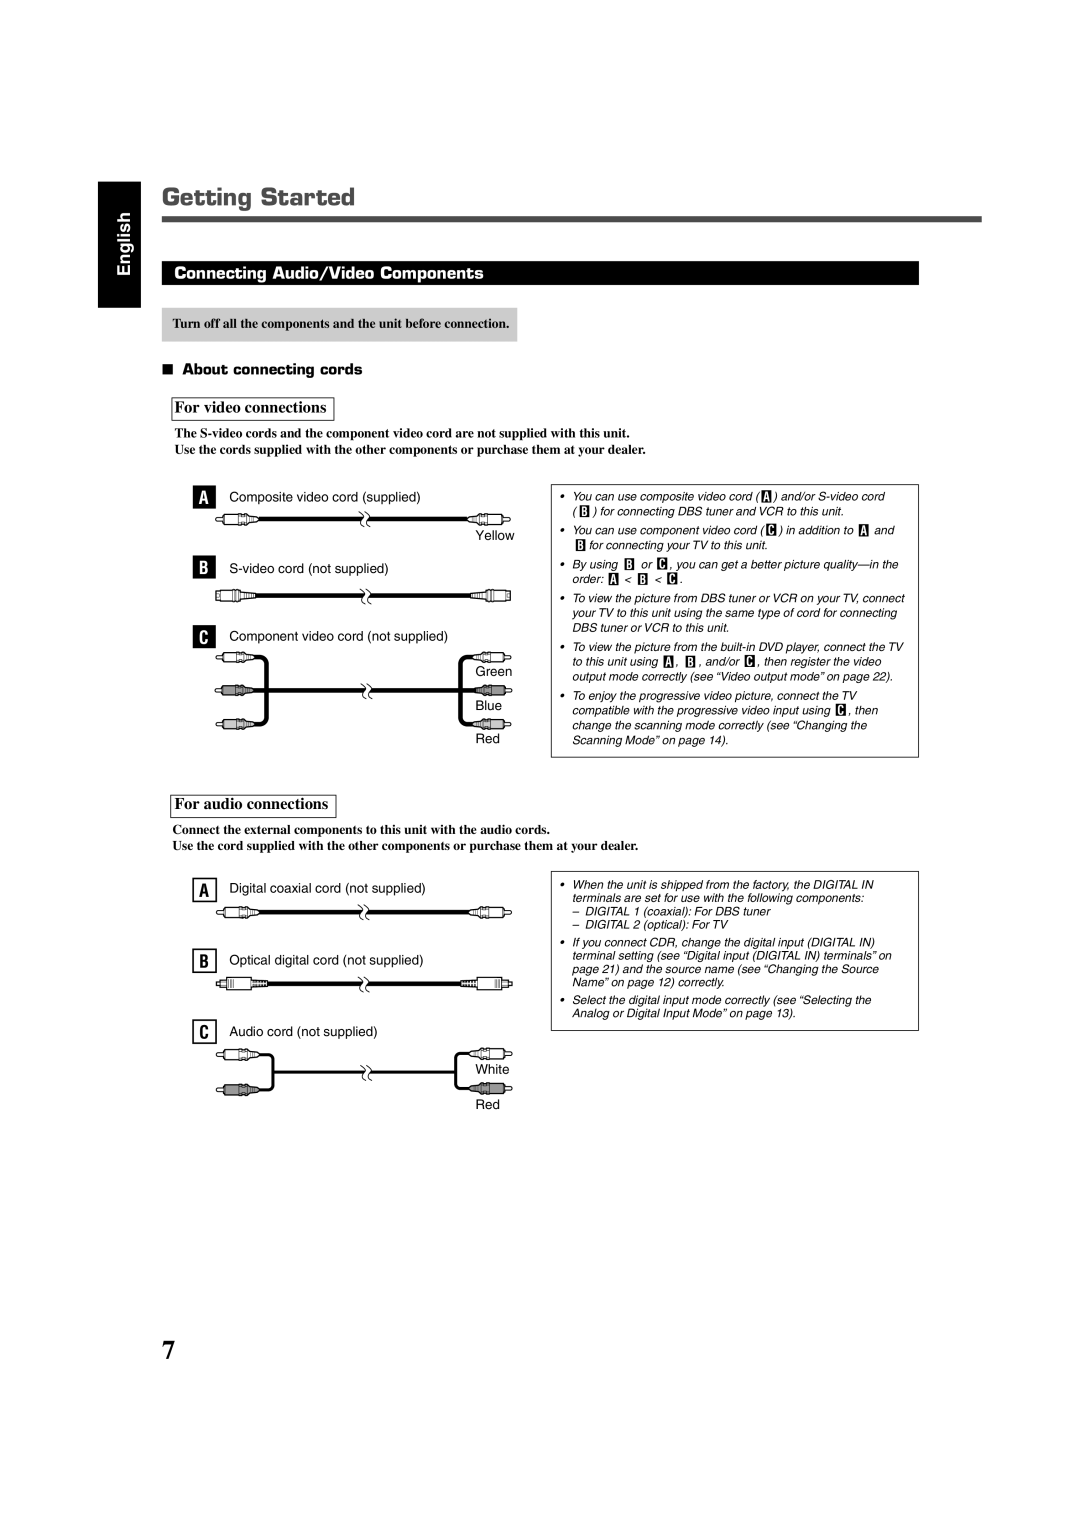
The RX-DV3SL supports multiple audio formats, including Dolby Digital and DTS, allowing for an immersive surround sound experience. The receiver features multiple inputs, including HDMI, optical, and coaxial connections, making it compatible with a wide range of modern devices such as Blu-ray players, gaming consoles, and streaming devices. The inclusion of HDMI inputs also ensures high-definition audio and video transfer, providing a seamless connection to your television.
Another impressive characteristic of the RX-DV3SL is its built-in AM/FM tuner, enabling users to listen to their favorite radio stations with clarity and ease. Additionally, the receiver features an intuitive on-screen menu system that simplifies setup and navigation, allowing users to access settings and features effortlessly.
The RX-DV3SL boasts an elegant and sleek design, perfectly fitting into any home theater setup. It comes with a remote control, offering convenience and ease of operation from a distance. Furthermore, the receiver is built with quality components to ensure longevity and reliability over time.
In terms of connectivity, the RX-DV3SL includes multiple speaker outputs, allowing for versatile setup options like bi-wiring or connecting additional subwoofers. This flexibility enables users to tailor their audio experience according to personal preferences and room acoustics.
In summary, the JVC RX-DV3SL is a feature-packed home theater receiver that combines powerful performance, connectivity, and user-friendly technology. Whether you're watching movies, playing video games, or enjoying your favorite music, the RX-DV3SL delivers an exceptional audio experience, making it a fantastic addition to any home entertainment system.