26
Two types of cassette tapes can be recorded onto, including
normal (Type I), and High position (Type II) tapes. These
types are identified automatically by the cassette deck unit
and the recording level is also corrected automatically.
Neither volume level nor sound effects during playback does
affect to the recording.
IMPORTANT:
• It should be noted that it may be unlawful to pre-
recorded tapes, records, or discs without the consent
of the owner of copy right in the sound or video
recording, broadcast or cable program and in any
literary, dramatic, or artistic embodied therein.
Manual Recording onto a Tape
1
Select one of the recording sources — FM/AM
broadcasts, CD, or other external equipment.
• To record FM/AM broadcasts, receive a station with
Tuner unit.
• To record a CD or its tracks programed, set the play-
pause mode for CD unit.
• To record from an external equipment connected to
ANALOG IN jacks, prepare it as required.
Make sure to select a source first, otherwise you
cannot use recording function.
2
Place a recordable tape with the side you want to
record facing up.
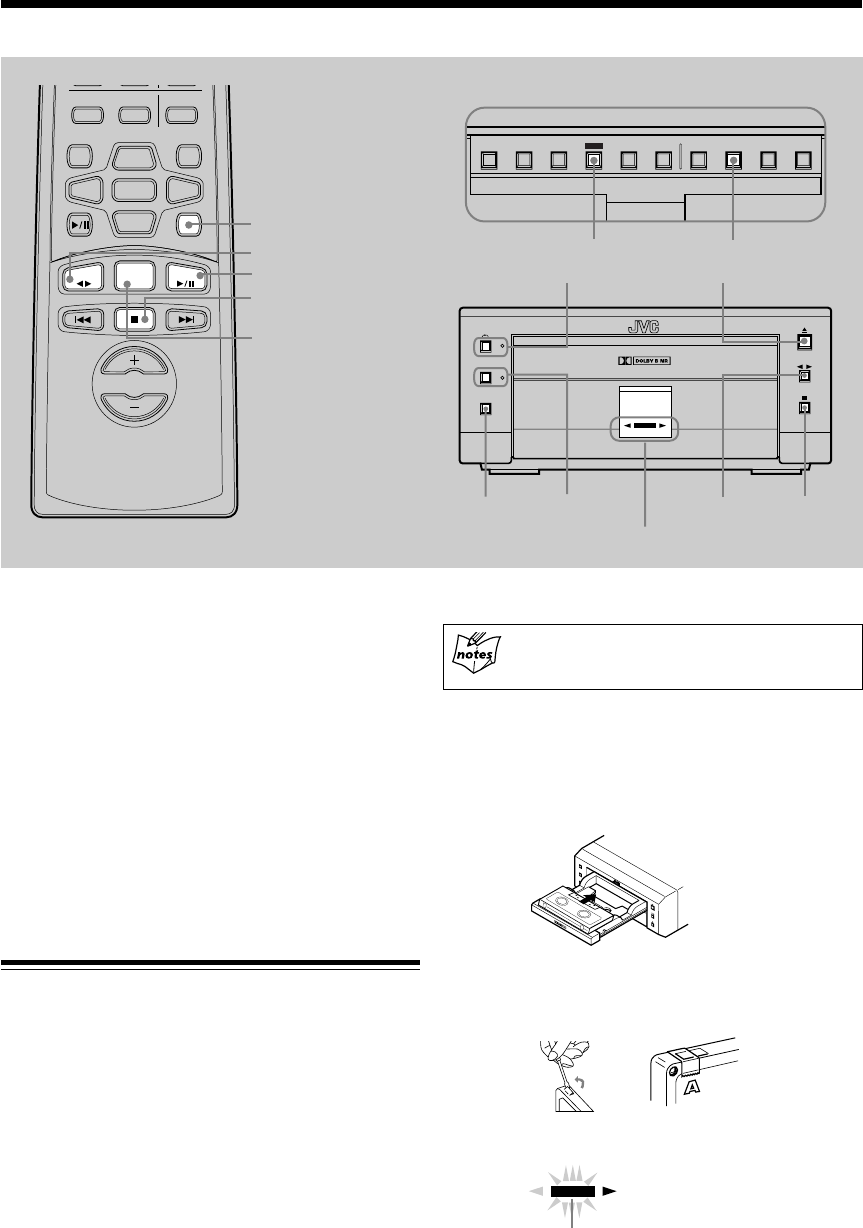
Press 0 (open/close) button on the cassette deck unit to
open the tape tray; place a tape on it; and press 0 (open/
close) button again to close it.
• You cannot record onto the tape without a protect tab.
When using that tape, cover the hole for desired side
with adhesive tape.
3
Press REC PAUSE button on the cassette deck unit.
Recording onto a Tape
REC PAUSE
DOLBY B NR
AUTO
REVERSE
REC
REC PAUSE DOLBY B NR
π (auto reverse) 0 (open/close)
` (playback) 7 (stop)
Tape operations indicators
\
REC
REC indicator
VOLUME
MD
ENTERPTY/EON
CANCEL
DISPLAY
/CHARA.
><
TAPE
FM/AM
DOWN
SET
UP
AUX
TITTLE/EDIT
CD
7
(stop)
TAPE ` (playback)
CD
6
(play/pause)
FM/AM
AUX
DISPLAY
/CHARA. PLAY
MODE REC
MODE TITLE
/EDIT CLOCK
/TIMERCANCEL ENTER
SET
SET REC MODE
Buttons behind the sliding panel
4 ¢
EN24-32.UX-G6R[B]/5 99.12.01, 09:2526