Getting started
Getting started
Connections
*In the following description, “TV” may be substituted with “monitor” or “projector.” *Before using the unit, you have to connect the unit to a TV and/or amplifier.
Before making any connections
•Do not connect the AC power cord until all other connections have been made.
•Since different components have different terminal names, carefully read the instructions supplied with the component you are going to connect.
To connect to a TV
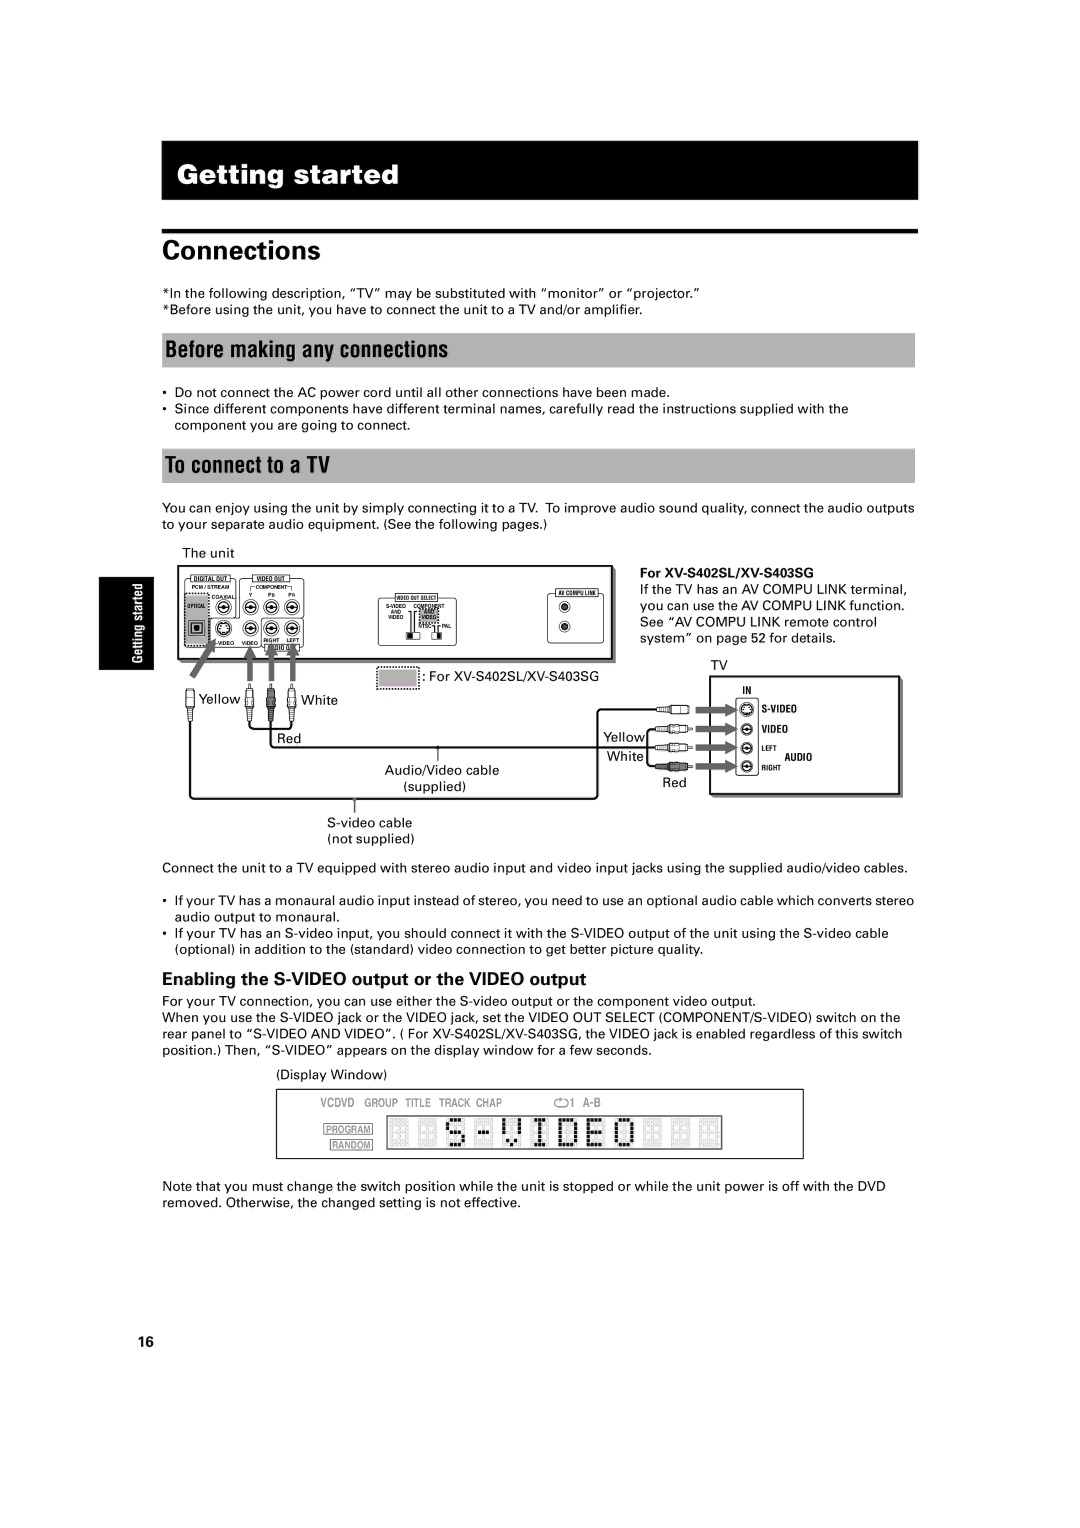
You can enjoy using the unit by simply connecting it to a TV. To improve audio sound quality, connect the audio outputs to your separate audio equipment. (See the following pages.)
The unit
DIGITAL OUT | VIDEO OUT | PR |
| AV COMPU LINK | For | |
PCM / STREAM | Y | PB |
| If the TV has an AV COMPU LINK terminal, | ||
COMPONENT |
|
|
| |||
COAXIAL |
|
|
| VIDEO OUT SELECT | you can use the AV COMPU LINK function. | |
OPTICAL |
|
|
| AND | AND | |
|
|
| COMPONENT |
| ||
|
|
|
| VIDEO | VIDEO | See “AV COMPU LINK remote control |
|
|
|
|
| NTSC PAL | |
VIDEO | RIGHT | LEFT |
|
| system” on page 52 for details. | |
![]()
![]()
![]() : For
: For
Yellow ![]()
![]()
![]() White
White
Red | Yellow | |
Audio/Video cable | White | |
Red | ||
(supplied) | ||
| ||
(not supplied) |
|
TV
IN
VIDEO
LEFT
AUDIO
RIGHT
Connect the unit to a TV equipped with stereo audio input and video input jacks using the supplied audio/video cables.
•If your TV has a monaural audio input instead of stereo, you need to use an optional audio cable which converts stereo audio output to monaural.
•If your TV has an
Enabling the S-VIDEO output or the VIDEO output
For your TV connection, you can use either the
When you use the
(Display Window)
VCDVD GROUP TITLE TRACK CHAP | 1 |
PROGRAM
RANDOM
Note that you must change the switch position while the unit is stopped or while the unit power is off with the DVD removed. Otherwise, the changed setting is not effective.
16
