HOME DVD PLAYER | V10M10_IM_EN_12312007 |
GETTING STARTED
HOME DVD PLAYER | V10M10_IM_EN_12312007 |
GETTING STARTED
Installing the Remote Control Batteries
1.Open the battery compartment cover on the back of the remote control.
2.Place one CR2025 battery as shown on the picture above. Make sure that the polarity
Notes on Using the Remote Control
Please note that a remote control should be pointed directly at the remote control sensor to get the better performance.
Brief Instructions on Installing the DVD Player
1. | Locate the place where you want to install this unit. |
2. | Refer to the quick connection guides starting on the following page to connect this unit to |
| other audio or display devices. While installing this unit to other devices, the power cord of |
| all devices in the installation process should be properly disconnected for the safety |
| purpose. |
3. | Connect the power cord of all devices again. Before connecting the power cords, please |
| carefully follow the safety instructions in the section of the user safety guide. |
4. | After connecting the power cords, turn on this unit and all the attached devices. |
5. | Before operating this unit, set the system settings of this unit and all the attached devices |
| based on your choice of the connection. To properly show the video and audio contents, |
| this unit and all the attached devices must be set with the correct system settings |
| accordingly based on your choice of the connection. For this unit, refer to the detailed |
| system setup instructions in this user’s manual. For the attached devices, refer to the |
| detailed system setup instructions in their user’s manuals respectively. |
3.Close the battery compartment.
Notes on Remote Control
1.Improper use of batteries may cause the battery leakage and corrosion. To operate the remote control correctly, follow the instructions below:
a.Do not insert the batteries in the wrong direction.
b.Do not attempt to recharge,
c.Do not leave the dead batteries in the remote control.
d.If you do not use the remote control for a long period of time, remove the installed batteries from the remote control to avoid possible damage from the battery corrosion. If battery leakage occurs, clean the battery compartment and then insert the new batteries. Please follow the general safety and handling instructions listed by the battery manufacturer. After cleaning, wash your hand.
2.Do not leave the remote control in an extremely hot or humid place.
3.Do not spill water or put any liquid on the remote control.
4.Do not expose the remote control sensor of the DVD player to a strong light source, such as direct sunlight.
5.The battery life is approximately one year under the normal working condition. However, it significantly depends on the battery type and its working condition. If the remote control doesn’t work or the signal gets weaker, replace the battery. The alkaline batteries are recommended for the longer battery life.
Special Notes
1.If this unit is not going to be used for a long period of time, please disconnect the power cord plug from the outlet.
2.This unit must be operated with the correct power supply corresponding to the marking label on the back of the unit.
3.This unit may not be compatible with some specially encrypted discs.
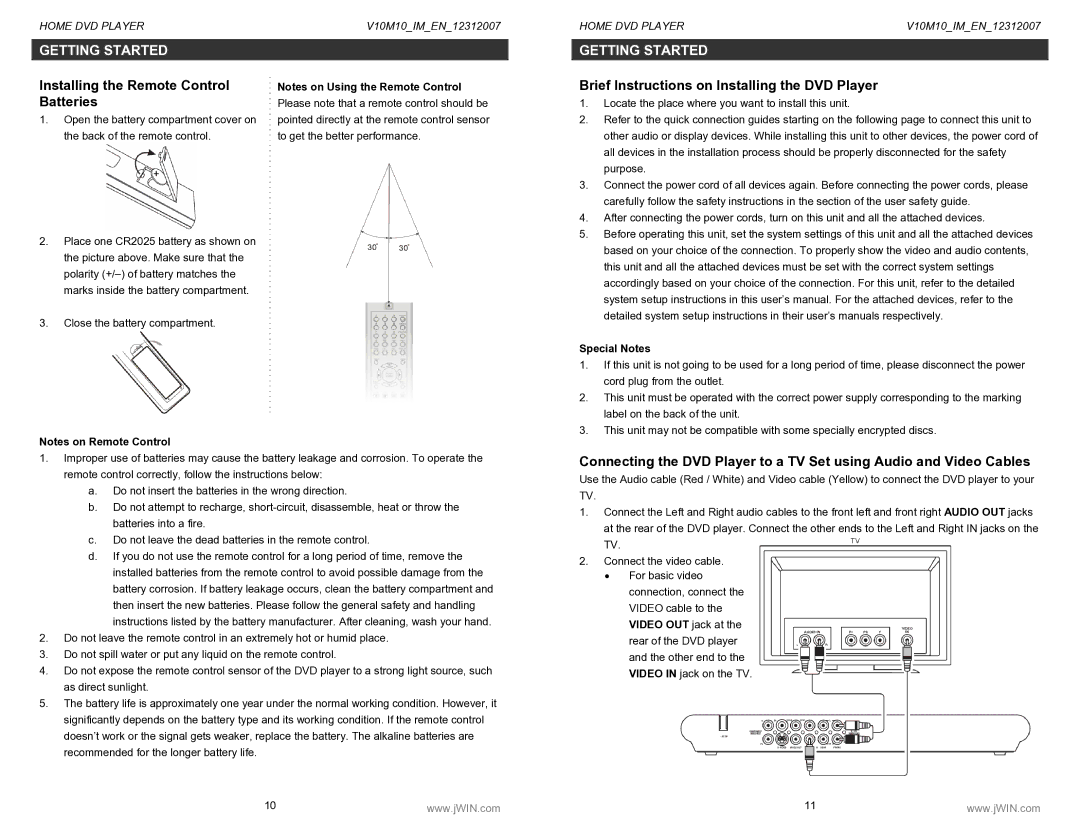
Connecting the DVD Player to a TV Set using Audio and Video Cables
Use the Audio cable (Red / White) and Video cable (Yellow) to connect the DVD player to your TV.
1.Connect the Left and Right audio cables to the front left and front right AUDIO OUT jacks at the rear of the DVD player. Connect the other ends to the Left and Right IN jacks on the TV.
2.Connect the video cable.
•For basic video connection, connect the VIDEO cable to the VIDEO OUT jack at the rear of the DVD player and the other end to the VIDEO IN jack on the TV.
10 | www.jWIN.com | 11 | www.jWIN.com |