USER’S MANUAL
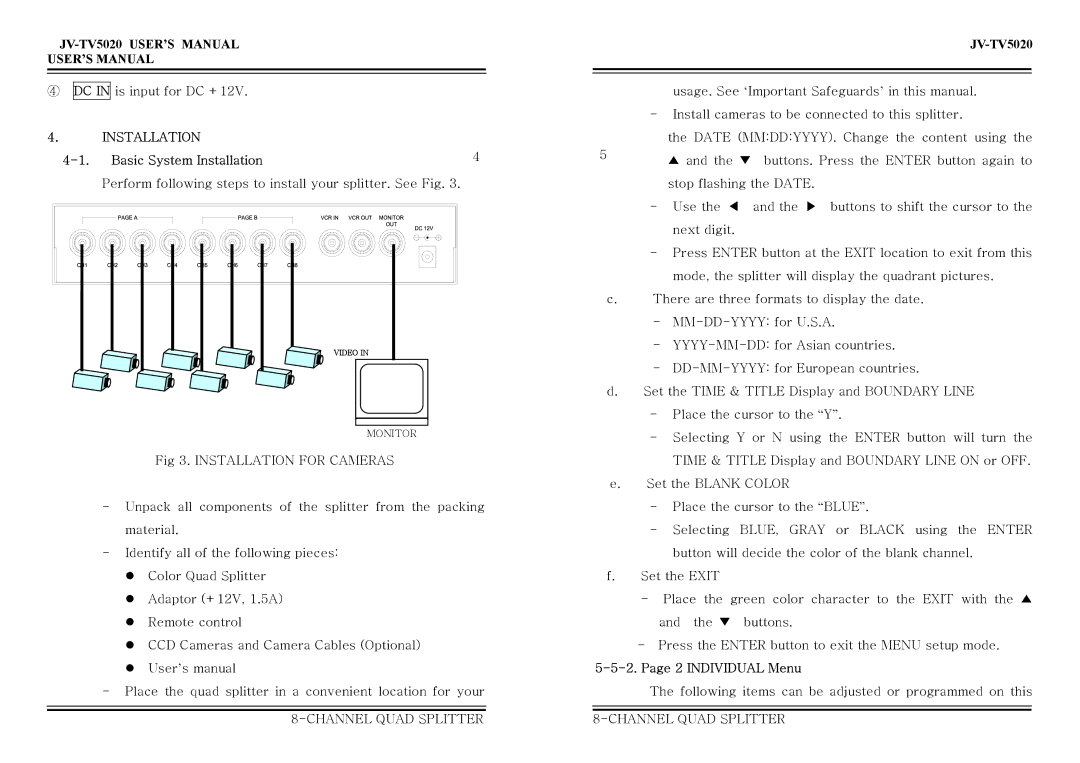
④DC IN is input for DC +12V.
4.INSTALLATION
| 4 |
|
Perform following steps to install your splitter. See Fig. 3.
VIDEO IN |
MONITOR
Fig 3. INSTALLATION FOR CAMERAS
-Unpack all components of the splitter from the packing material.
-Identify all of the following pieces: z Color Quad Splitter
z Adaptor (+12V, 1.5A) z Remote control
z CCD Cameras and Camera Cables (Optional) z User’s manual
-Place the quad splitter in a convenient location for your
usage. See ‘Important Safeguards’ in this manual.
-Install cameras to be connected to this splitter.
the DATE (MM:DD:YYYY). Change the content using the
5▲ and the ▼ buttons. Press the ENTER button again to stop flashing the DATE.
-Use the ◀ and the ▶ buttons to shift the cursor to the next digit.
-Press ENTER button at the EXIT location to exit from this mode, the splitter will display the quadrant pictures.
c.There are three formats to display the date.
-
-
-
d.Set the TIME & TITLE Display and BOUNDARY LINE
-Place the cursor to the “Y”.
-Selecting Y or N using the ENTER button will turn the TIME & TITLE Display and BOUNDARY LINE ON or OFF.
e.Set the BLANK COLOR
-Place the cursor to the “BLUE”.
-Selecting BLUE, GRAY or BLACK using the ENTER button will decide the color of the blank channel.
f.Set the EXIT
-Place the green color character to the EXIT with the ▲ and the ▼ buttons.
- Press the ENTER button to exit the MENU setup mode.
5-5-2. Page 2 INDIVIDUAL Menu
The following items can be adjusted or programmed on this
