1.Hold the rear end of the chuck in one hand and use the other hand to rotate the front end in a counterclockwise direction to open the jaws of the chuck.
2.Insert the shank of the bit (or other accessory) fully into the keyless chuck, taking care to keep the bit in the center of the jaws of the chuck.
LOOSEN
TIGHTEN
HOLD
FORWARD/REVERSE AND TRIGGER LOCK LEVER
Be sure the trigger is released when changing the position of the lever. Always store the tool in the “LOCKED/OFF” position.
Always check the direction of the Cordless Drill's rotation before use.
TO SELECT THE DIRECTIONS
OF ROTATION:
3.Turn the front end of the chuck clockwise to hold the bit in place.
4.Tighten securely by turning the front end of the chuck clockwise while holding the rear end.
OPERATING THE DRILL
![]()
![]()
![]()
![]()
![]()
![]()
![]() Never tape the trigger switch down to provide continu- ous high speed. The tool may fail under such conditions causing fire or personal injury.
Never tape the trigger switch down to provide continu- ous high speed. The tool may fail under such conditions causing fire or personal injury.
VARIABLE SPEED TRIGGER SWITCH
THIS TOOL IS CONTROLLED BY A TRIGGER SWITCH:
• The speed of the Cordless Drill depends on the amount of pressure you put on the trigger.
• The more pressure you apply, the faster | TRIGGER |
SWITCH | |
the Cordless Drill will go. |
|
• Release the pressure and the Cordless Drill |
|
will slow down. |
|
• To select forward Cordless Drill rotation, press the trigger lock
from left to right flat against the Cordless | TRIGGER | |
LOCK | ||
Drill body. | ||
|
• To select reverse, press the trigger lock lever in the opposite direction.
• The center position locks the tool.
TORQUE SETTINGS
![]() To prevent damaging the tool or driving screw too deep into work piece, release the trigger when you feel the clutch slip.
To prevent damaging the tool or driving screw too deep into work piece, release the trigger when you feel the clutch slip.
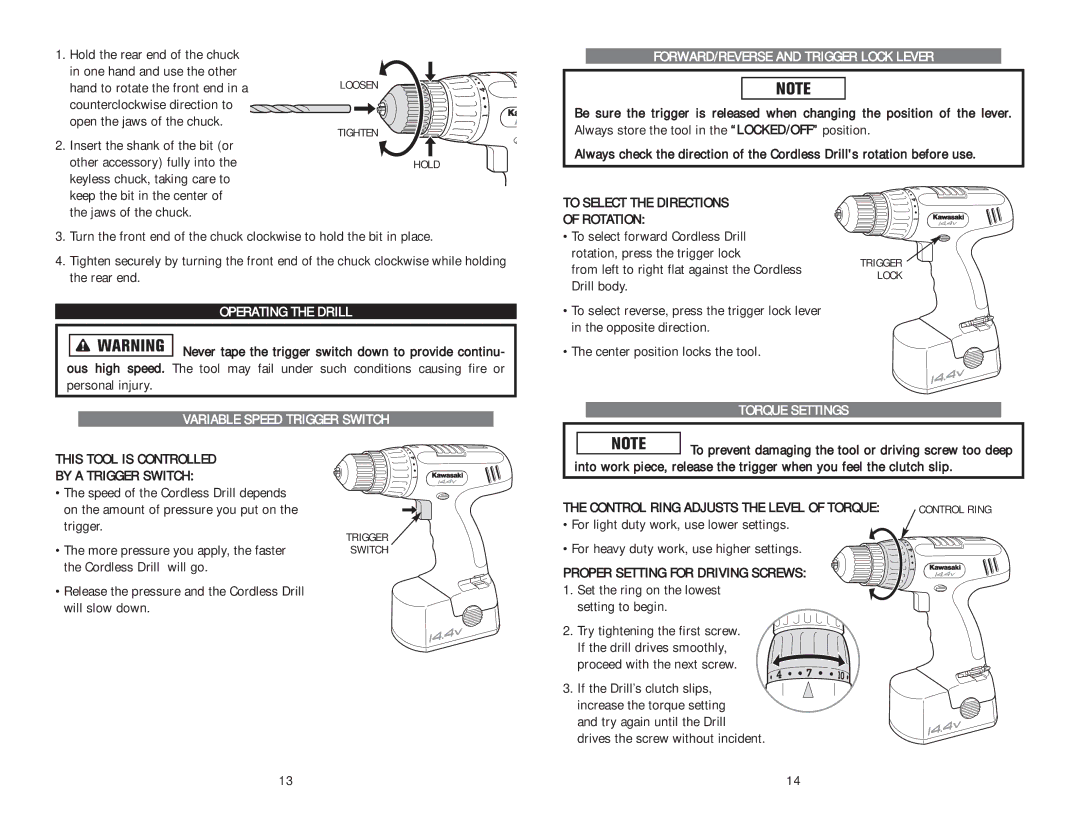
THE CONTROL RING ADJUSTS THE LEVEL OF TORQUE: | CONTROL RING |
• For light duty work, use lower settings. |
|
• For heavy duty work, use higher settings.
PROPER SETTING FOR DRIVING SCREWS: 1. Set the ring on the lowest
setting to begin.
2. Try tightening the first screw. If the drill drives smoothly, proceed with the next screw.
3. If the Drill’s clutch slips, increase the torque setting and try again until the Drill drives the screw without incident.
13 | 14 |