ASSEMBLY
VARIABLE SPEED TRIGGER SWITCH
![]() Be aware that this tool is always in an operating condition because it does not have to be plugged into an electrical outlet. Always turn the switch “OFF” and remove the battery pack before changing bits.
Be aware that this tool is always in an operating condition because it does not have to be plugged into an electrical outlet. Always turn the switch “OFF” and remove the battery pack before changing bits.
INSTALLING / REMOVING SOCKET ON THE ANVIL
![]() When removing the socket or bit from the tool, avoid contact with skin and use proper protective gloves when grasping the socket, bit or accessory. Accessories may be hot after prolonged use.
When removing the socket or bit from the tool, avoid contact with skin and use proper protective gloves when grasping the socket, bit or accessory. Accessories may be hot after prolonged use.
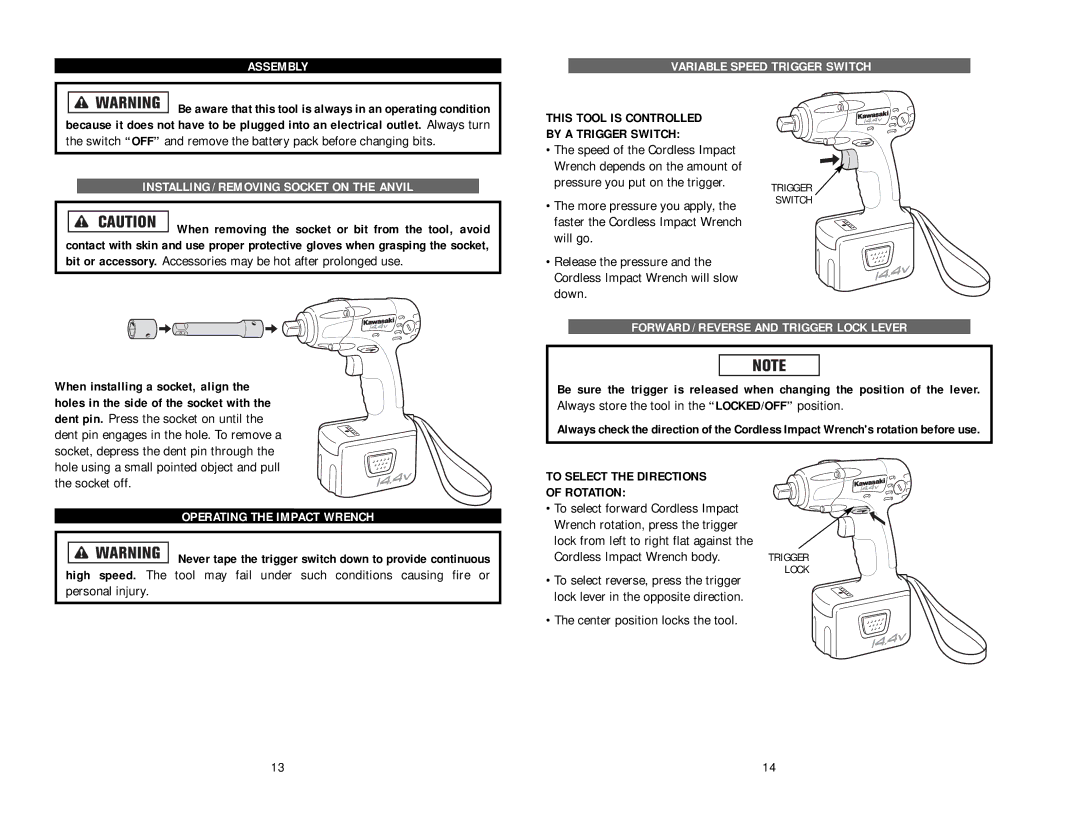
THIS TOOL IS CONTROLLED BY A TRIGGER SWITCH:
•The speed of the Cordless Impact Wrench depends on the amount of pressure you put on the trigger.
•The more pressure you apply, the faster the Cordless Impact Wrench will go.
•Release the pressure and the Cordless Impact Wrench will slow down.
TRIGGER ![]() SWITCH
SWITCH
When installing a socket, align the holes in the side of the socket with the dent pin. Press the socket on until the dent pin engages in the hole. To remove a socket, depress the dent pin through the hole using a small pointed object and pull the socket off.
OPERATING THE IMPACT WRENCH
Never tape the trigger switch down to provide continuous
high speed. The tool may fail under such conditions causing fire or personal injury.
FORWARD / REVERSE AND TRIGGER LOCK LEVER
Be sure the trigger is released when changing the position of the lever. Always store the tool in the “LOCKED/OFF” position.
Always check the direction of the Cordless Impact Wrench's rotation before use.
TO SELECT THE DIRECTIONS |
|
OF ROTATION: |
|
• To select forward Cordless Impact |
|
Wrench rotation, press the trigger |
|
lock from left to right flat against the |
|
Cordless Impact Wrench body. | TRIGGER |
| LOCK |
• To select reverse, press the trigger lock lever in the opposite direction.
• The center position locks the tool.
13 | 14 |
