8. Attach the rip fence to the table and secure it by pushing down the rip fence locking handle.
9. Attach the miter gauge to the table by sliding it into the miter gauge slot.
INSTALLING THE WORKLIGHT
1.Insert a maximum 15 watt bulb into the socket of the light housing.
2.The light is located on a flexible tube allowing the worklight to be positioned onto the work area.
OPERATING THE WORKLIGHT
1.To turn the worklight on press the light ON/OFF switch to the “I” position.
2.To turn the worklight off press the light ON/OFF switch to the “O” position.
3.To adjust the direction of the light move the worklight tube to the most suitable position.
CONNECTING THE DUST COLLECTOR
![]()
![]()
![]()
![]()
![]()
![]()
![]() Control wood dust and chips in a confined area and guard against all possible ignition sources. Failure to do so can result in fire and cause personal injury or death.
Control wood dust and chips in a confined area and guard against all possible ignition sources. Failure to do so can result in fire and cause personal injury or death.
Connect the dust extraction equipment to the port on the back of the band saw.
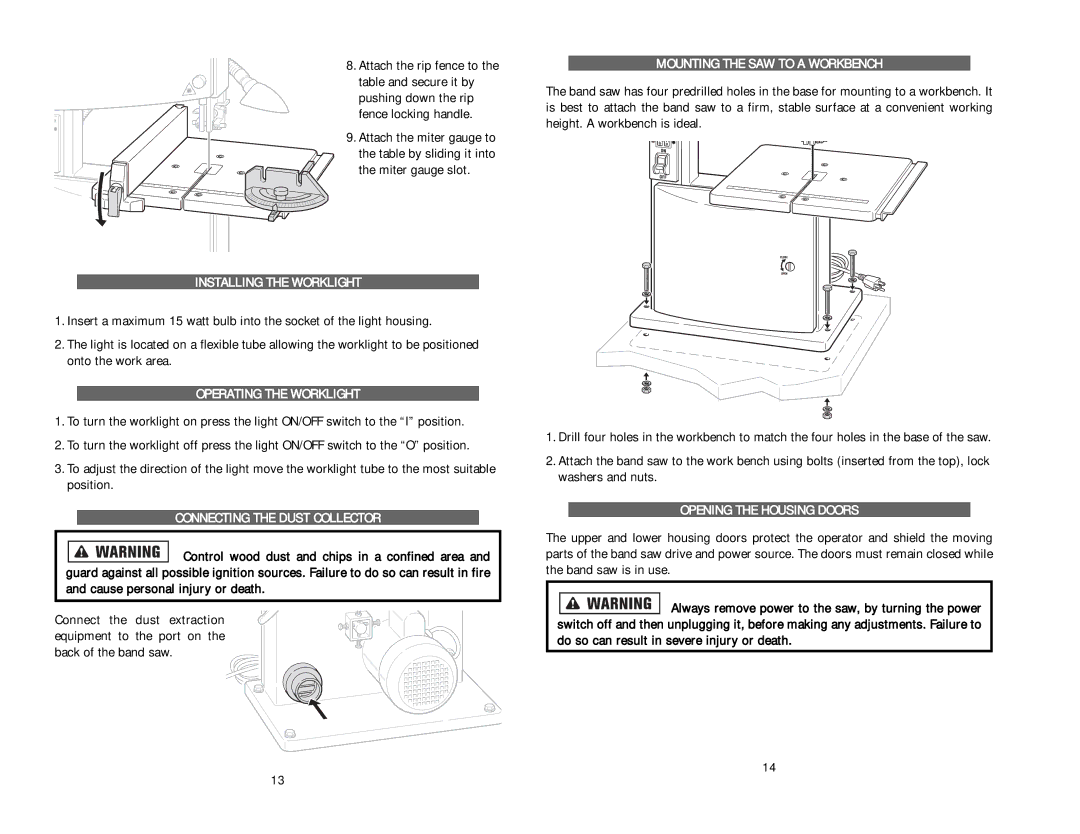
MOUNTING THE SAW TO A WORKBENCH
The band saw has four predrilled holes in the base for mounting to a workbench. It is best to attach the band saw to a firm, stable surface at a convenient working height. A workbench is ideal.
1.Drill four holes in the workbench to match the four holes in the base of the saw.
2.Attach the band saw to the work bench using bolts (inserted from the top), lock washers and nuts.
OPENING THE HOUSING DOORS
The upper and lower housing doors protect the operator and shield the moving parts of the band saw drive and power source. The doors must remain closed while the band saw is in use.
![]()
![]()
![]()
![]()
![]()
![]()
![]() Always remove power to the saw, by turning the power switch off and then unplugging it, before making any adjustments. Failure to do so can result in severe injury or death.
Always remove power to the saw, by turning the power switch off and then unplugging it, before making any adjustments. Failure to do so can result in severe injury or death.
14
13