SETTING THE TABLE SQUARE WITH THE BLADE
![]() Always remove power the saw, by turning the power switch off and then unplugging it, before making any adjustments. Failure to do so can result in severe injury or death.
Always remove power the saw, by turning the power switch off and then unplugging it, before making any adjustments. Failure to do so can result in severe injury or death.
1. Fully raise the upper blade guide.
2. Check that the band saw tension is correct.
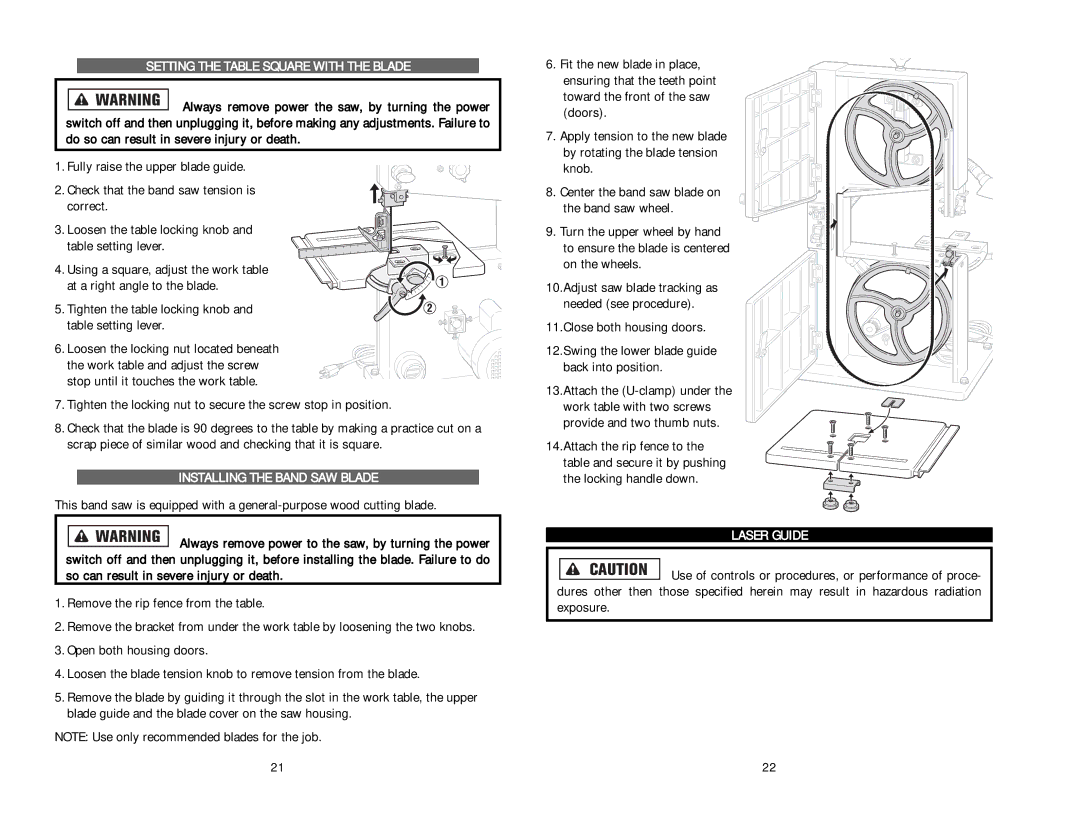
3. Loosen the table locking knob and table setting lever.
4. Using a square, adjust the work table at a right angle to the blade.
5. Tighten the table locking knob and table setting lever.
6. Loosen the locking nut located beneath the work table and adjust the screw stop until it touches the work table.
7.Tighten the locking nut to secure the screw stop in position.
8.Check that the blade is 90 degrees to the table by making a practice cut on a scrap piece of similar wood and checking that it is square.
INSTALLING THE BAND SAW BLADE
This band saw is equipped with a
![]() Always remove power to the saw, by turning the power switch off and then unplugging it, before installing the blade. Failure to do so can result in severe injury or death.
Always remove power to the saw, by turning the power switch off and then unplugging it, before installing the blade. Failure to do so can result in severe injury or death.
1.Remove the rip fence from the table.
2.Remove the bracket from under the work table by loosening the two knobs.
3.Open both housing doors.
4.Loosen the blade tension knob to remove tension from the blade.
5.Remove the blade by guiding it through the slot in the work table, the upper blade guide and the blade cover on the saw housing.
NOTE: Use only recommended blades for the job.
6. Fit the new blade in place, ensuring that the teeth point toward the front of the saw (doors).
7. Apply tension to the new blade by rotating the blade tension knob.
8. Center the band saw blade on the band saw wheel.
9. Turn the upper wheel by hand to ensure the blade is centered on the wheels.
10.Adjust saw blade tracking as needed (see procedure).
11.Close both housing doors.
12.Swing the lower blade guide back into position.
13.Attach the
14.Attach the rip fence to the table and secure it by pushing the locking handle down.
LASER GUIDE
![]() Use of controls or procedures, or performance of proce- dures other then those specified herein may result in hazardous radiation exposure.
Use of controls or procedures, or performance of proce- dures other then those specified herein may result in hazardous radiation exposure.
21 | 22 |