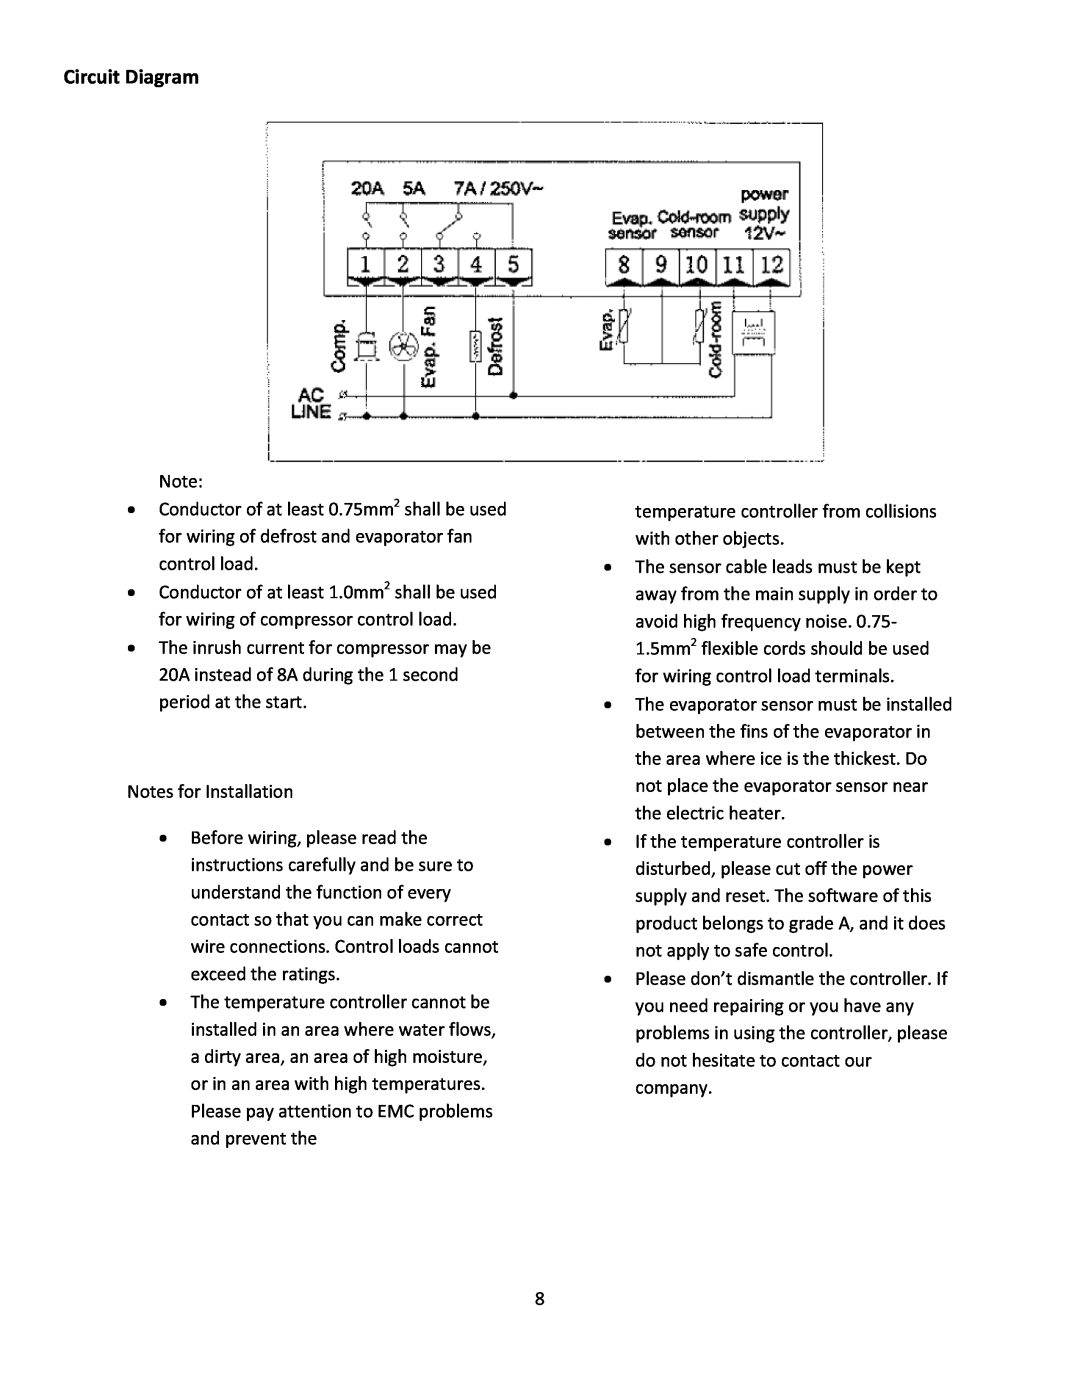
Circuit Diagram
Note:
•Conductor of at least 0.75mm2 shall be used for wiring of defrost and evaporator fan control load.
•Conductor of at least 1.0mm2 shall be used for wiring of compressor control load.
•The inrush current for compressor may be 20A instead of 8A during the 1 second period at the start.
Notes for Installation
•Before wiring, please read the instructions carefully and be sure to understand the function of every contact so that you can make correct wire connections. Control loads cannot exceed the ratings.
•The temperature controller cannot be installed in an area where water flows, a dirty area, an area of high moisture, or in an area with high temperatures.
Please pay attention to EMC problems and prevent the
8
temperature controller from collisions with other objects.
•The sensor cable leads must be kept away from the main supply in order to avoid high frequency noise. 0.75‐ 1.5mm2 flexible cords should be used for wiring control load terminals.
•The evaporator sensor must be installed between the fins of the evaporator in the area where ice is the thickest. Do not place the evaporator sensor near the electric heater.
•If the temperature controller is disturbed, please cut off the power supply and reset. The software of this product belongs to grade A, and it does not apply to safe control.
•Please don’t dismantle the controller. If you need repairing or you have any problems in using the controller, please do not hesitate to contact our company.
