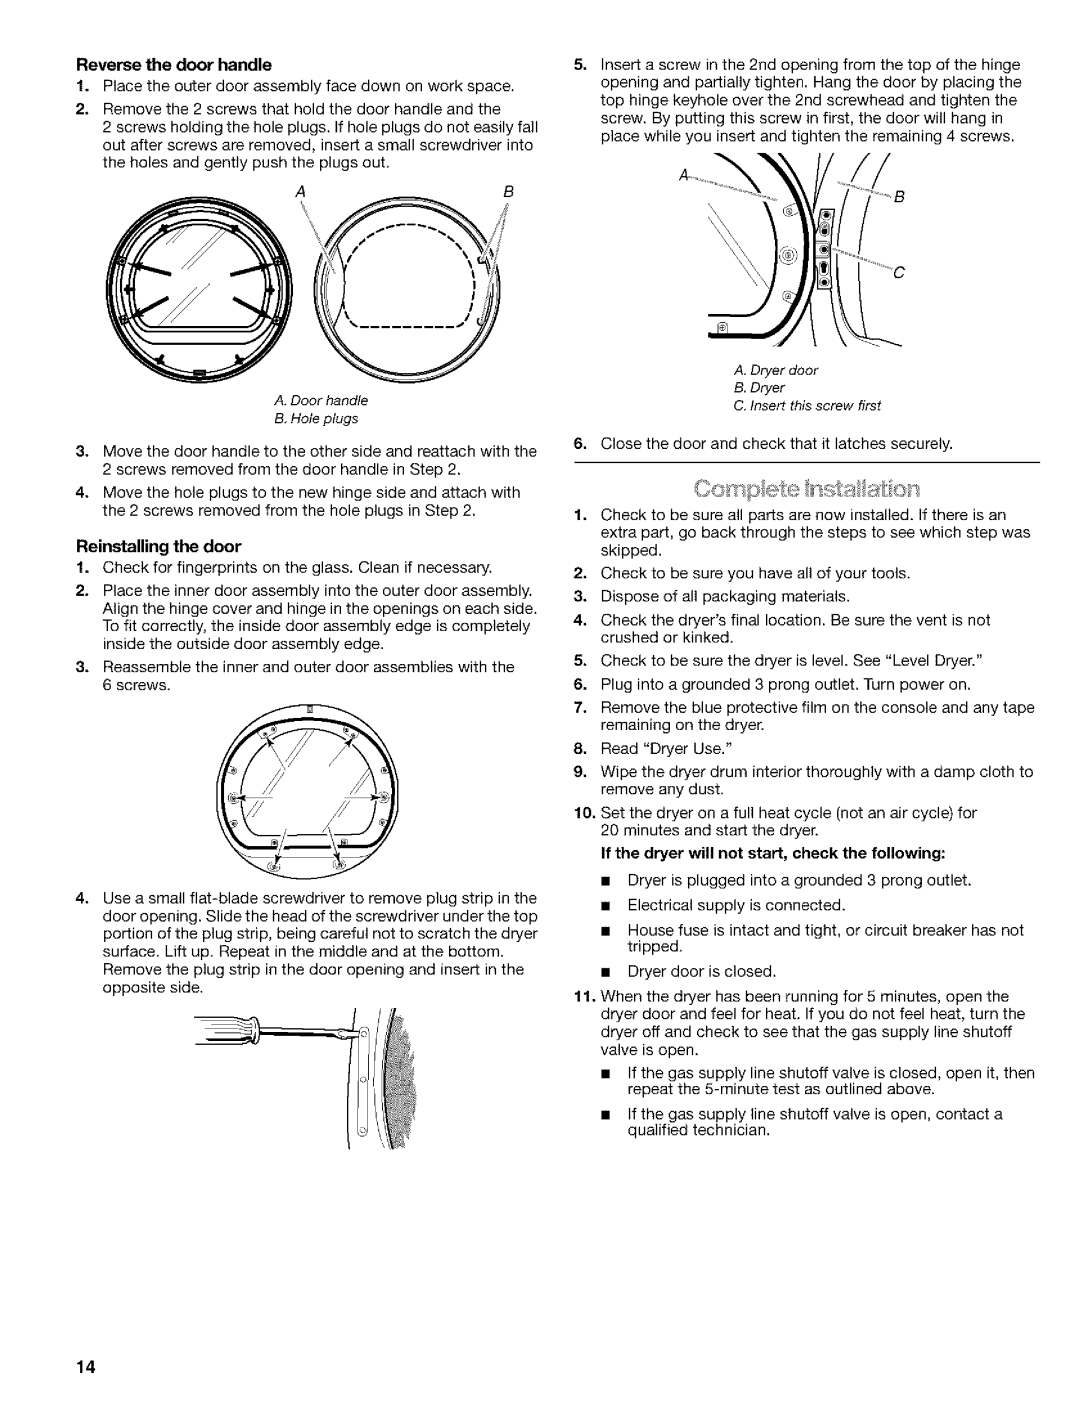
Reverse the door handle

1.Place the outer door assembly face down on work space.

2.Remove the 2 screws that hold the door handle and the

2 screws holding the hole plugs. If hole plugs do not easily fall out after screws are removed, inser[ a small screwdriver into the holes and gently push the plugs out.

A

5.Insert a screw in the 2nd opening from the top of the hinge opening and partially tighten. Hang the door by placing the top hinge keyhole over the 2nd screwhead and tighten the screw. By putting this screw in first, the door will hang in place while you insert and tighten the remaining 4 screws.

\/,

A. Door handle

B. Hole plugs

3.Move the door handle to the other side and reattach with the 2 screws removed from the door handle in Step 2.

4.Move the hole plugs to the new hinge side and attach with the 2 screws removed from the hole plugs in Step 2.

Reinstalling the door

1.Check for fingerprints on the glass. Clean if necessary.

2.Place the inner door assembly into the outer door assembly. Align the hinge cover and hinge in the openings on each side. To fit correctly, the inside door assembly edge is completely inside the outside door assembly edge.

3.Reassemble the inner and outer door assemblies with the 6 screws.

4.Use a small flat-blade screwdriver to remove plug strip in the door opening. Slide the head of the screwdriver under the top portion of the plug strip, being careful not to scratch the dryer surface. Lift up. Repeat in the middle and at the bottom.

Remove the plug strip in the door opening and insert in the opposite side.

A. Dryer door

B, Dryer

C. Insert this screw first

6.Close the door and check that it latches securely.

1.Check to be sure all parts are now installed. If there is an extra part, go back through the steps to see which step was skipped.

2.Check to be sure you have all of your tools.

3.Dispose of all packaging materials.

4.Check the dryer'sfinal location. Be sure the vent is not crushed or kinked.

5.Check to be sure the dryer is level. See "Level Dryer."

6.Plug into a grounded 3 prong outlet. Turn power on.

7.Remove the blue protective film on the console and any tape remaining on the dryer.

8.Read "Dryer Use."

9.Wipe the dryer drum interior thoroughly with a damp cloth to remove any dust.

10.Set the dryer on a full heat cycle (not an air cycle) for 20 minutes and start the dryer.

If the dryer will not start, check the following:

Dryer is plugged into a grounded 3 prong outlet.

Electrical supply is connected.

House fuse is intact and tight, or circuit breaker has not tripped.

Dryer door is closed.

11.When the dryer has been running for 5 minutes, open the dryer door and feel for heat. If you do not feel heat, turn the dryer off and check to see that the gas supply line shutoff valve is open.

If the gas supply line shutoff valve is closed, open it, then repeat the 5-minute test as outlined above.

If the gas supply line shutoff valve is open, contact a qualified technician.

14

Page 14
Image 14
Kenmore 110.9586 manual Reverse the door handle, Reinstalling the door, If the dryer will not start, check the following

110.9587, 110.9586 specifications

The Kenmore 110.9586 and 110.9587 models represent a significant contribution to the realm of home laundry appliances, allowing homeowners to experience cutting-edge technology and dependable performance. These washing machines are designed with a focus on efficiency, versatility, and user-friendliness.

One of the standout features of both models is their capacity. With a generous drum size, these washers can accommodate large loads, enabling users to clean more clothes in a single cycle. This feature not only saves time but also energy, as it reduces the number of loads required to complete laundry tasks.

In terms of wash cycles, the Kenmore 110.9586 and 110.9587 offer a wide range of options tailored to meet diverse fabric care needs. This includes specialized cycles for delicate items, heavy-duty fabrics, and even quick wash programs for those in a rush. The inclusion of a soil sensor helps to optimize the wash duration by detecting how soiled the clothes are, thereby ensuring effective cleaning while conserving water and energy.

Energy efficiency is a hallmark of these models. Both the 110.9586 and 110.9587 have been designed to meet or exceed Energy Star standards, making them environmentally friendly choices for the eco-conscious consumer. This not only benefits the environment but also results in lower utility bills, providing long-term savings for homeowners.

Another critical aspect of these washers is their advanced technology. The use of direct drive motors enhances reliability and reduces noise, creating a quieter laundry experience. Additionally, the models come with intuitive digital controls that simplify operation, allowing users to easily select their preferred wash settings.

Durability is another attribute that sets the Kenmore 110.9586 and 110.9587 apart from competitors in the market. Built with robust materials and engineering excellence, these washing machines are designed to withstand the demands of everyday use, ensuring longevity and less frequent repairs.

Overall, the Kenmore 110.9586 and 110.9587 washing machines stand out due to their impressive capacity, extensive wash options, energy efficiency, advanced technology, and durable construction. They provide a reliable, efficient, and convenient laundry solution, making them an ideal choice for families and individuals alike. With these models, users can experience the perfect blend of performance and practicality in their laundry routines.