Manuals
/
Panasonic
/
Home Audio
/
Stereo System
Panasonic
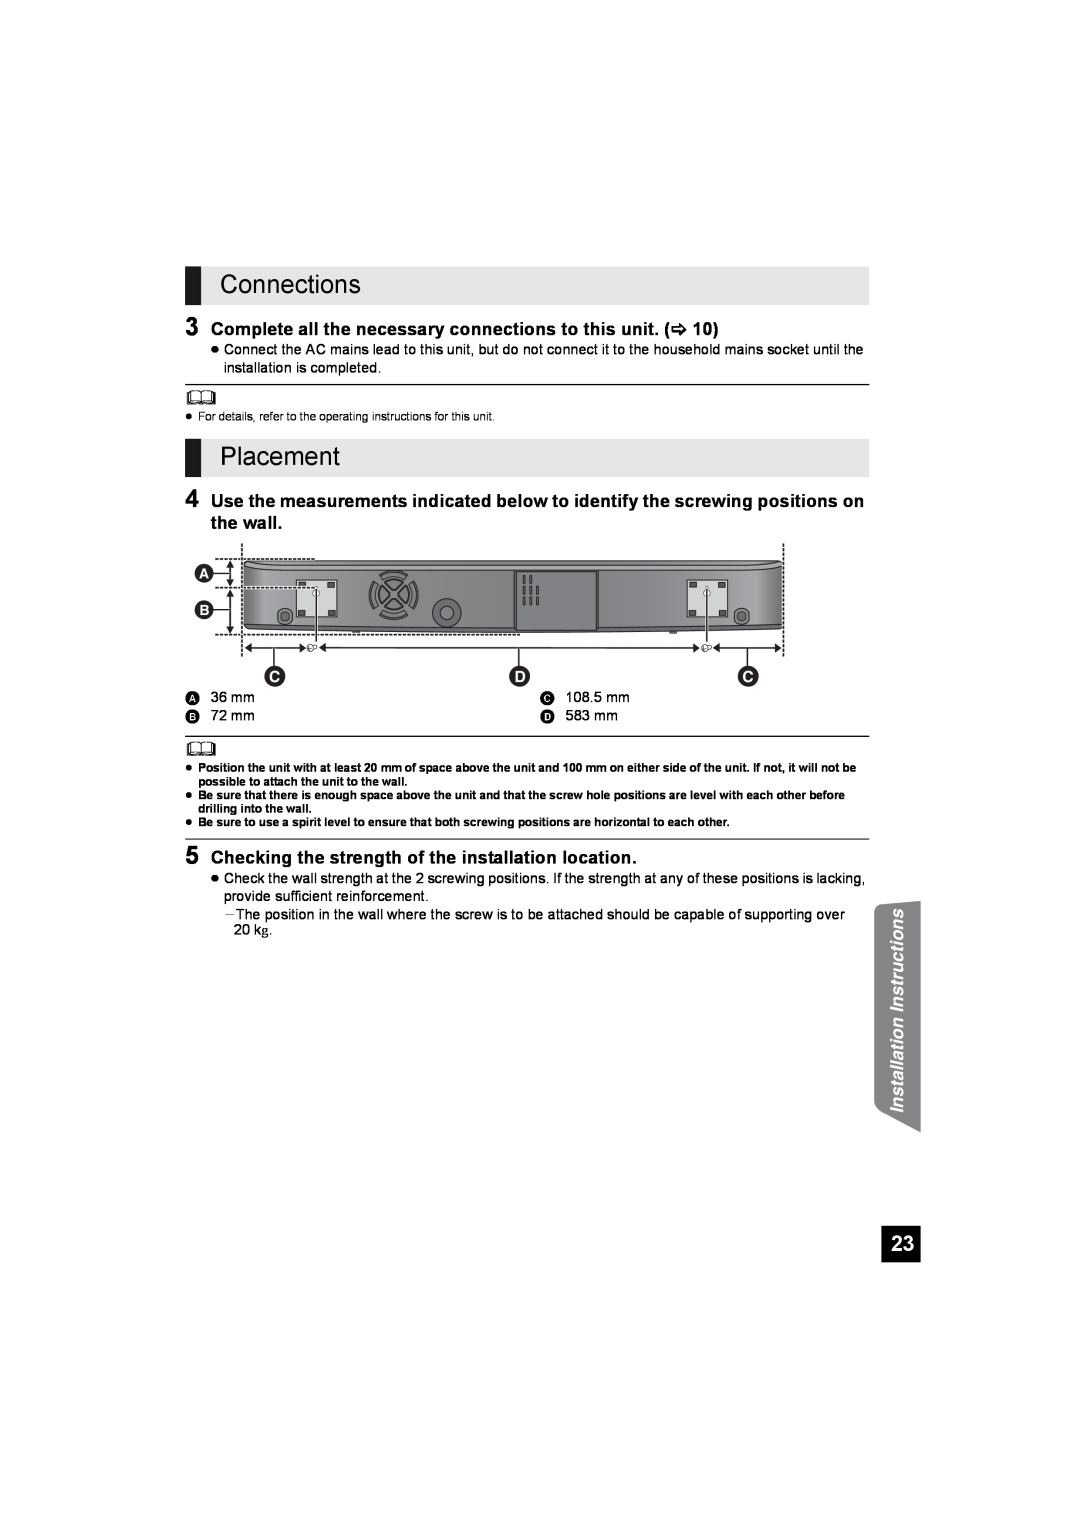
SC-HTB10 Connections, Placement, , 20 kg.Instructions Installation
Models:
SC-HTB10
1
23
28
28
Download
28 pages
55.49 Kb
20
21
22
23
24
25
26
27
Troubleshooting
Specifications
Install
Audio source indicator
Accessories
Changing this unit’s settings
Remote control
Placement
Automatic input switching
Using the IR Blaster
Page 23
Image 23
Page 22
Page 24
Page 23
Image 23
Page 22
Page 24
Contents
EG GN GS
Model No. SC-HTB10
RQTX1160-1B
Operating Instructions Home Theater Audio System
≥USE ONLY THE RECOMMENDED ACCESSORIES
Licenses
Safety precautions
Placement
Service
Operating Instructions
TABLE OF CONTENTS
Installation Instructions
To dispose or transfer this unit
Accessories
Unit care
Clean this unit with a soft, dry cloth
Control reference guide
This unit Front
This unit Rear
Operating Instructions
Remote control
To replace a button-typebattery
Placement
Operating Instructions
Assembling the unit
To prevent the unit from falling
HDMI
Connections
Connection to a TV
Basic connection with an ARC compatible TV
Operating
AC mains lead connection
Connection from an HDMI compatible device
Instructions
Audio format indicator
Using this unit
Audio source indicator
To adjust the volume/ subwoofer level
Clear-modeDialog
Audio effects
The various audio effects
Changing the audio effects
Automatic lip-syncfunction
Automatic input switching
Linked operations with the TV
Speaker Selection
AMPLIFIER SECTION
Specifications
Audio information
GENERAL
Sound
Troubleshooting
Power
General operation
VIERA Link
Remote control code
Changing this unit’s settings
Operating Instructions
Using the IR Blaster
Operating Instructions
Caution for AC Mains Lead
For Saudi Arabia and Kuwait
Model No. SC-HTB10
Safety Precautions
Installation Instructions
Home Theater Audio System
Requests regarding handling
tightened.Instructions Installation
Precautions for wall mount bracket installation
Attaching the wall mount brackets
Installation procedure
Components
Placement
20 kg.Instructions Installation
Connections
Attaching this unit to a wall
Installation Instructions
10 Push the lock pins fully into place
Page
ADVARSEL
SUOMI VAROITUS
VAROITUS
NORSK ADVARSEL
RQTX1160-1B
Top
Page
Image
Contents